E-38
Assembling the Stand
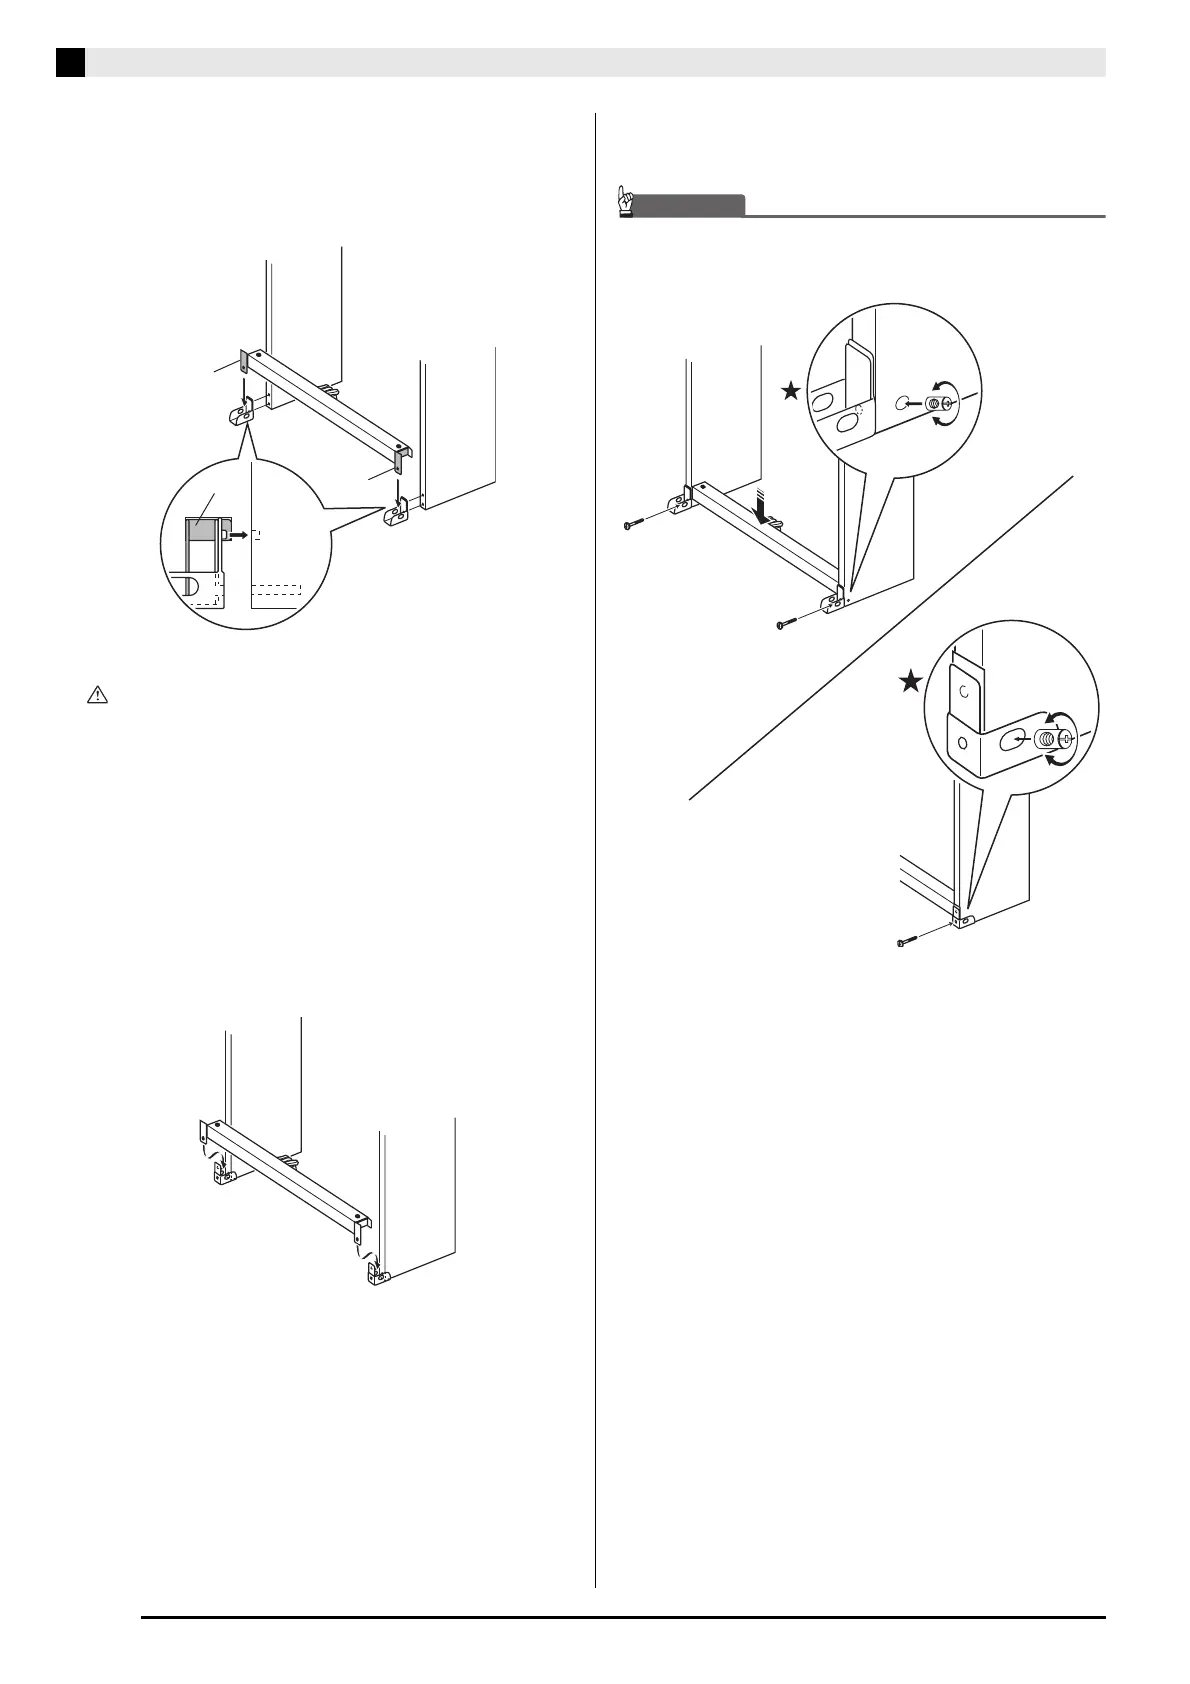
7.
Turn around the corner brackets as shown in
the illustration, and insert them between
pedal unit brackets I
-(a)
and I
-(b)
, and the
edges of the side panels.
WARNING
• The corner brackets help to prevent the stand from
tipping over. Whenever the stand is in a location that is
not up against a wall, reorient the corner brackets as
shown in the illustration. Leaving the corner brackets in
their original orientations can make it easy for the stand
to tip over towards the back, creating the risk of personal
injury.
Locating the Stand against a Wall
Leaving the anti-tipping brackets in their original
orientation, insert the pedal unit brackets between the
anti-tipping brackets and the edges of the side panels.
8.
Secure the corner brackets to the stand using
the screws you removed in step 6.
IMPORTANT!
• When tightening the corner bracket screws, press down
on the pedal unit to ensure that the pedal part comes into
contact with the floor.
• The side panels have joint connectors inside that engage
with the corner bracket screws. If you have trouble
inserting the screws into the joint connector screw holes,
use a screwdriver to rotate the joint connector and adjust
the position of the screw hole for easier access. See the
detail drawing (marked with a star) in the above
illustration.
I
-(a)
I
-(
b
)
I
-(
b
)
PX800_e.book 38 ページ 2006年10月12日 木曜日 午後12時5分

 Loading...