— 20 —
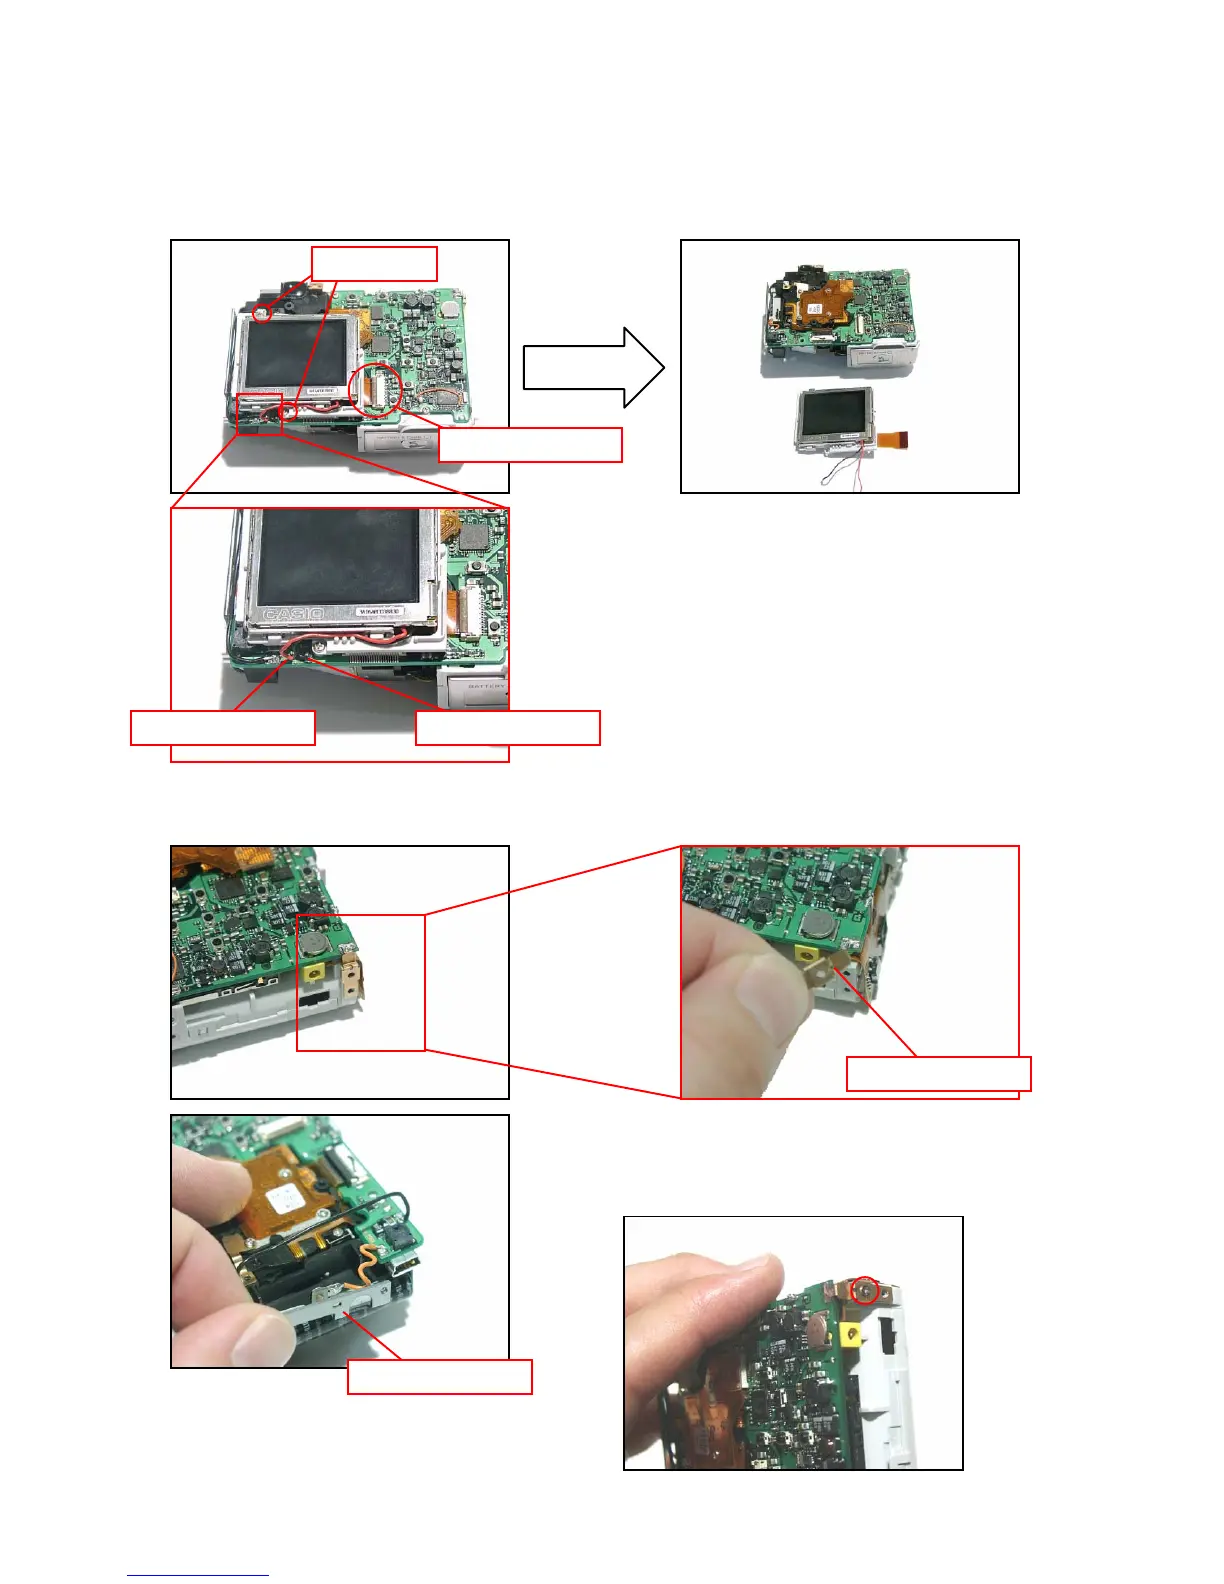
NOTE: Make sure to insert the connector tightly when
assembling, or the display will be defective.
Earth board
■ Removing the LCD
11. Remove two screws (S6).
12. Unsolder the power cord.
13. Remove the connector.
14. Remove the LCD unit.
Screws (S6)
Red cord Black cord
Connector
■ Removing the PCB
15. Unsolder the earth board and the clamp board.
Clamp board
NOTE: Temporarily fixing the earth board by a screw
makes it easier to solder when assembling.

 Loading...