EasyManuals Logo

Casio WK-240 Service Manual & Parts Catalogue

Casio WK-240
42 pages
To Next Page IconTo Next Page
To Previous Page IconTo Previous Page
Page #17 background imageLoading...
Page #17 background image
WK-240
– 15 –
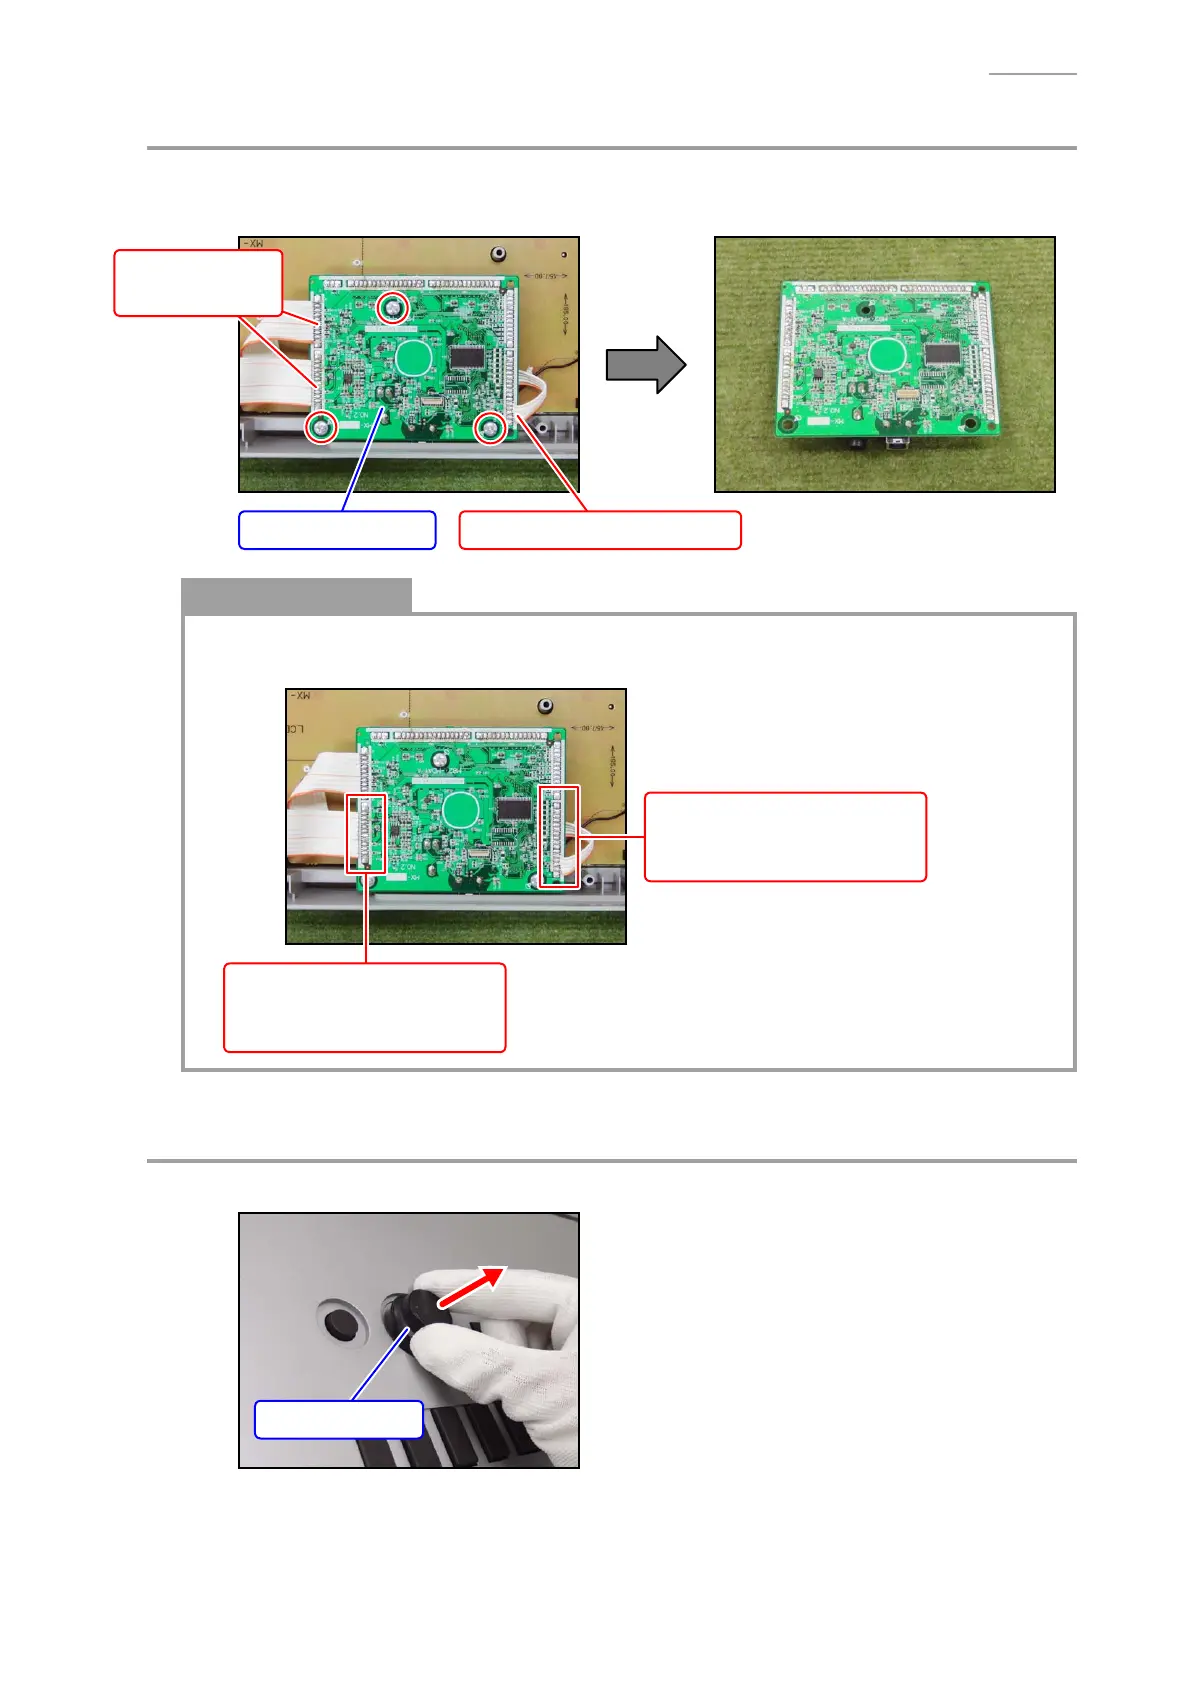
B. Remove the PCB UNIT/MAIN
B-1. Unsolder three ribbon cables.
B-2. Undo three screws to remove the PCB UNIT/MAIN.
PCB UNIT/MAIN Ribbon cable (PSA1 PCB)
Ribbon cables
(PSA1 PCB)
Notes on Assembly
The number of pins on the PCB pad differs from that on the cable.
Solder in the way that No.1 pin on the cable (orange) is connected to No.1 pad on the PCB.
Ribbon cable (PSA1 PCB)
PCB: 16 pads
Cable: 5 pins
Ribbon cable (PSA1 PCB)
PCB: 12 pads
Cable: 11 pins
C. Remove the BACK LIGHT UNIT
C-1. Remove the KNOB/ROTARY.
KNOB/ROTARY

Other manuals for Casio WK-240

Questions and Answers:

Question and Answer IconNeed help?

Do you have a question about the Casio WK-240 and is the answer not in the manual?

Casio WK-240 Specifications

General IconGeneral
Control typeButtons
MIDI-keyboard number of keys76 keys
MetronomeYes
Product colorBlack, Silver
Sound effectsChorus, Reverberation
Sound effects quantity180
Maximum polyphony (notes)48
Music memory capacity (songs)10
InterfaceUSB
Headphone outputs1
Display typeLCD
Power source typeAC, Battery, DC
Number of batteries supported6
Weight and Dimensions IconWeight and Dimensions
Depth385 mm
Width1161 mm
Height134 mm
Weight6900 g

Related product manuals