EasyManuals Logo

Casio XJ-A256 Function Guide

Casio XJ-A256
47 pages
To Next Page IconTo Next Page
To Previous Page IconTo Previous Page
Page #16 background imageLoading...
Page #16 background image
16
6.
When everything is the way you want, click [OK].
z This establishes a wireless LAN connection between the projector and computer, and causes
the computer screen contents to be projected from the projector.
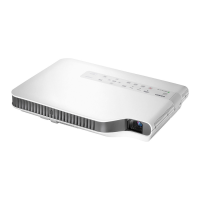
z The following shows the Wireless Connection 3 window that appears on the computer screen.
This window is not shown on the image being projected by the projector.
z Now if you want to configure security settings, refer to “Configuring Security Settings for a
Wireless LAN Connection” (page 18).
z For information about the Wireless Connection 3 procedure to simultaneously project images
from multiple computers and to perform other operations, see “Wireless LAN Connection
Operations” (page 25).
7.
To close Wireless Connection 3, click the close button in the upper right corner
of its window.
z If the message “The projector is still projecting. OK to exit?” appears, click [OK].
z This closes the Wireless Connection 3 window and returns the projected image to the
Wireless standby screen.
Note
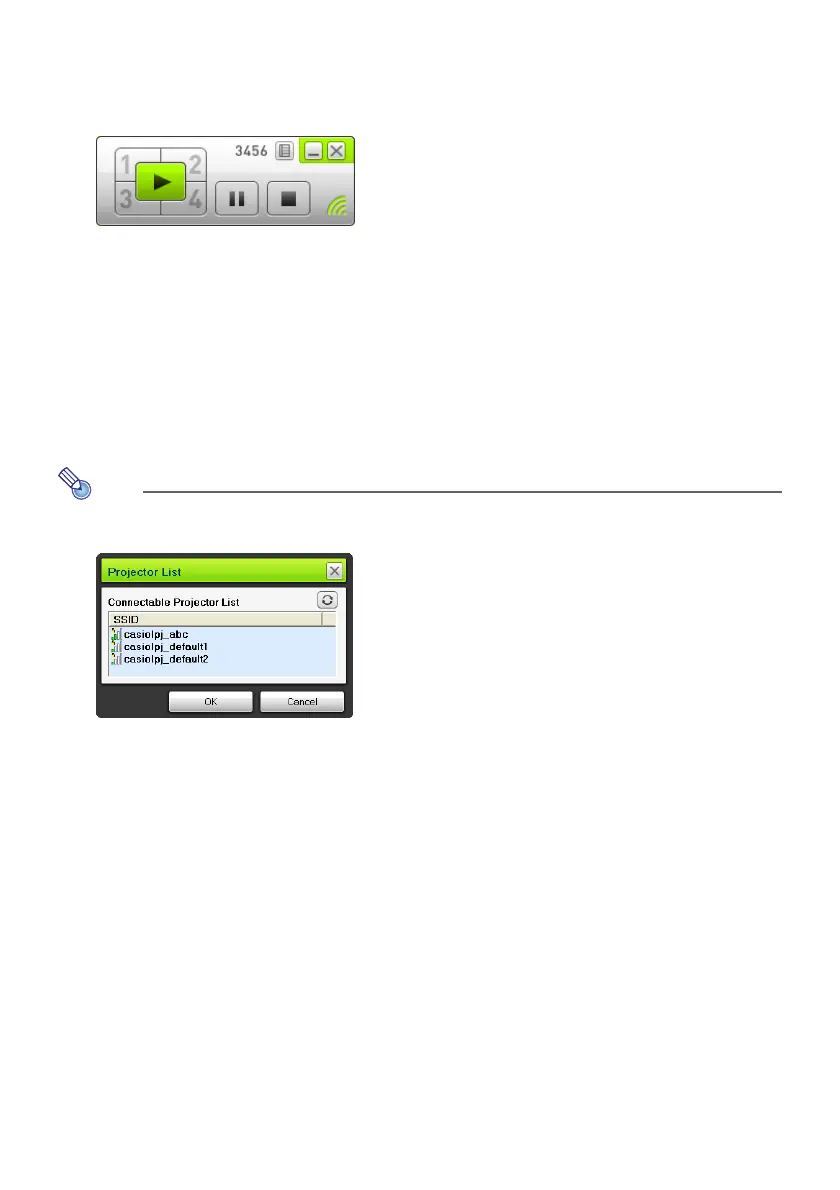
z When a computer finds multiple projectors that can be connected to, a Projector List dialog
box appears after the “Connecting” message.
When this happens, select the SSID of the projector to be connected to by clicking it, and then
click [OK].
z To re-establish a wireless LAN connection with projector configured with a default SSID after a
previous connection was terminated, perform the above procedure from the beginning. The
login number is updated to new one whenever the projector is re-started up. This means you
will need to check the login number each time you connect.
z Configuring security settings eliminates the need to enter a login code when establishing a
wireless LAN connection between the projector and a computer. Once you enter a character
string called a “passphrase” (or WEP key) the first time you connect, you will not need to
re-enter it from the next time you connect from the same computer.

Table of Contents

Other manuals for Casio XJ-A256

Questions and Answers:

Question and Answer IconNeed help?

Do you have a question about the Casio XJ-A256 and is the answer not in the manual?

Casio XJ-A256 Specifications

General IconGeneral
Matrix size0.65 \
Number of colors16.78 million colors
Projection distance- m
Projection technologyDLP
Contrast ratio (typical)2000:1
Screen size compatibility18 - 300 \
Projector native resolutionWXGA (1280x800)
Keystone correction, vertical±30 °
Aspect ratio16:10
RS-232 ports1
Offset84 %
Throw ratio1.15 - 2.3:1
Optical zoom2 x
Zoom capabilityYes
Focal length range- mm
Service life of light source20000 h
Full HDNo
Supported video modes1080i, 1080p, 480i, 480p, 576i, 576p, 720p
Analog signal format systemNTSC, PAL 60, PAL M, PAL N, SECAM
Supported graphics resolutions1280 x 800 (WXGA)
RMS rated power1 W
USB connector typeUSB Type-A
Serial interface typeRS-232
USB 2.0 ports quantityUSB 2.0 ports have a data transmission speed of 480 Mbps, and are backwards compatible with USB 1.1 ports. You can connect all kinds of peripheral devices to them.
S-Video inputs quantity0
Wi-Fi standards802.11b, 802.11g
Noise level35 dB
Noise level (economic mode)29 dB
On Screen Display (OSD) languagesCHI (SIMPL), CHI (TR), DEU, ENG, ESP, ITA, JPN, KOR, SWE
PlacementDesktop, Ceiling
Product typeStandard throw projector
Product colorWhite
Power sourceAC
AC input voltage100 - 240 V
AC input frequency50 - 60 Hz
Power consumption (standby)110 W
Power consumption (typical)210 W
Power consumption (PowerSave)0.4 W
Operating temperature (T-T)5 - 35 °C
Operating relative humidity (H-H)20 - 80 %
Cables includedAC, Composite, VGA
Weight and Dimensions IconWeight and Dimensions
Depth210 mm
Width297 mm
Height43 mm
Weight2300 g

Related product manuals