Do you have a question about the Casio XJ-M140/XJ-M145* and is the answer not in the manual?
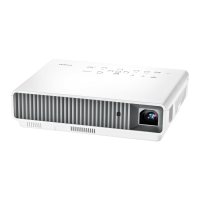
Describes the projector's key features, including light source, input options, and special functions.
Identifies and explains the functions of buttons on the remote control for projector operation.
Details the physical buttons and status indicators located on the projector unit.
Explains how to choose the desired input signal for projection from various sources.
Details how to activate and use the projector's 3D projection capabilities, including required accessories.
Describes how to swap left and right images for correct 3D viewing if images appear reversed.
Provides step-by-step instructions on how to modify the projected image's brightness level.
Guide to choosing different color settings (e.g., Standard, Graphics, Theater) for the projected image.
Explains how to zoom in or out on the projected image and scroll to view different parts.
Describes how to freeze the current projected image, capturing it in memory.
Steps to increase or decrease the projector's audio volume using the remote control.
Instructions on how to silence the projector's audio output temporarily.
Explains how to choose power-saving modes (Auto, Manual, Off) for efficiency.
Explains how to navigate and use the projector's setup menu for configuration.
Details the feature that powers up the projector automatically when plugged into a power source.
Explains how to input the factory default and custom passwords using key sequences.
Covers precautions and usage guidelines for the password feature to prevent unauthorized use.
Provides steps to follow if the projector password is forgotten, including contacting the distributor.
Describes how to reset settings for specific menu categories to their original factory values.
Explains settings for adjusting image brightness, contrast, color saturation, and tint.
Configures projector use when mounted upside down, flipping the image horizontally and vertically.
Specifies whether a startup screen (logo or none) is displayed when the projector turns on.
Defines what is displayed (blue, black, or logo) when no input signal is detected.
Specifies what is projected (blue, black, or logo) after the [BLANK] key is pressed.
Specifies the type of pointer (arrow, hand) displayed on the projected image.
Controls the auto-detection and selection of USB devices as the input source.
Selects audio output destination: projector speaker or external AUDIO OUT terminal.
Provides instructions for cleaning the projector's outer casing using a soft, damp cloth.
Explains the correct procedure for cleaning the projector lens using lens cloth or paper.
Details how to clean the projector's cooling vents to prevent dust accumulation and overheating.
Explains how to connect composite, S-video, and component video devices to the projector.
Details how to connect devices using an HDMI cable for video and audio projection.
Illustrates the operational range and optimal angles for the remote control signal receiver.
Provides a table relating screen size and projection distance for different models.
Shows how different aspect ratio settings affect projected images based on input signal.
Lists the various RGB, component, video, S-video, and HDMI signals supported by the projector.
Explains how to control the projector via a wired or wireless LAN connection using a computer.
Details how to control the projector using a serial cable connection to a computer and command codes.
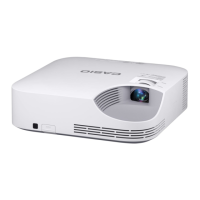
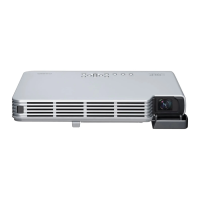
Lists the technical specifications of the projector models, including brightness, DLP chip, and terminals.
| Resolution | XGA (1024 x 768) |
|---|---|
| Technology | DLP |
| Zoom Ratio | 1.2x |
| Display Technology | DLP |
| Lamp Life | 20, 000 hours (Laser & LED Hybrid Light Source) |
| Projection Size | 30" to 300" |
| Lamp Type | Laser & LED hybrid light source |
| Input Ports | HDMI, VGA, Composite Video |
| Output Ports | Mini Jack |