7
Installation
Note
• Werecommendthatyouseekthehelpofanotherindividualwhen
installing this product.
• Thexingssuppliedaresuitableformostinstallations.Itisthe
responsibility of the installer to ensure that the fixings are suitable for the
ceiling type in the property.
Installation
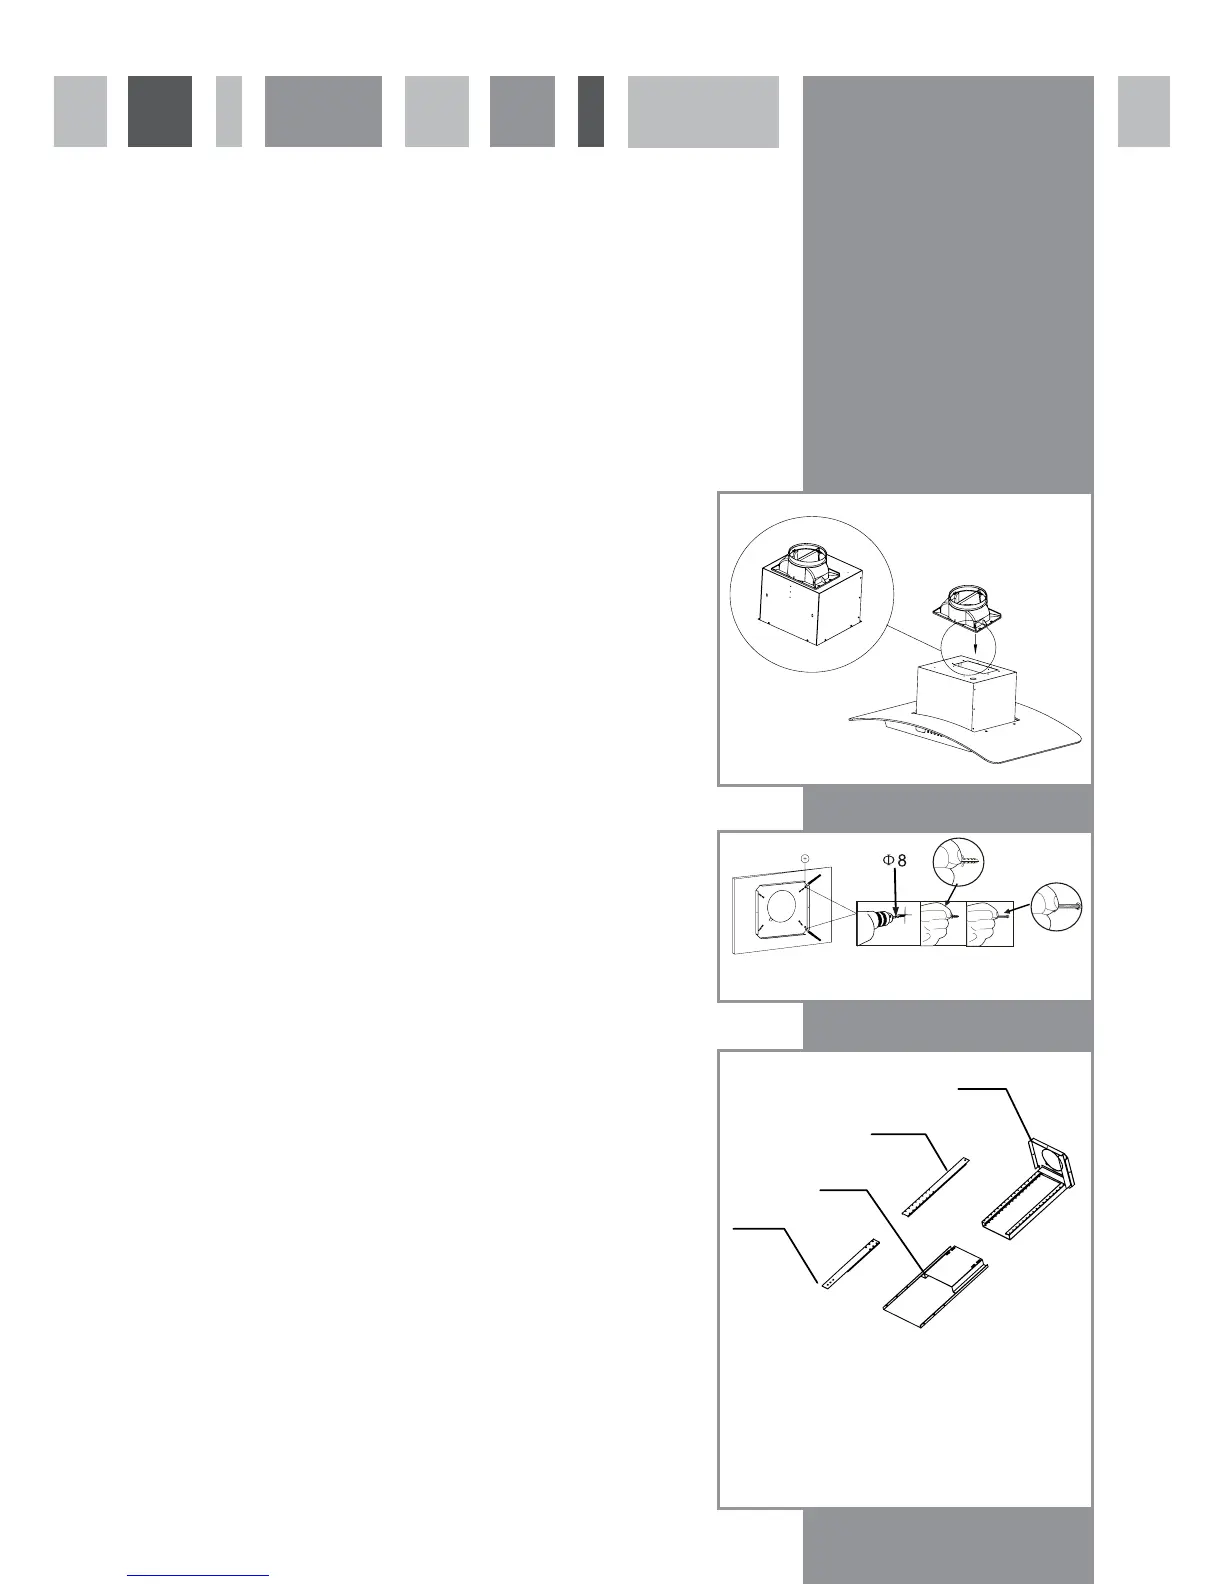
1. Firstly, fix the vent outlet to the extractor body using four screws, as
shown in fig 4.
2. Using the supplied template, mark the positions of the ceiling mounting
screws and the cut-out for the ducting pipe, if required.
Fix four suitable wall plugs into the holes and proceed to assemble the
extractor, as described in fig 5.
3. To determine the overall height of the chimney section, use the
calculation shown below for your extractor (refer to fig 3):
A = Height of gas hob burner or electric hotplate height from the
kitchen floor
B = Clearance required: Gas hobs 750mm recommended
Electric hobs: 650mm recommended
A+B is the required height of the body of the extractor above the floor.
Next we need to calculate the required height of the extractor.
Whole extractor height = ceiling height - height above floor (A+B)
4. Assemble the chimney sections 1, 2 3 and 4 on the diagram below,
using the supplied fixing screws and fix to the chimney body. Measure
the height of the chimney and ensure that it is equal or less than the
height calculated in step 3. (When the extractor is mounted the height
between the hob and extractor must be at least the minimum
height specified)
Fig. 4
Fig. 5
1
2
3
4
Fig. 6
1 – lower front strut
2 – lower mounting frame
3 – Upper front strut
4 – top mounting frame
 Loading...