24
After lighting the contact arc, the parameters are
set that favour joining of the edges of the material
tobeweldedduringtherststageofwelding.
The duration of the parameters mentioned above
may be adjusted from the main screen by selecting pa-
rameter EVO ST (see chapter 15)
.
Touch the workpiece with the electrode tip, press
the welding torch trigger and raise the electrode
tip; As soon as the electrode is raised, a high fre-
quency/voltage discharge is generated which
lights the arc. Parameters are also set that favour joining
oftheedgesofthematerialtobeweldedduringtherst
stage of welding.
The duration of the parameters mentioned above may be
adjusted from the main screen by selecting parameter
EVO ST (see chapter 15).
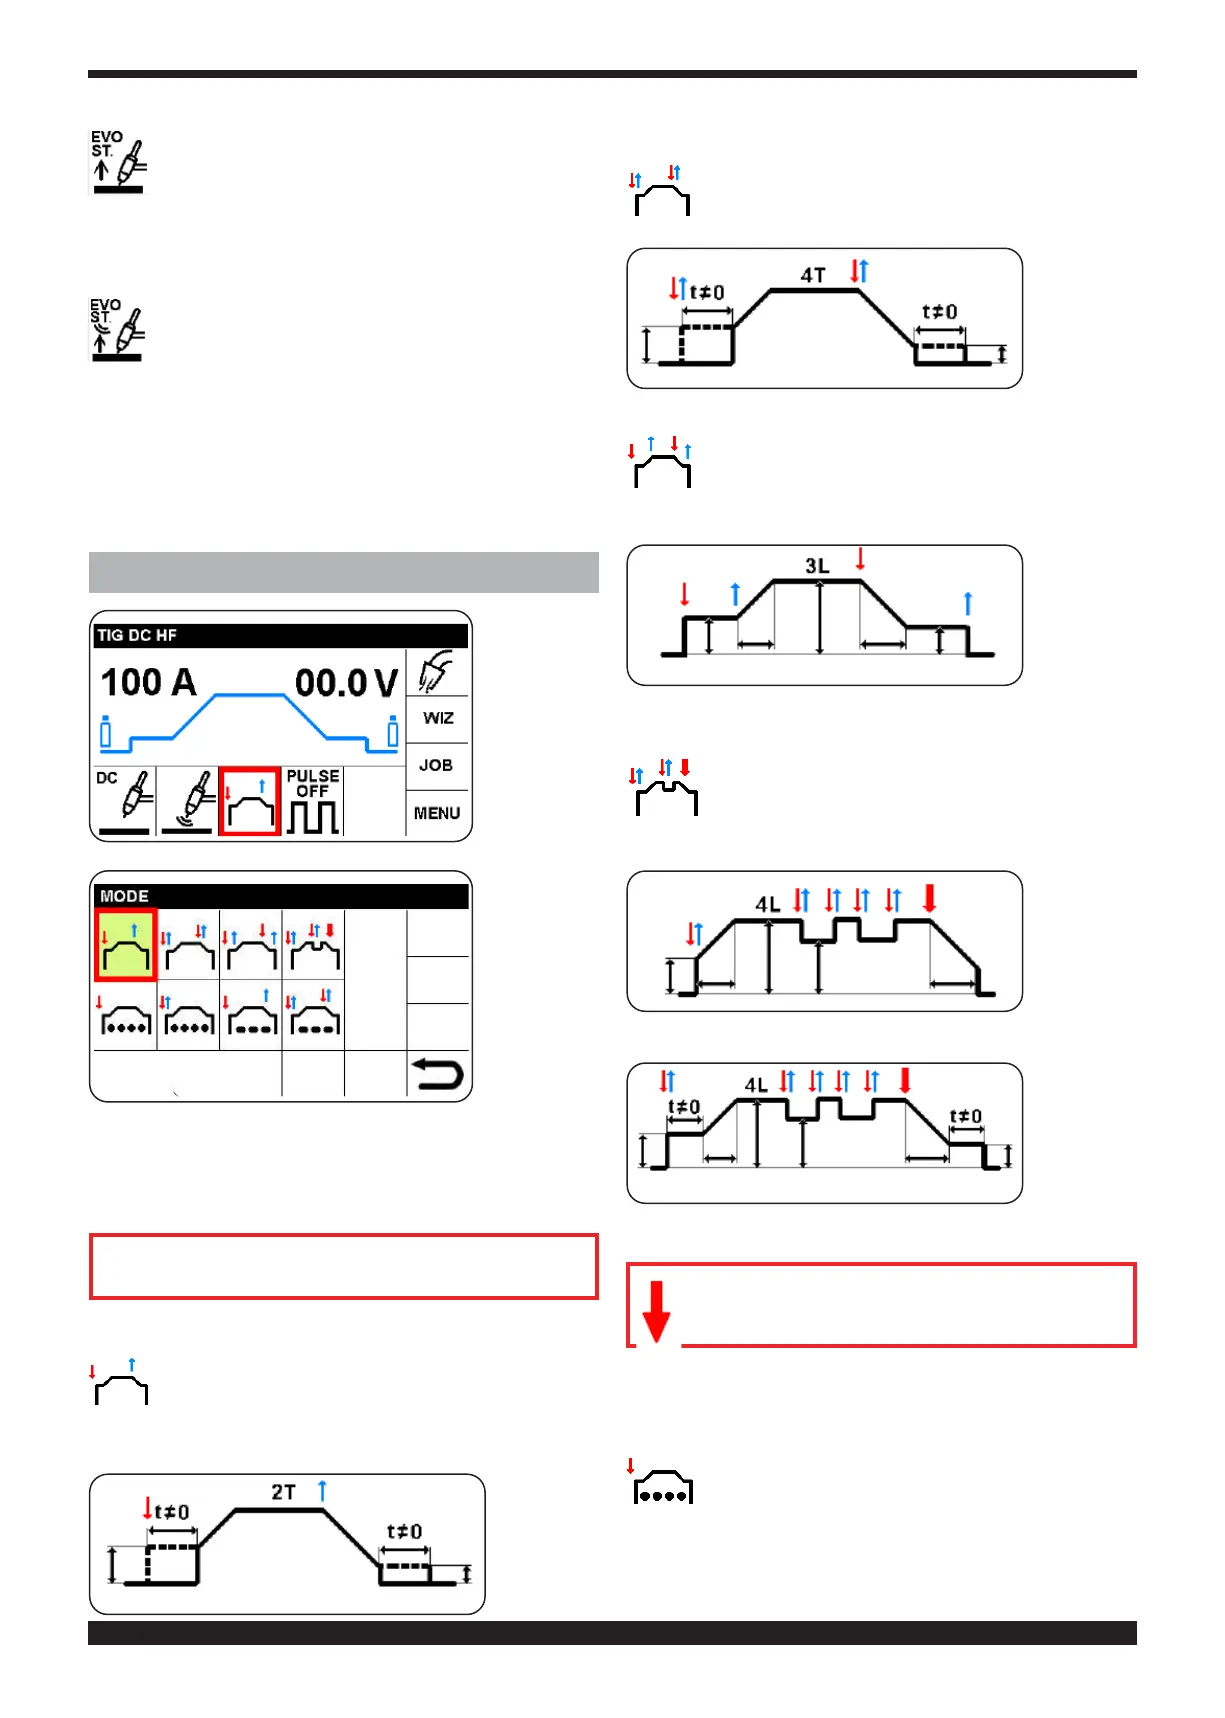
7 CHOICE OF START-UP MODE (SECTOR O)
Select and
conrmsec-
tor O relative
to start-up
modes
Select and
conrm the
s t a r t - u p
mode.
By adopting this method, it is possible to select, modify
and conrm all the types of start-up modes presented
below.
NOTE.
The red arrows indicate the movement of pressing
or releasing the welding torch trigger.
7.1 MANUAL MODE (2T):
Mode appropriate for brief welding or automated
robotized welding.
In this position, the pedal Art. 193 can be connected
7.2 AUTOMATIC MODE:
suitable for long duration welding.
7 . 3
THREE-LEVELS MODE:
Times of the currents are controlled manually;
currents are restored.
7.4 FOUR-LEVELS MODE:
With this mode, the operator can introduce an inter-
mediate current and restore it during welding.
This symbol means that the welding torch
trigger must remain pressed for more than
0.7 seconds to terminate welding.
Choice of spot welding and pause time modes leads to
a new dialog screen
7.5 MANUAL SPOT WELDING (2T):
The welding machine presets automatically for high-
frequency ignition (paragraph 6))




 To Next Page