25
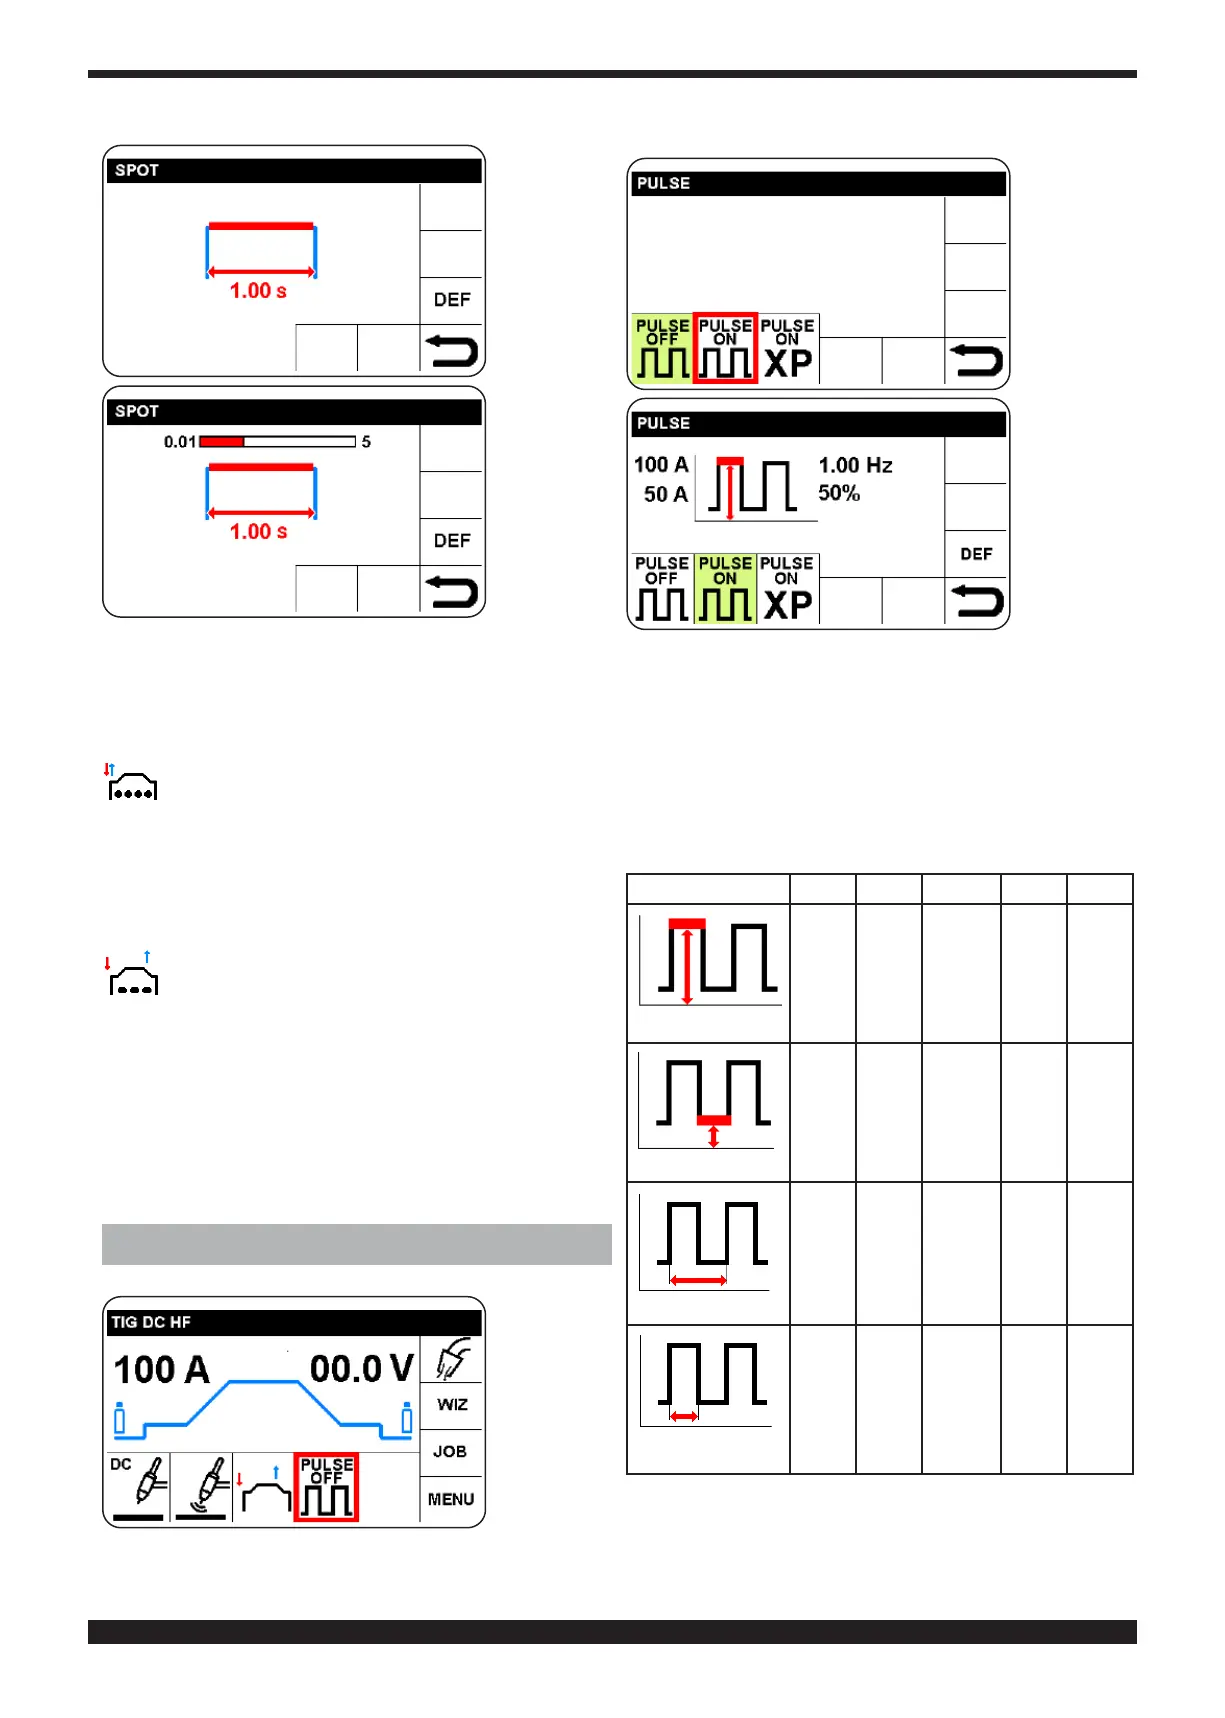
Spot weld-
ing time acti-
vates in red,
then press
knob B
Set and con-
rm the spot
welding time,
then press
without re-
leasing im-
mediately to
return to the
initial welding
screen, and
adjust the current.
Press the welding torch trigger and do not release it. The
arc is ignited and is shut off automatically when the time
is over.
7.6 AUTOMATIC SPOT WELDING (4T)
Time and current settings are the same as to 2T spot
welding. However, in this case, the operator presses and
releases the welding torch button and awaits until the
spot is done.
7.7 MANUAL PAUSE TIME WELDING (2T)
Time and current settings are the same as to 2T spot
welding. However, in this case, the operator presses and
releases the welding torch button and awaits until the
spot is done
This spot welding process alternates working and pause
times.
Widely used to obtain aesthetically pleasing welding,
without deforming the workpiece.
8 PULSE (SECTOR N)
Select and
conrm N
sector relative
to pulse to ac-
cess PULSE
ON (chapter
8.1) or PULSE
ON-XP (chap-
ter 8.2) modes
8.1 PULSE
Select and
c o n f i r m
PULSE ON
to access
pulse pa-
r a m e t e r s
setting.
The parame-
ter activates
in red. ttiva
in rosso.
Conrmandsettheselectedparameter.Conrmtheset-
ting to automatically move on to the next parameter, or
turn knob B to select the desired parameter.
By means of the same method, it is possible to select:
base current, pulse frequency and percentage of peak
current vs base current (Duty Cycle).
To return to the main screen, press knob B (do not re-
lease immediately) (> 0.7 sec.)
Parameter Min. DEF Max U.M. Ris.
Peak current
0 100 250 A. 1
Base current
5 50 Set
POINT
A
1
Frequency
0,16 0,16 2,5
KHz
Hz. 1
Duty Cycle
10 50 90 %. 1




 To Next Page