6564
ENGLISH ENGLISH
Recommendation
Dirt can be removed with a small brush or by shaking it carefully against a hard surface for
dust to fall o. You can also use warm water without detergents to get a better result. Make
sure they are completely dry before placing them.
Side brushes
Side brushes are designed with multiple bristles and are used to push dirt towards the suction
nozzle and to clean thoroughly edges and corners. These brushes can wear out over time,
aecting negatively to the cleaning eciency. For this reason, it is suggested to replace each
side brush after a maximum of 220 hours.
Recommendation
It is recommended to clean the side brushes once a week with the help of the cleaning brush.
Main brush
The main brush is designed with bristles and silicone, spins at top speed and helps introduce
dirt into the suction nozzle. This brush is in contact with the oor, and therefore with dirt, so it
can be worn out over time, aecting negatively to the cleaning eciency. For this reason, it is
suggested to replace each side brush after a maximum of 320 hours.
Recommendation
It is recommended to clean the main brush once a week with the help of the cleaning brush.
Sensors
Cleaning robot vacuum cleaners have dierent types of sensors, for example, proximity
sensors that allow the robot to move around while detecting obstacles or free-fall sensors
that help the robot detect slopes or possible gaps/unevenness such as staircases. These
sensors are always in contact with dust particles, and therefore can be blocked over time,
causing possible navigation errors. It is suggested to clean all the robot’s sensors with the
cleaning brush or with a dry cloth after a maximum of 35 hours of operation.
Battery charge and replacement
- To lengthen the battery’s service life, keep the robot charging on the charging base when
not in use.
- If the robot is not going to be used for a long time, remove the battery from the product and
store it in a dry and safe place.
- To replace the battery, follow the instructions below:
- Unscrew the 2 screws on the battery compartment, remove the battery cover and the
battery. Fig. 47
- Insert the new battery with the battery label facing up. Fig. 48
- Place the battery and the battery cover in its place and x properly the screws back again.
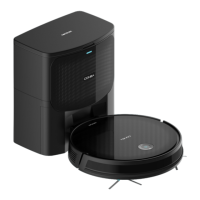
Conga Home 2000:
Change of the bag:
The ashing orange indicator light indicates that the dirt bag is full, or that you should change
the dirt bag as specied by the APP. It is recommended to change the dirt bag every 6-8 weeks.
Fig. 49
Opening
1. Pull on the handle to remove the dirt bag.
2. Discard the removed dirt bag.
3. Insert a new one.
4. Replace the cover.
Dust tube cleaning
If the indicator light ashes orange when the dirt bag is not full, unplug and rotate the unit to
check if there is a blockage in the transparent cover. If so, remove the screws with a screwdriver
as shown in the picture on the right. Then open the transparent cover and remove the lock.
Fig. 50 (Transparent dirt tube cover)
Remove the screws with a screwdriver and avoid violent removal. Replace the transparent
cover.
Maintenance
Cleaning of the infrared lens and the charging/emptying indicator
Check if the infrared lens and the charging/emptying indicator are dirty. If so, remove the dirt
with a clean, dry cloth and make sure they are completely clean. It is recommended to clean
them once a month. Fig. 51
Fan lter bracket cleaning
Check the fan lter holder for lint or dirt. If so, remove them with a clean, dry cloth. It is
recommended to clean them once a month. Fig. 52
5. TROUBLESHOOTING
Conga 2290 Ultra
Beeps while the oscillating red light is on:
Beeps Error Solution
01 1 Gyroscope error Place the robot on a
stable surface and
restart it. Do not
move it.