26
ENGLISH
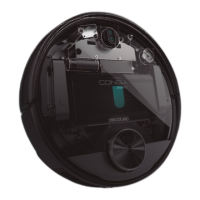
1. Mop
2. Mop bracket
3. Velcro
4. Tab
3. BEFORE USE
Take the product out of the box and remove all packaging materials.
Make sure all parts and components are included and in good conditions. If any sign of visible
damage is observed, contact immediately with the ofcial Technical Support Service of Cecotec.
4. INSTALLATION
Robot and charging base installation
Connect the charging base to a power supply and store the remaining cable. It is important to
store the remaining cable at the bottom of the charging base to avoid it from being dragged
and disconnected.
Fig. 6.
Place the charging base against the wall, leaving the safety distance indicated in the below
picture.
Note: Ensure a space of at least 1 m on both the left and right side of the charging base, and a
space of at least 2 m in front of it.
Fig. 7.
Note: Do not expose the charging base to direct sun light.
Long press the power button for 3 seconds; when the light indicator turns on, place the robot
on the charging base.
Fig. 8.
1. Steady blue light: ON/operating
2. Oscillating orange light: Charging
3. Red light blinks: Error
Notes:
Take the robot to the charging base if the battery is low. The robot might not turn on if the
battery is very low.
The robot will automatically turn on when placed on the charging base.
The robot cannot be turned off during charging.