DETAIL VIEW: TUTORIAL
Adjusting the settings in Detail view is an extension of setting them in the summary
view described above. To do this manually for each band, you would follow the
same procedure:
• Set all the Level and Gain controls to minimum (Level= -80 and Gain= -20).
• Gradually increase the Level until the noise in that band disappears.
• Rene the Gain settings to achieve an appropriate degree of noise
suppression without artefacts.
However, it is unlikely that you will have to do this because you will be starting from
the (approximately) correct settings derived using the summary view, or obtained
from the Learn function. In either case, it should only be necessary to rene the
settings.
Note: You can also operate the Learn function in Detail view, whereupon you will
see it adjusting the settings in real time.
Pressing and holding any of knobs 1 - 6 temporarily switches that band off,
allowing you to hear the effects of noise suppression in that band alone.
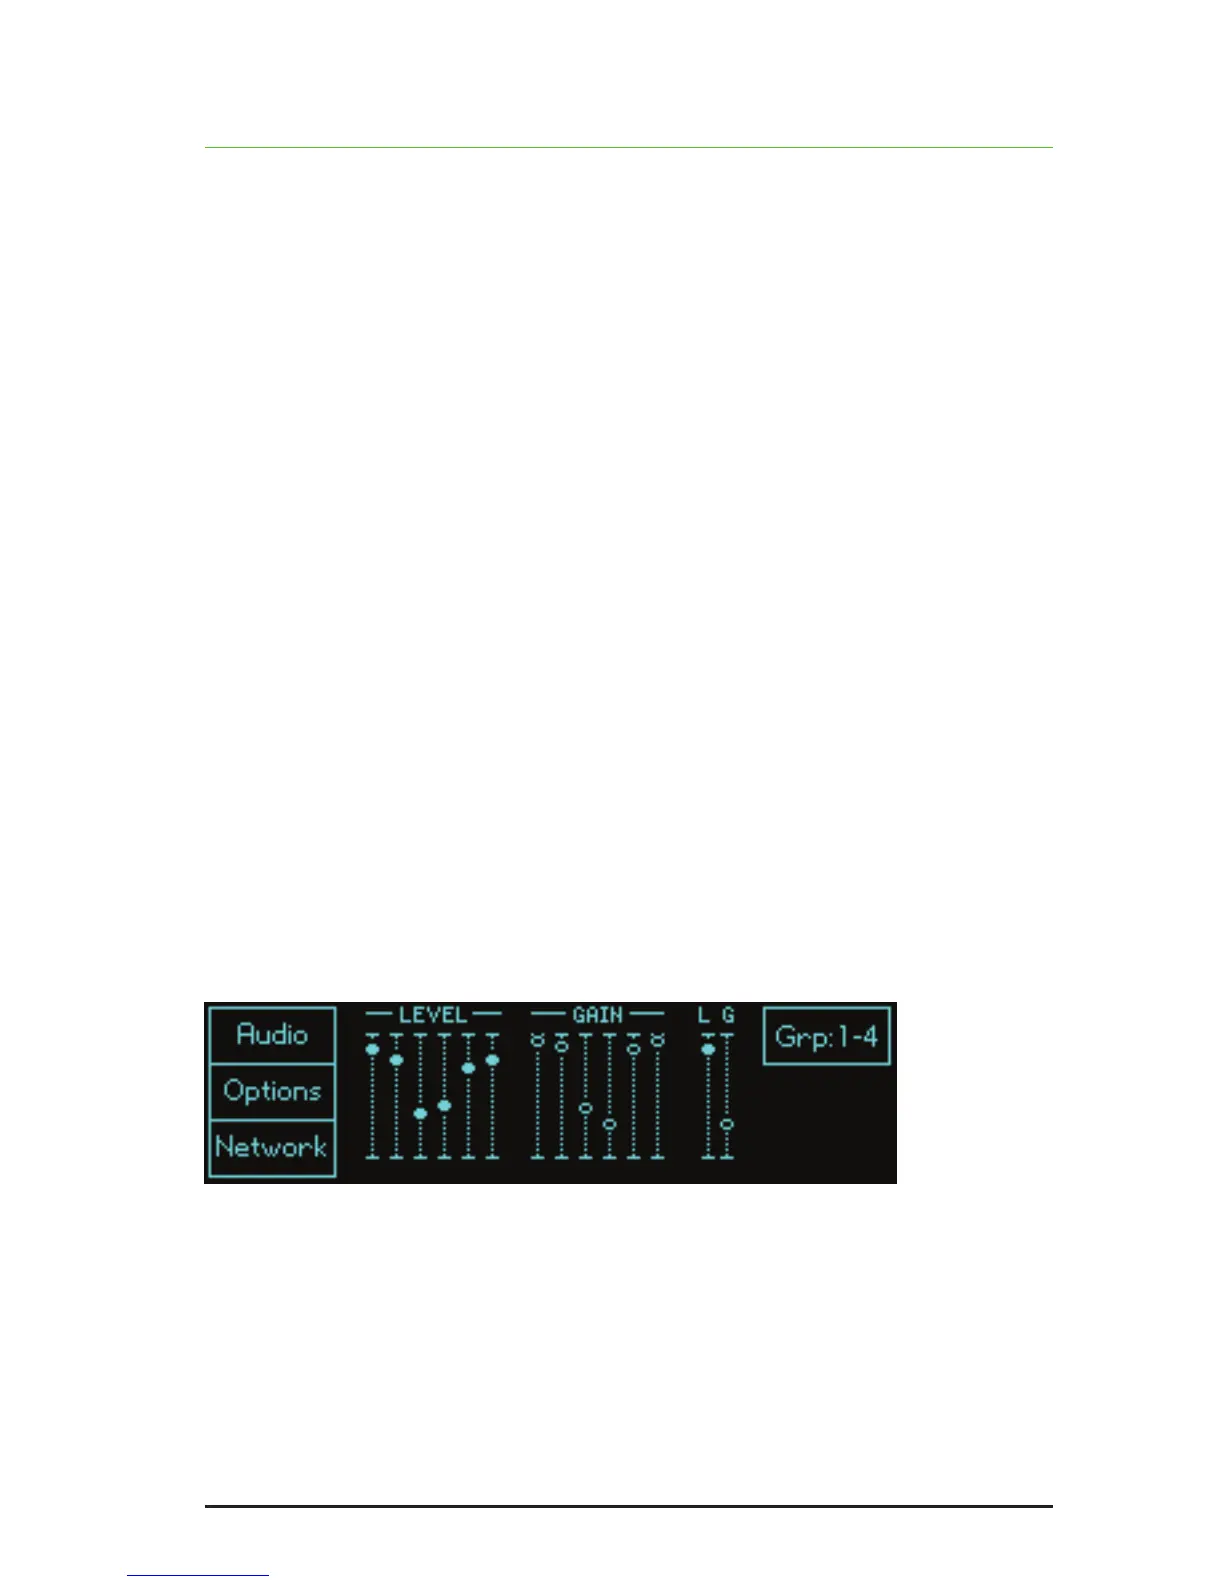
Example
You may nd that, for a given piece of audio, the greatest effect comes from bands
3 and 4. This suggests that the noise is concentrated in the mid frequencies, so
higher level settings and lower gain settings are appropriate for bands 3 and 4,
whereas the gains of bands 1, 2, 5 and 6 should remain relatively close to 0dB to
ensure that minimal signal damage occurs in the bands that do not contain much
noise.
The nal conguration may look like this: