EasyManua.ls Logo

Celestron StarSense Explorer DX 102AZ User Manual

Celestron StarSense Explorer DX 102AZ
4 pages
To Next Page IconTo Next Page
Page #1 background imageLoading...
Page #1 background image
ENGLISH | 1
Unpack your telescope and verify that all parts are
present. Your StarSense Explorer DX includes:
a telescope tube, a tripod and mount head, an
accessory bag, slow motion controls, an accessory
tray, two eyepieces, an erect image diagonal, a
finderscope, a StarSense phone dock, StarSense
Explorer app code card, and a hex key (hidden inside
the slot in the front of the mount head).
To set up the tripod, spread the legs outward until
they are fully extended and push down the center leg
brace.
ITEM #22460
Extend the legs of the tripod by loosening the three
hand knobs on each leg. Pull each leg section all
the way out and tighten the hand knobs to secure
them in place.
ENGLISH
102AZ
Quick Setup Guide
Place the accessory tray on top of the center brace
and line up the three holes. Insert the three thumb
screws through the bottom of the leg brace and
thread them into the tray.
To attach the slow-motion knobs
to your mount,
first locate the supplied hex key hidden inside the
slot in the front of your mount.
Place the slow-motion control knob over the
D-shaped gear shaft and push inward to make sure
it is fully seated. Use the hex key to tighten the
setscrews onto the gear shaft. Return the hex key to
its storage position in the front of the mount.
Hold the telescope tube next to the mount with the
dovetail bar on the tube facing the clamp on the top
of the mount arm.
Slide the dovetail bar into the clamp at the top of
the mount and tighten the hand knob on the bottom
of the clamp to secure the telescope in place.
Locate the erect image diagonal and remove the
plastic covers. Insert the barrel of the diagonal into
the focuser and secure in place by tightening the set
screws.
Insert the barrel of the 25 mm eyepiece into the
diagonal and tighten the set screw.
2
4
5
6
7
8
9
10
1
3
Question and Answer IconNeed help?

Do you have a question about the Celestron StarSense Explorer DX 102AZ and is the answer not in the manual?

Celestron StarSense Explorer DX 102AZ Specifications

General IconGeneral
Aperture102mm
Focal Length660mm
Focal Ratiof/6.5
Optical DesignRefractor
Mount TypeAltazimuth
StarSense TechnologyYes
Highest Useful Magnification241x
Lowest Useful Magnification15x
Limiting Stellar Magnitude12.5
Resolution (Rayleigh)1.37 arc seconds
Resolution (Dawes)1.14 arc seconds
Optical CoatingsFully Coated
Smartphone CompatibilityYes
Magnification26x, 66x
FinderscopeStarPointer red dot finderscope
Included Eyepieces25mm, 10mm
TripodAdjustable-height tripod included

Summary

Quick Setup Guide

Unpack and Identify Parts

Instructions for unpacking the telescope and verifying all included components.

Tripod Setup

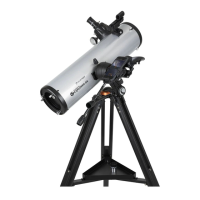
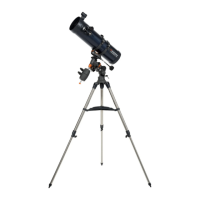
Steps for extending tripod legs, securing them, and attaching the accessory tray.

Attach Slow-Motion Controls

Guide on how to install and secure the slow-motion control knobs using the hex key.

Mount Telescope Tube

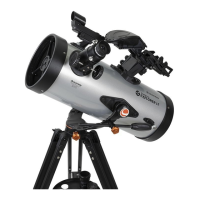
Procedure for attaching the telescope tube to the mount using the dovetail bar.

Install Diagonal and Eyepiece

Steps for inserting the erect image diagonal and the 25 mm eyepiece into the focuser.

Install Finderscope

Instructions for sliding the finderscope bracket into the dovetail slot on the telescope tube.

Prepare Battery

Action to remove a plastic tab from the battery to enable its function.

Attach StarSense Phone Dock

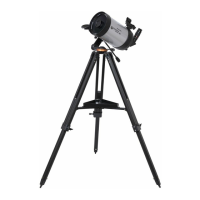
Guide to install the StarSense phone dock onto the mount's port.

Secure Smartphone in Dock

Instructions for aligning and securing the smartphone into the StarSense phone dock.

Remove Lens Cap and Focus

Final step to remove the front lens cap and focus the image using the focuser knobs.

Downloading and Activating the App

Moving the Telescope

Aligning the Finderscope

Choose a Target

Select a distant, recognizable object for alignment during daylight.

Center Target in Eyepiece

Align the telescope's view with the chosen target and focus the image.

Adjust the Finderscope

Use adjustment knobs to align the finderscope's red dot with the telescope's centered target.
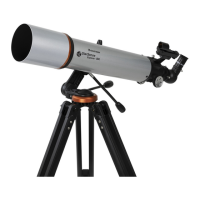
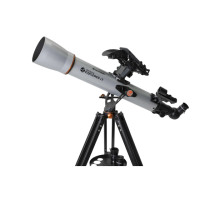
Attaching the Smartphone

Your First Night Out

Related product manuals