EasyManua.ls Logo

Celestron StarSense Explorer LT User Manual

Celestron StarSense Explorer LT
20 pages
To Next Page IconTo Next Page
Page #1 background imageLoading...
Page #1 background image
ENGLISH | 1
Unpack your telescope and verify that all parts
are present. Your StarSense Explorer LT includes:
a telescope tube with altitude slow motion rod
attached, a lens cap, an accessory bag, a tripod with
alt-azimuth yoke mount and center leg brace attached,
a StarSense smartphone dock, two eyepieces, a 2x
Barlow lens, two tube mounting screws, an erect
image diagonal, an eyepiece accessory tray, a
StarPointer finderscope and StarSense Explorer
app code card.
To set up the tripod, spread the legs outward until
they are fully extended and push down the center
leg brace.
ITEM #22451
Extend the center portion of each of the three tripod
legs down about 6 to 12 inches. Use the tightening
screw on each leg to secure the extended leg in place.
ENGLISH
80AZ
Quick Setup Guide
Check to ensure that all three legs are the same
height once extended to provide a level platform for
the telescope.
Place the eyepiece accessory tray on top of the
tripod’s center leg brace. Thread the tray into the
threaded hole in the center of the leg brace until it
is fully seated.
NOTE:
If necessary, rotate the accessory tray
counterclockwise until the accessory holes
are not covered by the leg brace arms as
shown here.
Loosen the knob on the altitude rod guide on the
side of the yoke mount so the hole is unobstructed.
Slide the altitude rod into the rod guide on the
mount and lower the altitude hubs on the telescope
tube into the cradles on the top of each yoke arm.
Tighten the altitude rod guide screw to hold the
telescope in place.
Insert the two tube mounting screws through the
yoke mount and into the hubs on the telescope tube
to secure it in place.
To install the finderscope, remove the two silver nuts
from the threaded posts on the top of the tube, near
the focuser.
1
7
2
4
5
6
3
8
9
10
Question and Answer IconNeed help?

Do you have a question about the Celestron StarSense Explorer LT and is the answer not in the manual?

Celestron StarSense Explorer LT Specifications

General IconGeneral
Optical DesignRefractor
Mount TypeAlt-azimuth
Smartphone CompatibilityYes
Eyepiece25mm
FinderscopeStarSense Explorer
Weight7.2 lbs (3.27 kg)

Summary

Quick Setup Guide

Unpack and Verify Parts

Verify all telescope parts are present from the included list in the box.

Assemble Tripod

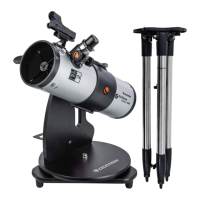
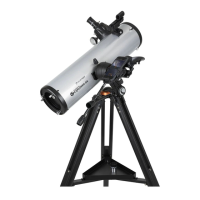
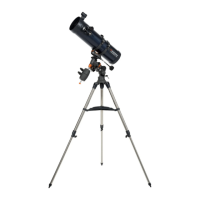
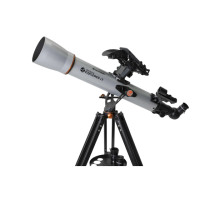
Spread, extend, and level the tripod legs to create a stable viewing platform.

Attach Accessory Tray

Secure the eyepiece accessory tray to the tripod's center leg brace.

Mount Telescope Tube

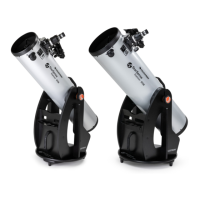
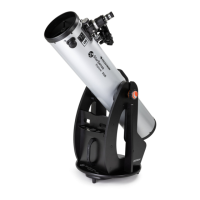
Attach the telescope tube to the yoke mount and secure it with screws.

Install Finderscope

Attach the finderscope to the telescope tube using mounting screws and nuts.

Install Diagonal and Eyepiece

Connect the diagonal to the focuser and insert the eyepiece securely.

Use Barlow Lens

Insert the Barlow lens between the diagonal and eyepiece to double magnification.

Install Smartphone Dock

Mount the StarSense smartphone dock onto the telescope tube.

First Observation

Remove the lens cap and focus the image for your first viewing.

Download and Activate App

Download, install, and activate the StarSense Explorer mobile application.

Moving the Telescope

Azimuth and Altitude Movement

Loosen knobs to move the telescope left/right and up/down for aiming.

Fine Adjustment

Use the slow motion rods for precise incremental adjustments.

Slow Motion Rod Range

Understand and reset the limited range of the altitude slow motion rod.

Aligning the Finderscope

Choose Target

Select a distant object during the day for alignment.

Center Target in Eyepiece

Align the main telescope view with the chosen distant object.

Adjust Finderscope

Align the finderscope's red dot with the centered object in the main telescope.

Attaching the Smartphone

Prepare StarSense Dock

Remove the protective cap covering the mirror on the StarSense dock.

Secure Smartphone

Place and secure your smartphone into the spring-loaded dock holder.
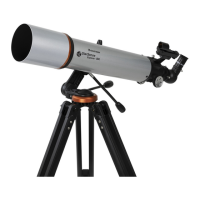
Related product manuals