Page 11<&(%$*4.8"4,7%H'*#$"&8#I%/7*,#*%4,77%JKLLLKLMMKNOPO1Item 63873
?@<6AQRS6;@ACRED@CEA6E@ET6 @??6DUGQ
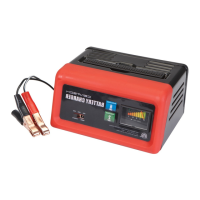
T.,(3"83%U,$$*(>%R'$#"9*%!*."47*
@%?S@;j%E6@;%U@AA6;Q%D@Q%T@F?6%U@AA6;Q%6dSGR?CRE1%%
AR%;6XFT6%;C?j%R<%@%?S@;j%E6@;%U@AA6;Q%<RGGRV%AB6?6%CE?A;FTACRE?%6d@TAGQ1%
XR%ERA%SGFW%CE%TB@;W6;0?A@;A6;%FEACG%XC;6TA6X%AR%XR%?R1
AR%S;6!6EA%?6;CRF?%CEaF;Q-%
V*,(%@E?CK,//(&e*9%#/7,#.K(*#"#$,8$%#,2*$>%3&337*#%,89%.*,e>K9'$>%('++*(%)&(`%37&e*#%
).*8*e*(%4&88*4$"83I%9"#4&88*4$"83I%&(%)&(`"83%8*,(%+,$$*(>1%%%
U,$$*(>%,4"9%4,8%4,'#*%/*(5,8*8$%+7"898*##1
V@;ECEWi X&%8&$%'#*%?$,($%#*$$"83%$&%
4.,(3*%+,$$*("*#1%%F#*%$&%='5/%#$,($%&87>1
TRGX%U@AA6;C6?- Begin charging at lowest rate,
increase rate as battery reaches normal temperature.
XR%ERA%TB@;W6%@%<;Rk6E%U@AA6;Q1
1. Unplug Charger/Starter.
2. Attach at least a 24-inch-long
6-gauge (AWG) insulated battery cable to
NEGATIVE (NEG, N, –) battery post.
3. Connect POSITIVE (RED) charger clip to
POSITIVE (POS, P, +) post of battery.
T@FACREi Do not face battery when
making final connection.
4. Position yourself and free end of battery
cable as far away from battery as possible –
then connect NEGATIVE (BLACK) charger
clip to free end of battery cable.
5. Plug Charger/Starter into grounded 120V receptacle.
6. Turn Power Switch on.
7. Press Function Select Button until desired function
lights up. ;*2*(%$&%A,+7*%U%&8%/,3*%P1
V@;ECEWi X&%8&$%'#*%J]!%]^^@%?$,($%
2'84$"&8%2&(%4.,(3"831
8. Press Start/Stop button to start function.
9. When finished, turn Power Switch
off and unplug power cord.
10. When disconnecting Charger/Starter, always
do so in reverse sequence of connecting
procedure and break first connection while
as far away from battery as practical.
11. After use clean, then store the Charger/
Starter indoors out of children’s reach.