115mm115mm
53mm53mm
60mm60mm 25mm25mm
115mm115mm
53mm53mm
60mm60mm 25mm25mm
115mm115mm
53mm53mm
60mm60mm 25mm25mm
1 1
4 5
!
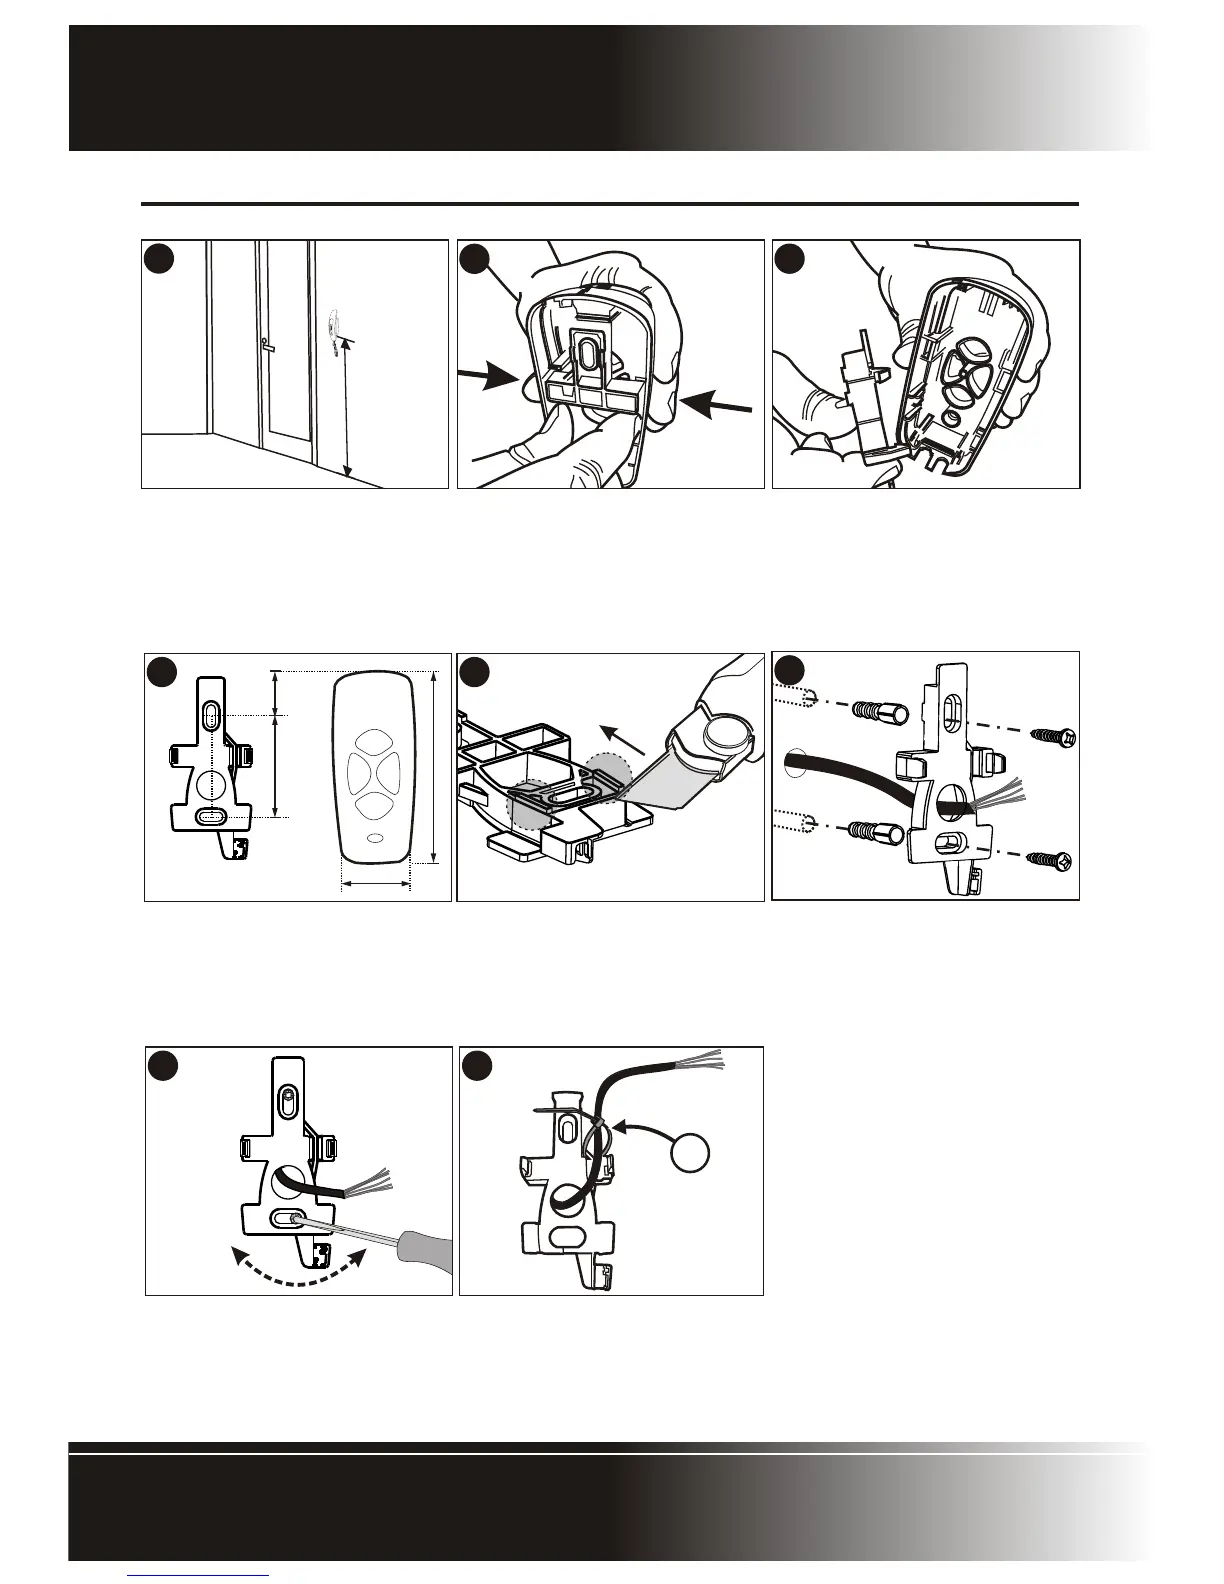
Outer dimensions of the mounting
holes in the cradle base relative to the
cradle base.
!
Hold the cradle base against the wall
at the required height and ensure that
it is vertical.
!
Mark the location of the mounting
holes.
!
Using a 6mm masonry bit, drill holes
into the wall for the rawlplugs
provided in the kit.
!
If the cable is being routed into the
unit from a concealed conduit behind
the base, route the cable through the
cable entry point provided.
!
Ensure that at least 140mm of cable
extends out of the wall.
Page 10 - Polophone Intercom
HANDSET INSTALLATION
Handset InstallationHandset Installation
1
2
3
!
Position handset on wall where
required and at a height that will allow
for comfortable use of the handset. A
height of 1550mm from the floor to
the base of the cradle is recom-
mended.
!
To remove the cradle base, squeeze
the sides of the cradle.
!
Extract the cradle base.
!
In the case of an uneven wall, the
tabs may be cut as shown to allow the
cradle base to ‘sit’ on the wall without
rocking.
7 8
!
Screw the base firmly into position
and using the slots provided in the
mounting holes to adjust the base to
be perfectly vertical.
!
Route the cable over the channel in
the cradle base cross bar and using
the cable tie (A) - provided secure
the cable to the cradle base as
shown.