!
!
!
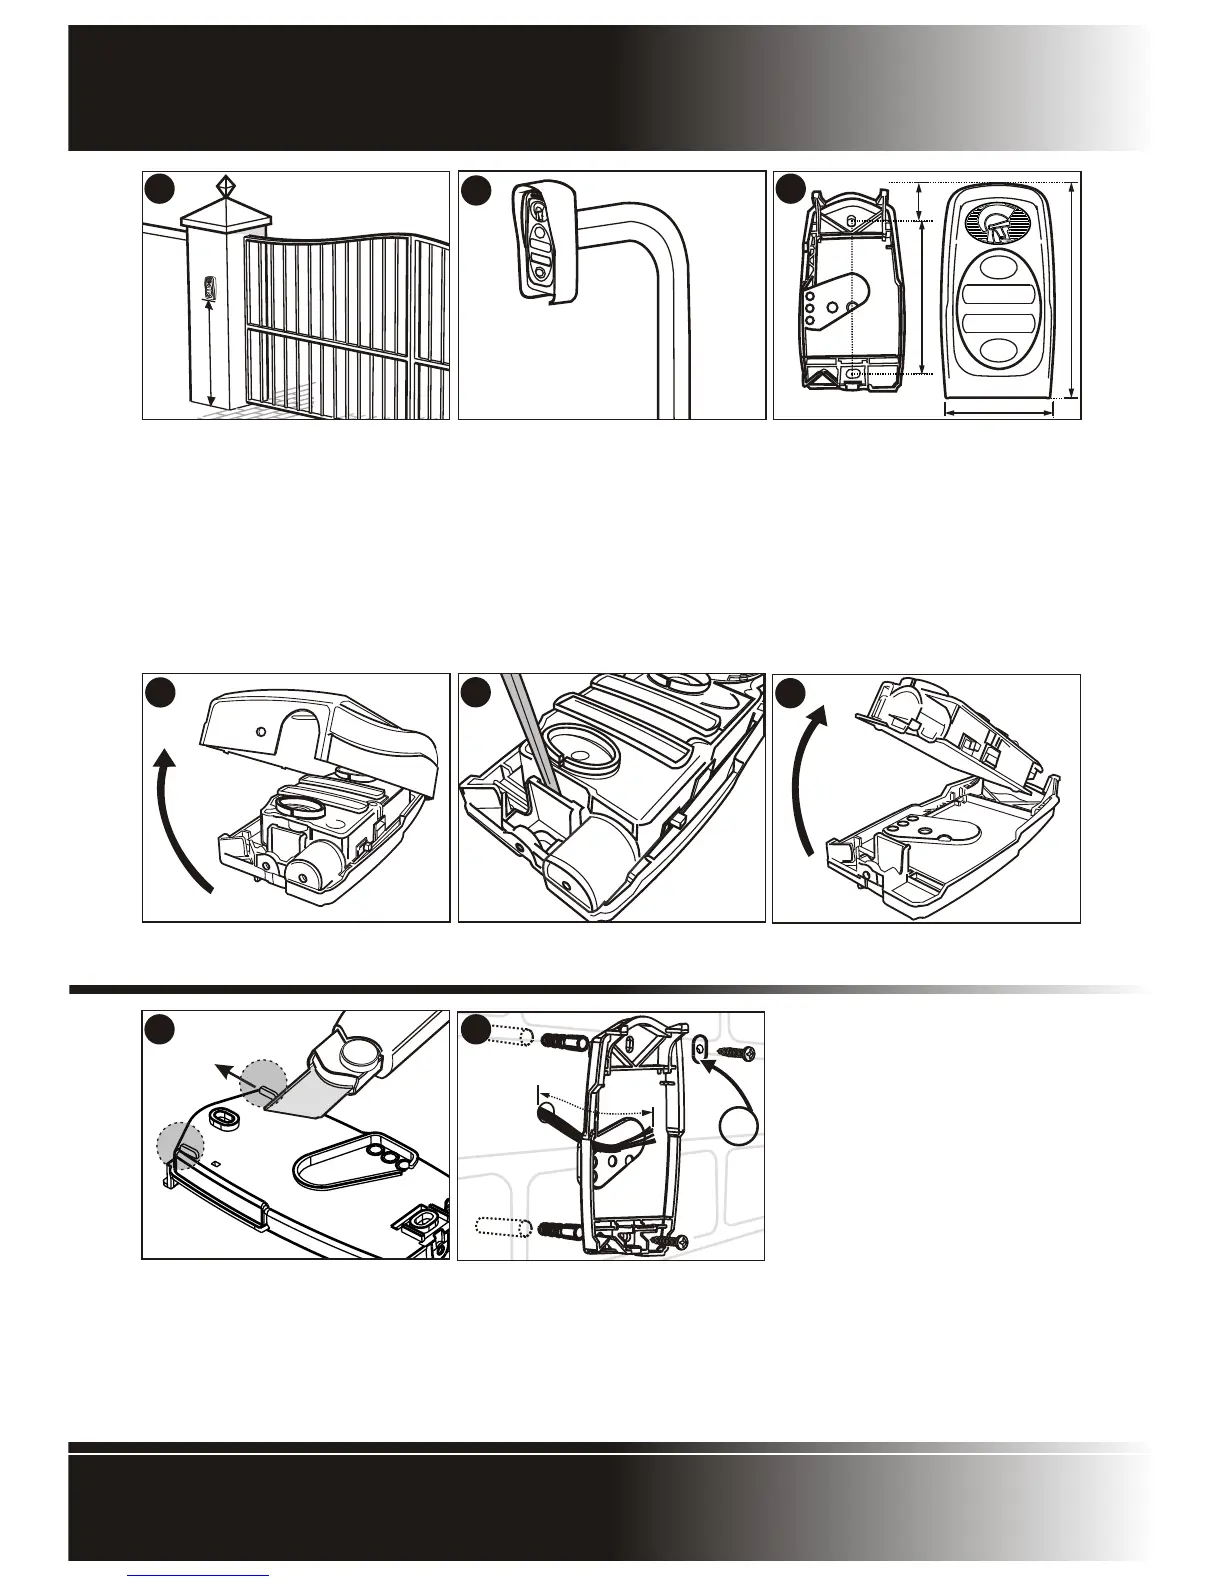
Position entry panel on wall adjacent
to entrance gate or door
Mount at a height that allows
speaking into the system to be
comfortable.
A recommended height is shown.
.
1A
!
Dimensions of the entry panel base
and mounting holes relative to the
entry panel cover.
1B
Alternatively mount the entry panel
onto a gooseneck ensuring that:
!
The entry panel does not protrude
too far into the driveway.
!
The entry panel is not set too far back
and can be easily accessed from a
vehicle.
!
The height allows speaking into the
system to be comfortable.
Gooseneck Installation
3
4
!
Lift off the outer cover of the entry
panel.
!
Insert screwdriver as shown and un-
clip the electronic module from base.
!
In the case of an uneven wall, the
tabs may be cut as shown to allow
the base to ‘sit’ on the wall without
Rocking.
!
Lift electronic module off base.
5
!
!
!
Position entry panel on wall adjacent
to entrance gate or door
Mount at a height that allows
speaking into the system to be
comfortable.
A recommended height is shown.
.
1A
!
Dimensions of the entry panel base
and mounting holes relative to the
entry panel cover.
1B
Alternatively mount the entry panel
onto a gooseneck ensuring that:
!
The entry panel does not protrude
too far into the driveway.
!
The entry panel is not set too far back
and can be easily accessed from a
vehicle.
!
The height allows speaking into the
system to be comfortable.
Gooseneck Installation
3
4
!
Lift off the outer cover of the entry
panel.
!
Insert screwdriver as shown and un-
clip the electronic module from base.
!
In the case of an uneven wall, the
tabs may be cut as shown to allow
the base to ‘sit’ on the wall without
Rocking.
!
Lift electronic module off base.
5
6 7
74mm74mm
110mm110mm
18mm18mm
138mm138mm
2
!
Hold the entry panel base against the
wall at the required height ensuring
that it is vertical.
!
Mark the location of the mounting
holes.
!
Using a 6mm masonry bit, drill holes
into the wall for the rawlplugs
provided in the kit.
!
If the cable is being routed into the unit
from a concealed conduit behind the
base, knock out one of the cable entry
holes provided in the base and feed
through the cable. Ensure that at least
100mm of cable extends out of the
wall.
!
Fit sealing washer (A) onto top
mounting screw before installing.
Page 8 - Polophone Intercom
ENTRY PANEL INSTALLATION
 Loading...