ChamSys QuickQ Series Service Document
Page 5 of 17 www.chamsys.co.uk
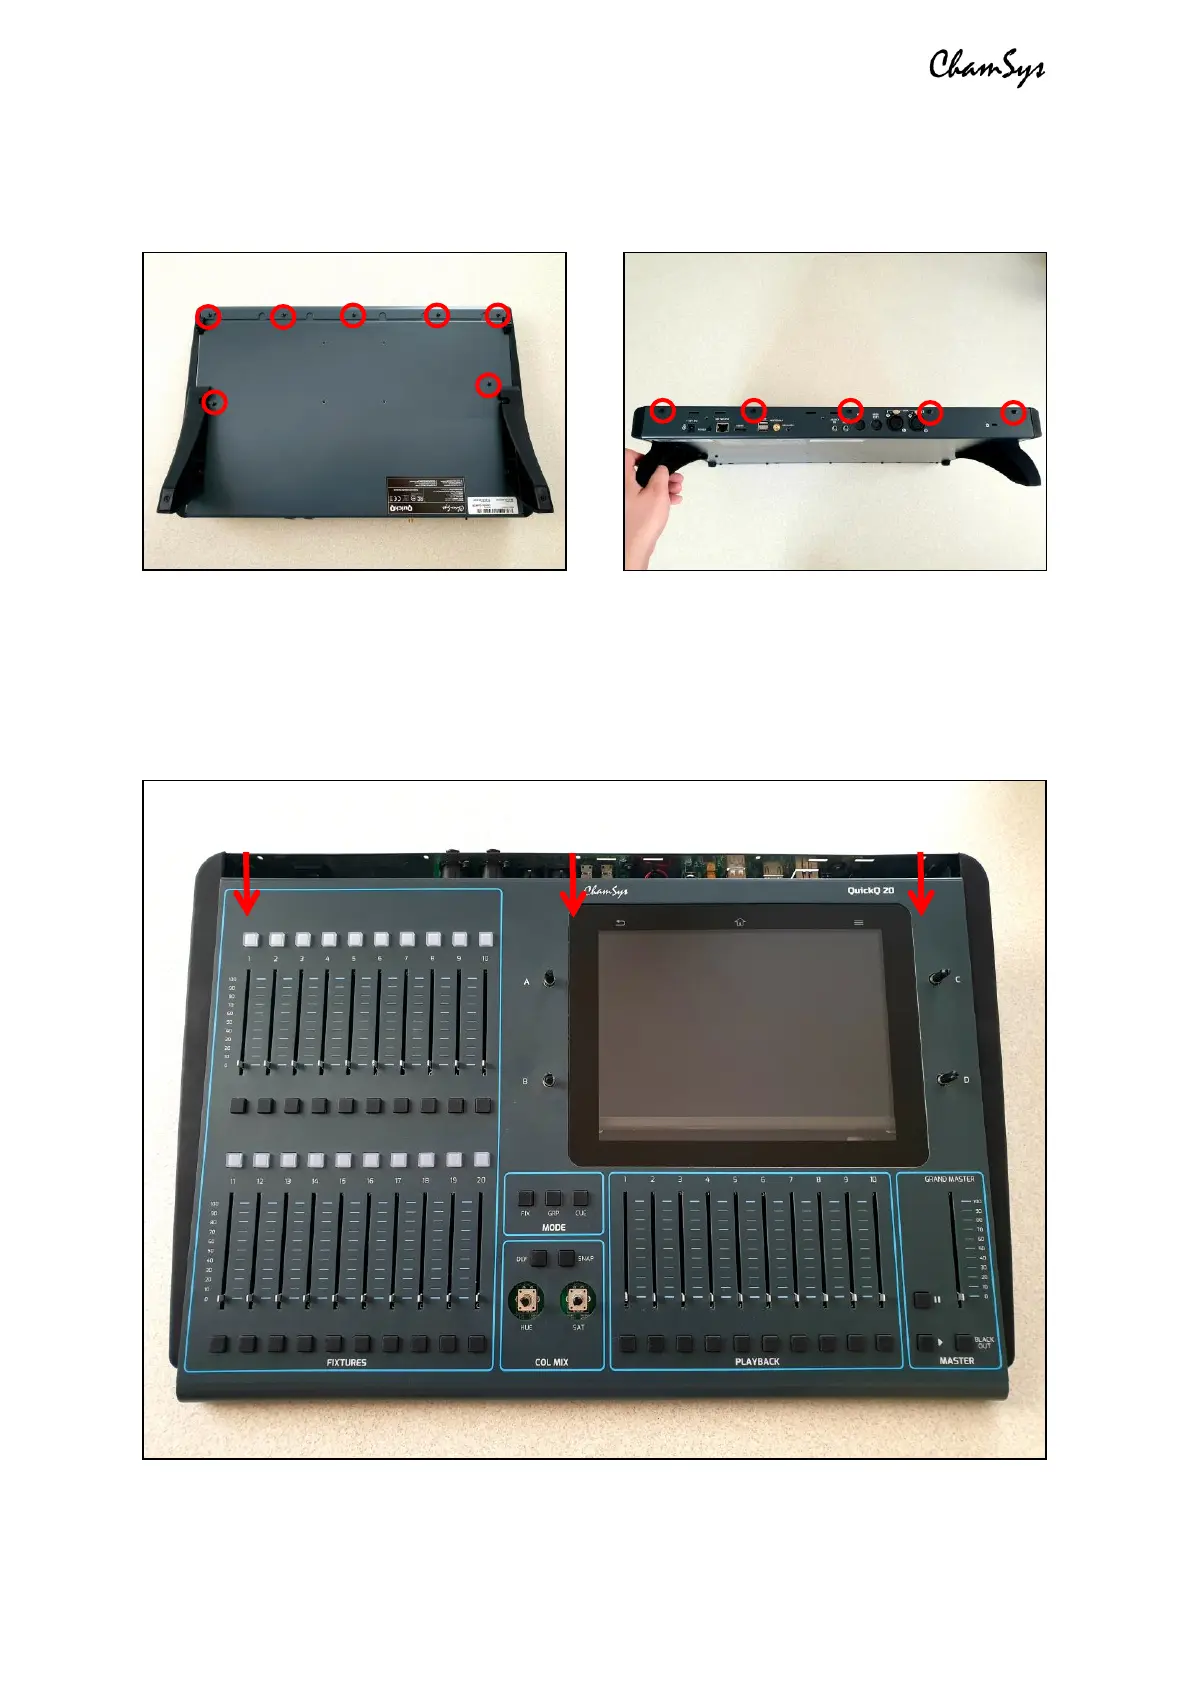
Step one: Remove the M3x6 black screws from the rear and bottom of the console using
a PZ1 screwdriver, as highlighted in the images below. Note that the QuickQ 30 has more
of these screws to remove, but these are found around the same places as the example.
Step two: Remove all fader caps and encoder knobs. These simply pull off with a little
force. If you are carrying out repairs on one panel, remove the caps for this panel only.
Step three: Place the console on a flat surface, face up with the front towards you. Slide
the front panel down towards you, by approximately 1 inch. This can be achieved by
gripping the sides and pushing with your thumbs. See the image below for reference.
 Loading...