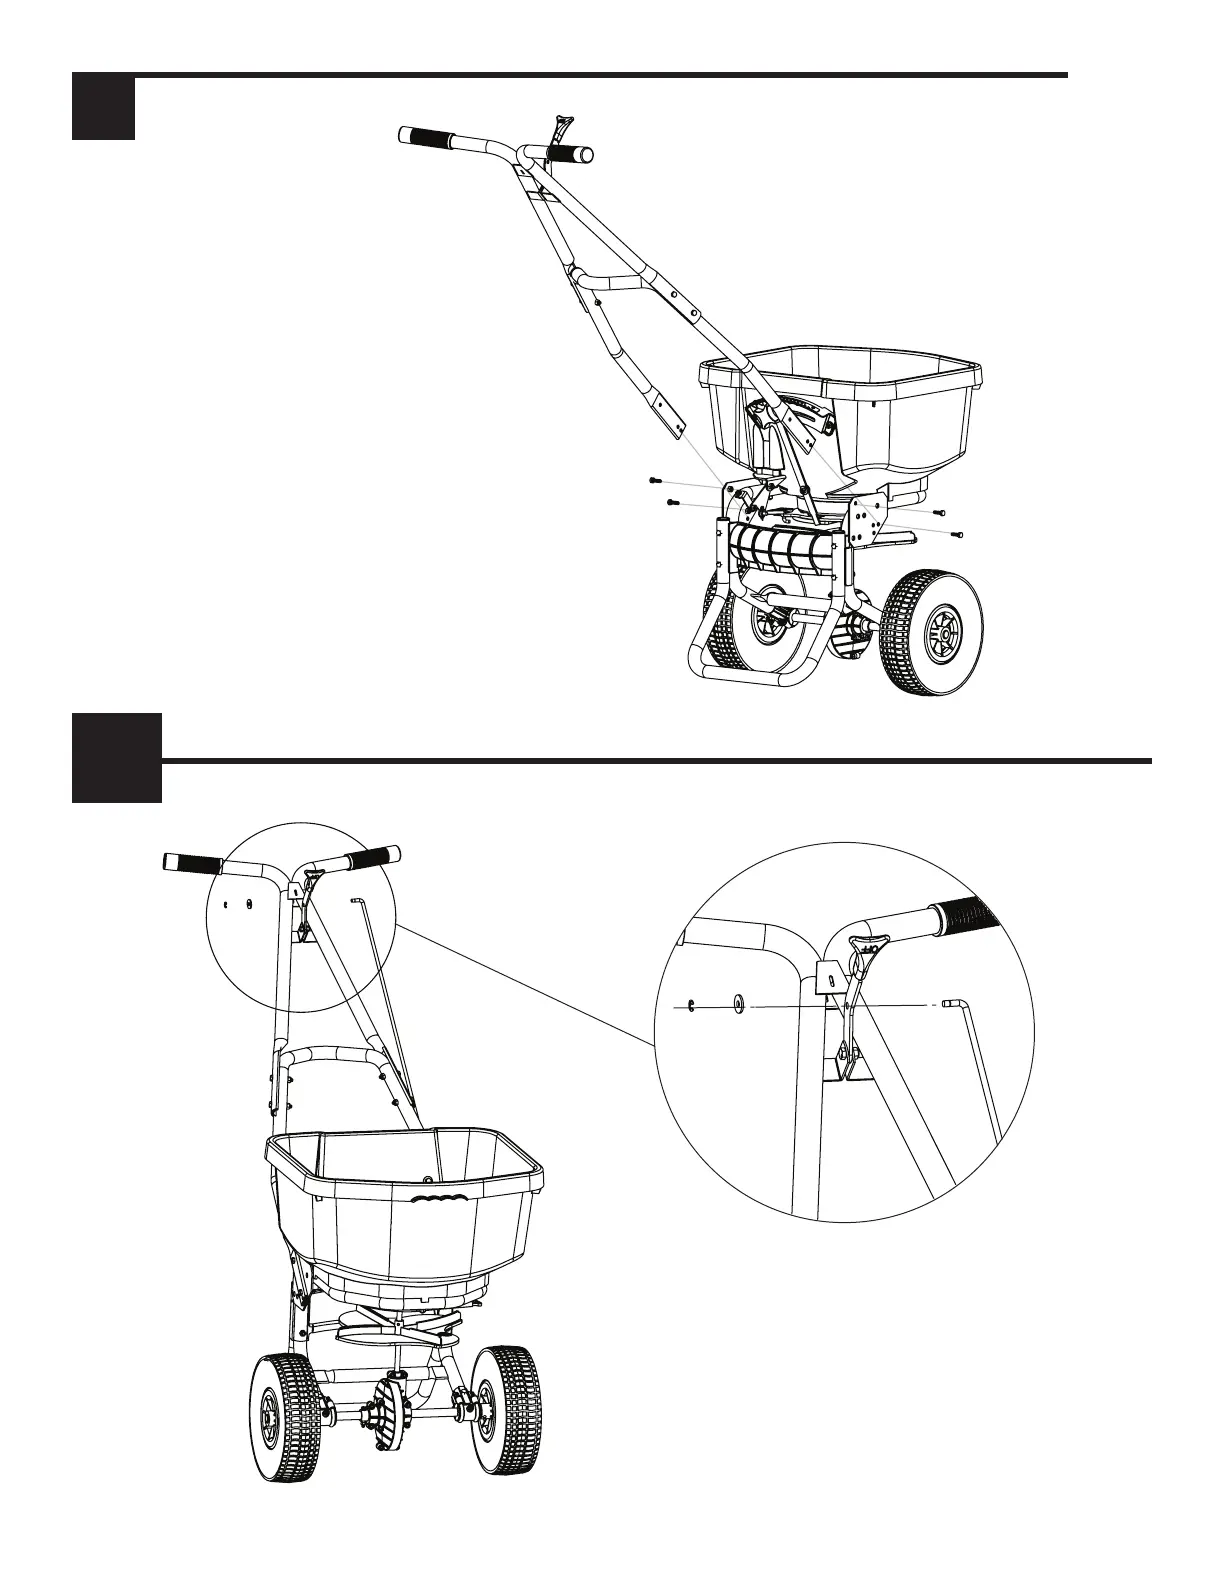
ACTUATOR ROD ASSEMBLY
ENSAMBLAJE DE LA VARILLA DEL ACTUADOR/ ASSEMBLAGE DE LA TIGE DE L’ACTIONNEUR
3
2.1
Insert actuator rod (C-4) through hole in control handle. Secure
with M6 at washer (H-7) and external retaining ring (H-6).
Inserte la varilla del actuador (C-4) a través del oricio en la manija
de control. Asegure con una arandela plana M6 (H-7) y un anillo de
retención externo (H-6).
rez la tige de l’actionneur (C-4) dans le trou de la poignée de
commande. Fixez-la à l’aide d’une rondelle plate M6 (H-7) et de
l’anneau de retenue externe (H-6).
5
Align holes on handle to main body. screw in the
handle to the body using hex bolts and nuts (H-3).
Alinee los oricios del mango con el cuerpo principal.
Atornille el mango con pernos hexagonales (H-3).
Alignez les trous de la poignée au cadre principal.
Vissez la poignée au cadre principal à l’aide d’écrous
hexagonaux (H-3).
H-3
H-3
H-3
H-3
C-1
C-2
H-6 H-7
C-4