EN
| Intelect
®
Legend 2 - Service Manual DOMESTIC 35
REPAIR OPERATION
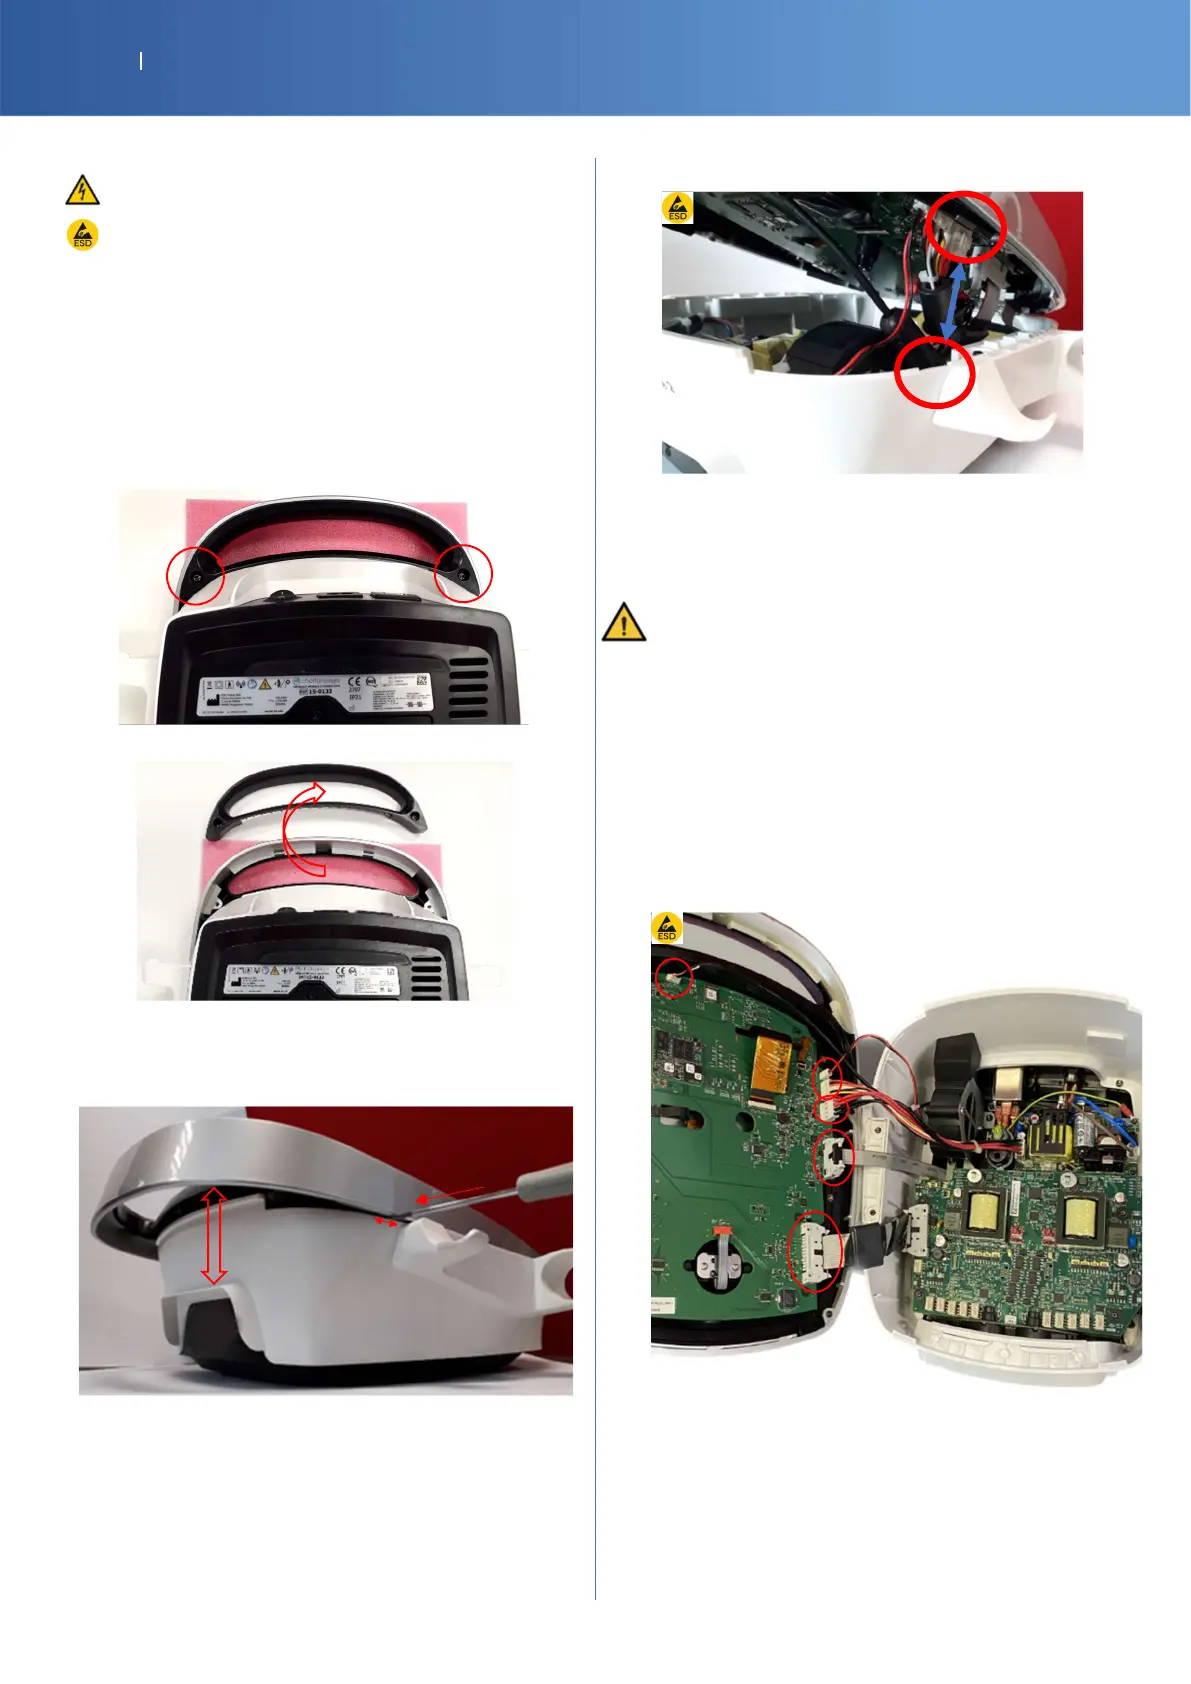
7.3. SEPARATING TOP & LOWER ASSEMBLY
Unplug the device from the mains first
ESD equipment is required to open the device
G16-4101-SP MOB2 DEVICE HANDLE
INTERNAL BLACK
14-1045-SP M4X12 TORX SCREW x 5
Unscrew the handle lock piece and remove the
handle lock piece
Turn the device upside down on a soft surface (to
avoid damaging the IMD lens and knob button),
Unscrew the handle lock piece (Torx T20 2 x
M4x12)
Remove the handle lock piece.
Return the device on its feet
Insert a little flat screwdriver 1 cm near of US
applicator support.
Push on the screwdriver to unlock the clip and, in
the same time, separate gently the top and the
lower part. Repeat this on the other side.
Put the front face on the left side to disconnect all
the cables(x5)
To separate completely the top, disconnect the
following 6 connectors. (unlock and pull)
SP-14-1052 IL2 INTERNAL USB CABLE
SP-14-1058 IL2 CABLE BATTERY TO CTRL PCBA
SP-14-1057 IL2 CABLE POWER SUPPLY TO CTRL PCBA
SP-14-1033 IL2 INTERNAL VACUUM 10PINS RIBBON CABLE
SP-14-3798 IL2 2CH US-STIM RIBBON CABLE
OR
SP-14-3797 IL2 4CH US-STIM RIBBON CABLE
 Loading...