iGage X9x User Manual page 20 of 53
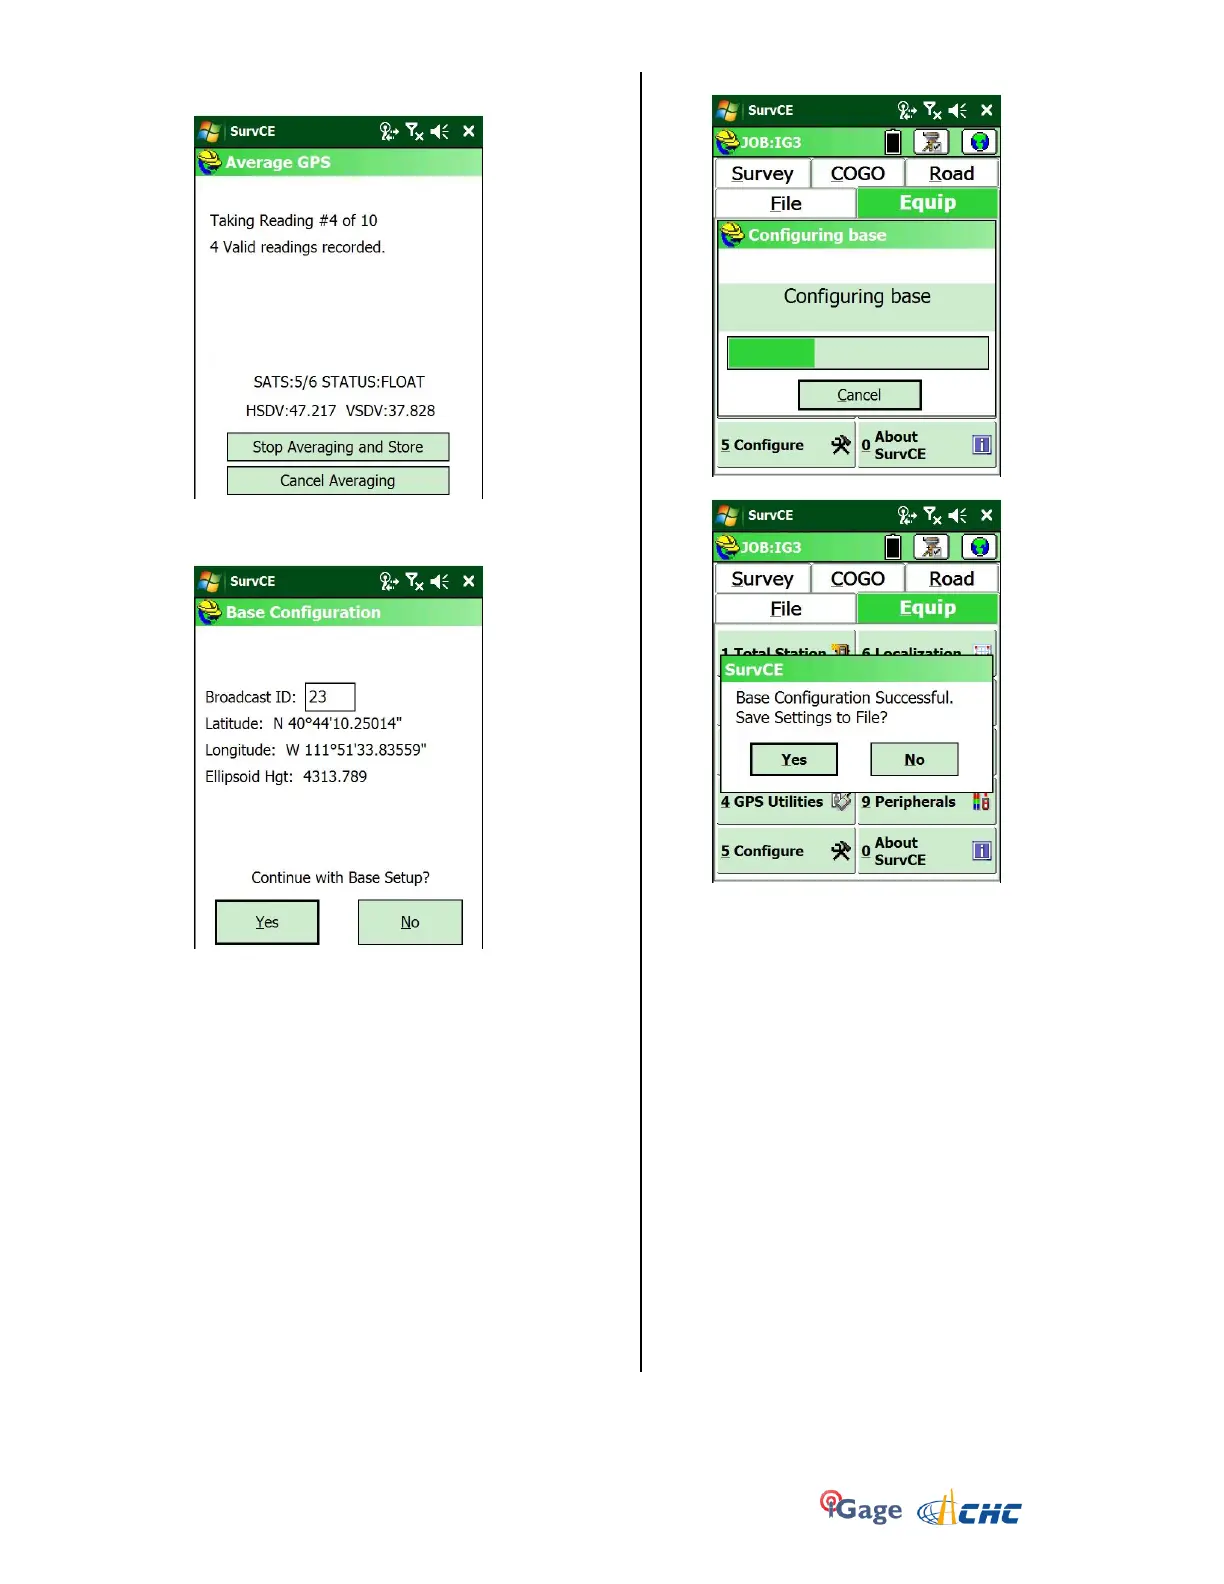
21. Select an appropriate number of samples to average,
then click on the green check mark:
22. Let the average complete:
Enter a unique broadcast ID to differentiate your
receiver:
Note: The Broadcast ID should be in the range of 0 to
64 for CMR. Once a rover locks on to a correction
stream with a specific Broadcast ID, the rover will not
listen to another ID without being rebooted or reset.
23. Click on Yes, then after a few seconds:
24. After a moment, SurvCE asks:
25. Answer Yes to complete the base configuration.
26. At this point, check the red TX LED on the radio, it
should blink once every second.
The base is set and is broadcasting corrections to
rovers.
27. After starting the base, check if the Yellow files LED is
blinking once each second. If not, click and hold the
Files button on the receiver front for one second to
begin storing carrier phase data. You may want to have
this data to submit an OPUS solution or to process
static shots taken with the rover.
IMPORTANT NOTE:
If you click on ‘Equip: Monitor Skyplot’ after configuring the
base, the base may be disconnected from the radio and
corrections will no longer be broadcast.
Once the base has been configured and is broadcasting
corrections, don’t enter the monitor skyplot screen.