Page 11SKU 66604 For technical questions, please call 1-800-444-3353.
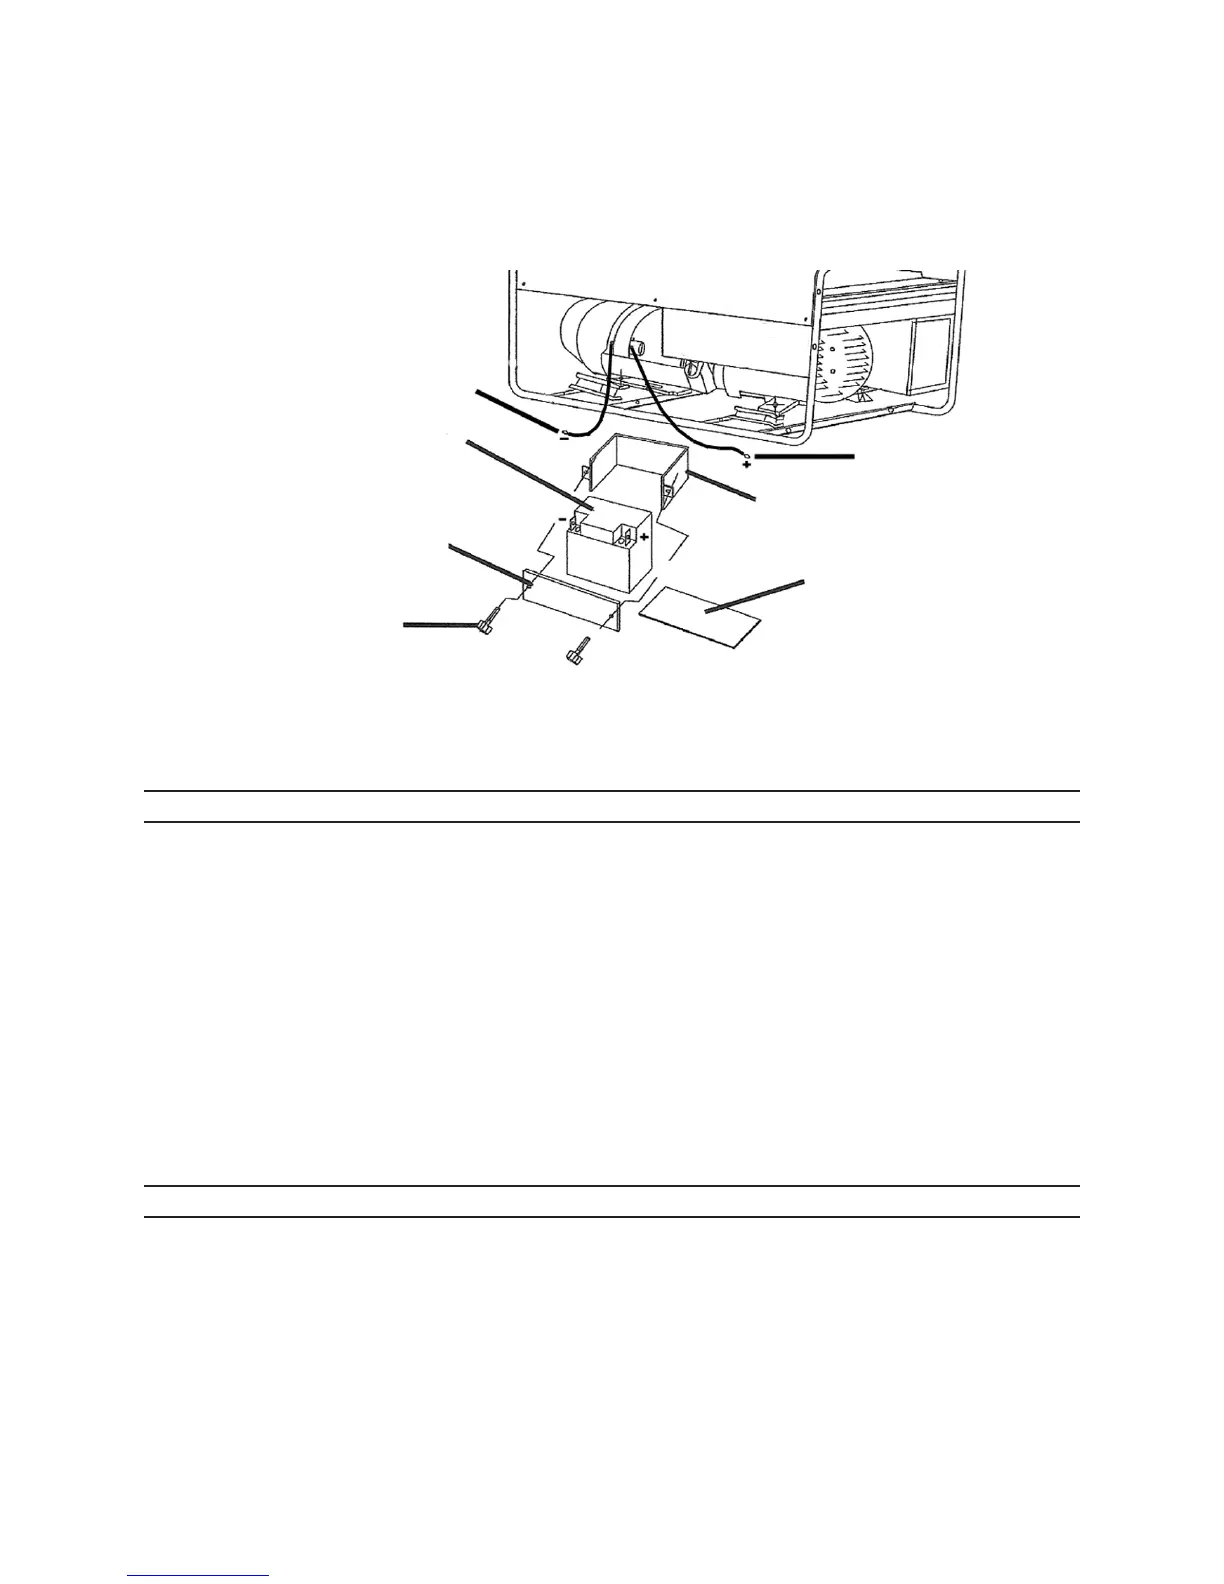
Align the two mounting holes in the Battery Bracket (47) with the two threaded 5.
mounting holes in the Battery Guard Plate (44). Then secure the Battery Bracket
to the Battery Guard Plate, using two Bolts with Lock Washers (46).
(See Figure B.)
BOLT WITH LOCK WASHER (46)
NEGATIVE BATTERY CABLE
POSITIVE BATTERY CABLE
BATTERY GUARD PLATE (44)
BATTERY TRAY (48)
BATTERY BRACKET (47)
12 VDC BATTERY
(NOT INCLUDED)
FIGURE B
Connect the Engine’s Positive Battery Cable (RED +) to the Battery’s positive (+) 6.
terminal. Then connect the Engine’s Negative Battery Cable (BLACK --) to the
Battery’s negative (--) terminal. (See Figure B.)
TO ATTACH THE WHEEL ASSEMBLY
With additional assistance, and a proper lifting device, raise the left side of the 1.
Generator about 6 to 8 inches off the oor surface.
Attach the two Axle Brackets (53) to the lower Frame (42), using two Bolts (52) and 2.
two Lock Washer Nuts (13) for each Axle Bracket (See Assy. Diagram, page 21).
Slide the Axle (49) through the two Axle Brackets (53). 3. (See Assy. Diagram.)
Insert one Wheel (50) onto each end of the Axle (49). 4. (See Assy. Diagram.)
Secure the Axle (49) and Wheels (50) in place, using four Pins (51). 5.
(See Assy. Diagram.)
INSTALLATION INSTRUCTIONS
IMPORTANT: 1. Electrical and other permits may be required for the installation of
emergency or portable power systems. Make sure to investigate the local building
and electrical codes before installing this unit.
Locate the Generator (outdoors only) where cooling air is readily available. Locate 2.
the Generator so that the air inlets and outlets are not blocked by obstructions
such as bushes, trees, walls, snow drifts, etc. Locating the Generator in the path