15
the carry cot (g. 12A); Then pull out the hinges from
their slots (g. 12B).
13. Remove the elastic straps from the hood’s pin joints (g.
13A) and remove the two plastic aps positioned on
the carrycot’s sides (g. 13B). After removing the hood,
pull out the fabric from the pin and the structure release
button (g. 13C) and slide it under the carrycot’s struc-
ture (g. 13D). Remove the internal lining by pulling it
up (g. 13E). To completely remove the carrycot’s lining,
remove the safety harness from its slots located at the
base of the internal lining (g. 13F).
REPLACING THE CARRYCOT LINING
14. Insert the shoulder straps and the crotch strap into the
fabric lining’s holes (g. 14A); Insert the plastic into the
slot between the styrofoam protections and the car-
rycot structure (g. 14B). Fit the front part of the fabric
making sure that the slot matches the pin (g. 14C);
Repeat this step on the opposite side of the carrycot
(g. 14D). Position the plastic aps of the external lining
in the relevant openings (g. 14E) and pass the elastic
straps around the pin joints of the hood (g. 14F). Fit the
mattress inside the carry cot making the straps slide in-
side the relevant slots. To complete replacing the lining,
fasten the hood and cover as described above.
CARRY COT SAFETY HARNESS
The carry cot features a three-point safety harness com-
posed of two shoulder straps and a crotch strap.
WARNING: The safety harness must be used solely to
transport the child in the car.
15. For all other use, put the safety harness under the mattress
in the relevant space as illustrated in g. 15A and 15B.
16. To position the shoulder straps in their slots, loosen
them by means of the button located near the position
of your child’s feet inside the fabric pocket. (g. 16).
USING THE CARRY COT SAFETY HARNESS
17. If the straps are fastened, open the buckle by pressing
the red button and spread the straps (g. 17A - 17B).
18. To loosen the two shoulder straps, use the release but-
ton located on the outside of the carry cot near the po-
sition of your child’s feet and pull the straps up (g. 18).
19. Now you can put your child inside the carry out and run
the upper straps over your child’s shoulders. Overlap the
two parts of the buckle (g. 19A) and, once t together,
insert them in the buckle until you hear the click conrm-
ing fastening (g. 19B).
WARNING: Always insert the two parts of the buckle in the
buckle together.
WARNING: to make sure that the safety harness is fastened
correctly, pull it with force.
20. Tighten the safety harness of the carry out by pulling on
the relevant adjustment belt (g. 20).
WARNING: to use the carry cot in the car, the carrying han-
dle must be kept in the rest position (horizontal).
USING THE CARRY COT IN THE CAR
Read these instructions carefully before tting and install-
ing the product. Prevent anybody to use the product with-
out reading the instructions.
• Keep this manual with the product.
• For use in the car, fasten the carry cot using only the sup-
plied kit; the kit can be used only to fasten the carry cot.
• No car safety product can guarantee the total safety of
your baby in the event of a crash; however, use of this
product reduces the risk of injury and death.
• Incorrect use of the product increases the risk of serious
injury to your baby, not only in case of a crash, but also in
other situations as well.
• If the product is damaged, deformed or worn, it must be
replaced: as its original safety features may have been
compromised.
• This product must not be modied in any way, unless the
modication is approved by the manufacturer. Do not in-
stall accessories, spare parts, or any component not sup-
plied by the manufacturer.
• Never leave your child unattended in the carry cot.
• Never leave the carry cot on the car seat unsecured: it
might knock against other passengers injuring them.
• If the car has been left in the sun for a long time, check the
carry cot before placing your child in it, making sure that
none of its parts are too hot: in such an event, let the child
car seat cool down rst before placing the child into it, in
order to avoid burns.
• After an accident, even a slight one, the carry cot and CAR
KIT may have been damaged, even if it is not visible to the
naked eye. They must be replaced.
• Never use safety products in used cars: They may have suf-
fered structural damage, even if this is not visible to the
naked eye.
• ARTSANA declines all responsibility for the improper use
of its product.
WARNING
• This is a “Universal“ child restraint. It is approved according
to Regulation No. 44.04 series of amendments 04. Suitable
for general use in vehicles and compatible with most but
not all vehicles’ seats.
• For perfect compatibility, check that the manufacturer of
your vehicle has indicated in the car manual whether your
vehicle foresees the installation of Universal child reten-
tion devices for the age group in object.
• This child restraint has been classied as “Universal” under
more stringent conditions than those that were applied to
earlier designs not displaying this notice.
• Only suitable if the vehicle is tted with 3-point static or
3-point retractor safety belts approved according to UN/
ECE Regulation No.16, or other equivalent standard.
• In case of doubt, contact the manufacturer of the reten-
tion device or reseller.
CAR SEAT REQUIREMENTS
21. To fasten the carry cot to the car seat, the car seat must
meet the following requirements:
- it must be facing forward (g. 21A);
- it must be a rear seat with at least two 3-point seat belts
(g. 21B), approved according to standard UNI/ECE 16 or
other equivalent standard.
FASTENING AND REMOVING THE CARRY COT IN THE CAR
To install the CAR KIT, following the assembly instructions
below before positioning the carry cot in the car:
BUCKLES FOR CAR SEAT BELTS
22. To fasten the two buckles on the pins located at the
shield that can be adjusted to various positions.
ATTACH AND REMOVE
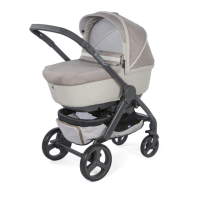
2. To mount the hood on the carry cot, position the pin
joints found on both sides of the carry out vertically (g.
2A), and insert the two plastic ends in the slots as illus-
trated in g. 2B.
3. To complete the mounting of the fabric part of the hood,
fasten the two click buttons located on both sides of the
carry cot (g. 3).
4. Then pass the metal pin through the fabric slot located
inside the back of the hood (g. 4).
REAR OPENING
5. To ensure proper ventilation, the carry cot features a rear
opening; to open it, just fold the ap on the upper part of
the carry cot (g. 5).
VISOR
6. The internal part of the visor features a fabric ring that al-
lows you to hang soft toys (g. 6).
COVER
7. To fasten the cover close both the zips by your child’s
feet (Fig. 7). Then fasten the fabric ap of the cover to the
hood using the two snap buttons (g. 7A). To ensure the
utmost safety of your child, you can use the fabric ap in
the vertical position, fastening it using the relevant holes
(g. 7B).
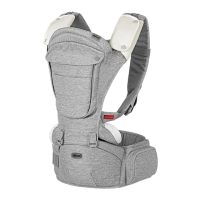
COMFORT KIT
The Comfort Kit features 2 shoulder pads and crotch strap.
8. To put on the comfort kit, insert the shoulder pads on the
straps as shown in g. 8A and t the crotch strap inside
the padding (g. 8B).
ADJUSTABLE BACKREST - COMFORT SYSTEM
9. carrycot’s backrest can be adjusted gradually. To incline
or recline the backrest, use the wheel located on the
outer part of the carry cot near the baby’s feet (g. 9).
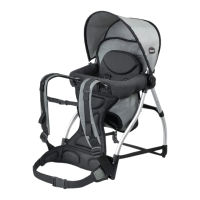
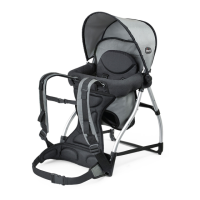
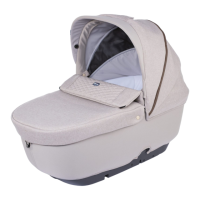
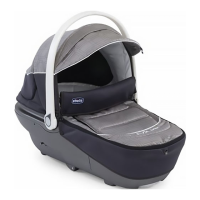
CARRYING HANDLE
10. The carrycot features a comfortable carry handle that
can be adjusted in three positions (g. 10):
A) Transport
B) Middle
C) Rest
11. To put the handle in the vertical position, grasp it in the
centre and pull it up until you hear a click (g. 11 A);
to put the handle back in the rest position, press both
buttons at the base of the handle at the same time and
then turn it downwards (g. 11B - 11C).
WARNING: Do not transport the carrycot with the handle
in middle or rest position, but only with the handle in carry-
ing position (vertical).
REMOVING THE CARRY COT LINING
Before starting to remove the carry cot lining, unfasten the
safety harness (see the paragraph USING THE CARRY COT
SAFETY HARNESS) and remove the comfort kit.
12. To remove the hood, unfasten the buttons on the sides
and pull out the fabric from the pin in the rear part of
 Loading...