16
ends of the carry cot (g. 22A), insert each buckle in the
pin pushing it (g. 22B) and pulling the buckle down
until you hear a click (g. 22C).
23. WARNING! Do not mount the buckles backwards! (g. 23).
The carry cot is now ready to be positioned in the car.
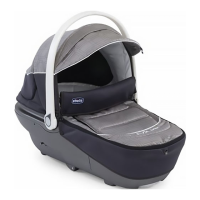
FASTENING THE CARRY COT IN THE CAR
24. To fasten the carry cot to the rear seat, position it at the
centre, aligned with the car seat, and fasten it using the
seat belts of the two outer seats (g. 24).
25. If the rear seat of your car has a 3-point seat belt in the
middle seat too, the carry cot can be fastened also shift-
ed to one side occupying the middle seat and lateral
seat using the seat belts of these two seats (g. 25).
26. Pull and fasten the two seat belts in the seat’s buckles
(g. 26).
Recline the carry cot backrest completely
WARNING! Never use the carry cot in the car with the
backrest raised! Safety is not guaranteed!
Follow the steps below on both sides:
27. Take the seat belt and make a loop (g. 27);
28. Take the car kit buckle and rotate the buckle’s red bar
outward (g. 28).
29. Insert the loop you’ve made in the seat belt in the buck-
le (g. 29A – 29B) and rotate the red bar to its initial posi-
tion so that it ts inside the loop (g. 29C).
30. Pull the seat belt toward the retractor pressing the carry
cot against the seat so that it is fastened well (g. 30).
WARNING! Make sure that the carry cot is t against the
backrest and seat.
31. WARNING! Make sure that the belts are tensioned (g. 31).
REMOVING THE CARRY COT FROM THE CAR SEAT
Follow the steps below on both sides.
32. Unfasten the buckle from the carry cot pulling the buck-
le’s red tab outward and pushing (g. 32) to release the
carry cot from the seat belt. The buckle is left fastened
to the seat belt.
WARNING! Never use the seat belt to fasten passenger
without removing the CAR KIT buckle: it can be dangerous!
33. To remove the buckle from the belt, loosen the loop in
the belt (g. 33A) and rotate the red bar so that it comes
out (g. 33B).
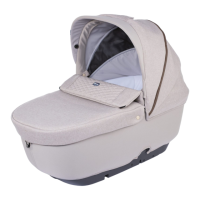
FASTENING THE CARRY COT TO THE STROLLER
Prepare the stroller to mount the carry out according to the
stroller’s instructions.
WARNING: Before using the carry out on the stroller, the
safety harness must be t under the mattress in the rel-
evant space (g. 15A - 15B).
WARNING: To fasten the carry cot to the stroller structure,
remove the seat rst.
34. Hold the handle in carrying position (vertical) and po-
sition the carry cot in the vertical joints until you hear
the click conrming fastening. Place the carry cot with
the baby’s feet end facing the stroller’s handle (g. 34A).
To facilitate fastening the carry cot on the stroller, there
are labels with instructions on both sides of the fabric
showing you the correct alignment of the carry cot with
the fasteners (g. 34B).
WARNING: Before using, make sure that the carry cot is
properly locked on by pulling on it upwards.
WARNING: Do not try to put the carrycot in the forward
facing position; this is not a correct position (g. 34C).
REMOVING THE CARRY COT FROM THE STROLLER
Place the handle in carrying position (vertical)
35. Pull the button on the front of the carry cot (g. 35A)
and keeping the button raised remove the carry out
from the stroller structure by pulling it up (g. 35B).
WARNING: The fastening and releasing operations can be
carried out also with your child inside the carry cot; how-
ever, these operations may be more dicult to execute
with the child’s weight. Pay attention when carrying out
the above mentioned operations.
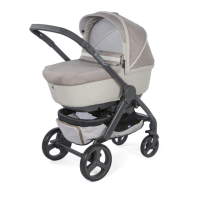
Important Note: the images and instructions in this man-
ual refer to a single carry cot version. Some of the compo-
nents and functions described here may vary according to
the model purchased.
WARRANTY
The product is guaranteed against any conformity defect in
normal conditions of use as provided for by the instructions
for use.
The warranty shall not therefore apply in the case of da-
mages caused by improper use, wear or accidental events.
For the duration of warranty on conformity defects please
refer to the specic provisions of national laws applicable in
the country of purchase, where provided.
NOTICE D’EMPLOI
IMPORTANT LIRE LES INS
TRUCTIONS SUIVANTES ATTEN
TIVEMENT AVANT UTILISATION
ET LES CONSERVER POUR LES
BESOINS ULTÉRIEURS DE RÉFÉ
RENCE.
AVERTISSEMENT : GARDER CET
EMBALLAGE À DISTANCE DES EN
FANTS AFIN D’ÉVITER LES RISQUES
DE SUFFOCATION.
AVERTISSEMENTS
• AVERTISSEMENT : Ne jamais lais-
ser votre enfant sans surveillance.
• AVERTISSEMENT : Cet article
convient pour un enfant qui ne
sait pas s’asseoir seul, rouler sur
lui-même ni se redresser en appui
sur les mains et les genoux. Poids
maximal de l’enfant : 9 kg
• Age d’utilisation indicatif : 0 à 5/6 mois.
• AVERTISSEMENT : Ne poser que
sur une surface plane, horizontale,
ferme et sèche.
• AVERTISSEMENT : Ne pas laisser
d’autres enfants jouer sans sur-
veillance à proximité du coun.
• AVERTISSEMENT : Ne pas utiliser
si l’un des éléments du coun est
cassé, déchiré ou manquant.
• AVERTISSEMENT : Le coun ne
peut être utilisé pour le transport
en voiture qu’en présence du KIT
CAR fourni.
• Utiliser exclusivement les pièces de
rechange fournies ou agréées par
le fabricant.
• Éviter les ammes ouvertes et
autres sources de forte chaleur,