CHIGO CAC FCU
3. Install the Main Body
A. Exiting ceiling (Keep the ceiling level)
(1) Drill some holes on the ceiling according to the installation paper card
● Keep the center of the ceiling opening in line with that of the main unit;
● Ensure the length and outward holes of the connecting pipes, drain pipes and electrical connection;
● Please reinforce the strength of the ceiling to keep the ceiling level and without vibration
(2) Determine the location of installation hook according to holes of the installation hook on four corners of
the installation paper card.
● Drill four holes with φ12mm and height of 50~55mm at the position as determined on the roof, and then
lay expansion hooks;
● Aim the concave of the installation hook at the expansion hook when installing. Determine the length of
the hook based on the height of ceiling and then cut away the excessive part;
● If the ceiling is rather high, cut the installation hook at the middle. Use φ12 round steel bar for welding
and the length of the steel bar is based on the height of ceiling
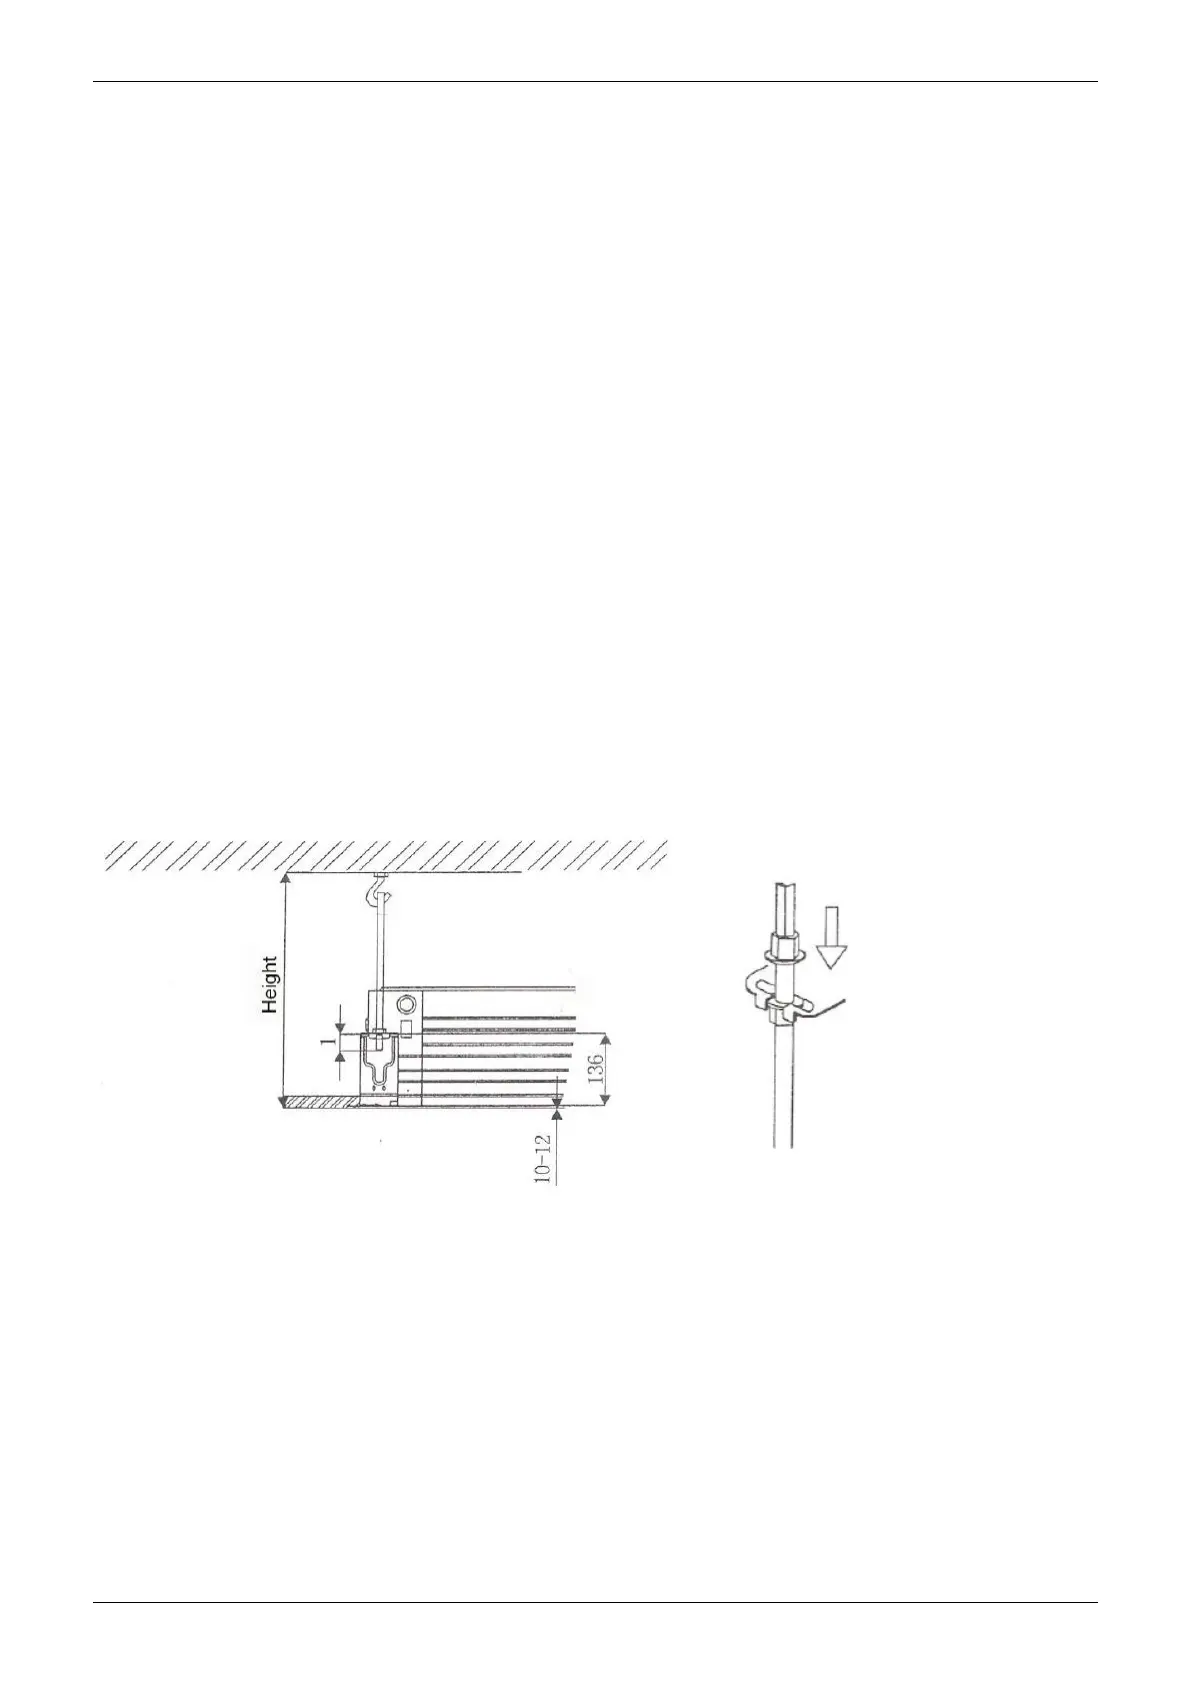
Please adjust the four hexagon nuts on the installation hook and keep the main unit level
● If the drain pipe is slanted, it may cause error action of the water level switch and then water leakage;
● Adjust the location of the main unit to ensure even distance to the four sides of the ceiling and the bottom
of the main unit into the bottom of the ceiling for 10~12mm (See Bottom left figure)
● After adjusting the location and levelness of the main unit, fasten the nuts on the installation hooks to fix
the unit (see bottom right figure)
B. For new room and new ceiling
(1) Carry out installation following the step of A (2) aforesaid. You can buried some hooks in new room,
which can bear the weight of the unit and not loose for concrete shrinking;
(2) After hoisting the main unit, fix the installation paperboard onto the main unit with M6 ×12 bolts
(accessories), which will determine the size and position of the ceiling opening (See Fig 7)
● Keep the ceiling level when installing;
● The rest procedure is as the steps of A(1) aforesaid;
(3) Install as the steps of A(3) aforesaid
(4) Remove the installation paperboard
 Loading...