Do you have a question about the Christie Roadster HD18K and is the answer not in the manual?
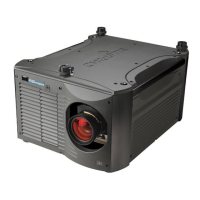
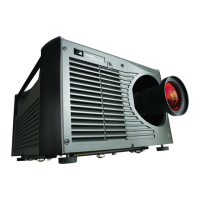
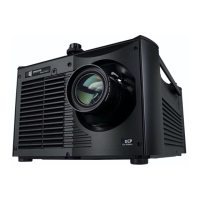
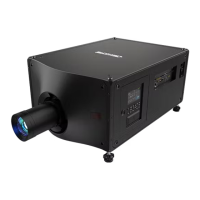
Overview of the Roadster & Mirage S+/HD Series projectors, highlighting their technology and features.
Lists the standard components that should be included with the projector.
Instructions for completing purchase records and registering the projector's warranty.
Step-by-step guide for a quick initial setup of the projector for temporary use.
Key factors to consider before installing the projector, including lifting and stacking safety.
Guidance on determining throw distance, vertical position, and mounting the projector.
Details on connecting various input signal sources to the projector's input panel.
How to connect the projector for remote control via RS232, RS422, and Ethernet.
Instructions for networking multiple projectors using serial or Ethernet connections.
Proper procedures for connecting the projector to a power source and ensuring safe operation.
How to adjust the projected image orientation based on projector mounting position.
Instructions for leveling the projector to ensure safe and reliable lamp operation.
Guide to adjusting lens settings for image size, sharpness, and position.
Information on using different keypad types and converting between IR and wired modes.
Introduction to operating the projector after installation, covering features and menu system.
Explanation of basic projector components and functions like zoom, focus, and shutter.
Detailed instructions on operating the projector using the built-in and remote keypads.
Guide to navigating the projector's menu system to access and adjust settings.
How to select input sources and manage projector channels for different display setups.
Adjusting image parameters such as size, position, color, and brightness for optimal display.
Configuring system settings, communications, and advanced controls for performance tuning.
Utilizing Picture-in-Picture and Seamless Switching for multi-image and dynamic display transitions.
Procedures for managing lamp life, monitoring usage, and recording serial numbers.
Accessing the read-only status menu to view projector information and detected components.
Procedures for calibrating and matching multiple projectors for a unified display wall.
Methods for controlling the projector remotely via network and serial communication interfaces.
Troubleshooting common projector errors, including signal issues, user errors, and system malfunctions.
Essential safety warnings and operational guidelines for maintaining projector safety and performance.
Procedures for cleaning external covers, lenses, lamps, and filters for optimal performance.
Step-by-step instructions for replacing batteries in the IR remote keypad.
Detailed guide for safely replacing the projector's lamp module and air filter.
Instructions for removing and installing different projection lenses to change throw distance or projection type.
Guidance for resolving display issues like blank screens, poor black levels, or image distortion.
Troubleshooting lamp-related problems such as failure to ignite, sudden shutoff, or dim output.
Steps for resolving issues related to Ethernet connectivity and network communication.
Troubleshooting common errors related to 3D sync input signals and projector synchronization.
Technical specifications for panel resolution, refresh rates, brightness, and contrast.
Detailed specifications for projector input types, signal formats, and connector compatibility.
Technical specifications for control interfaces like remote keypad, Ethernet, and serial ports.
Electrical specifications including voltage, current, power consumption, and line cord requirements.
Information on plug types and associated electrical ratings for different projector models.
Specifications for the lamp type, power output, and adjustment ranges.