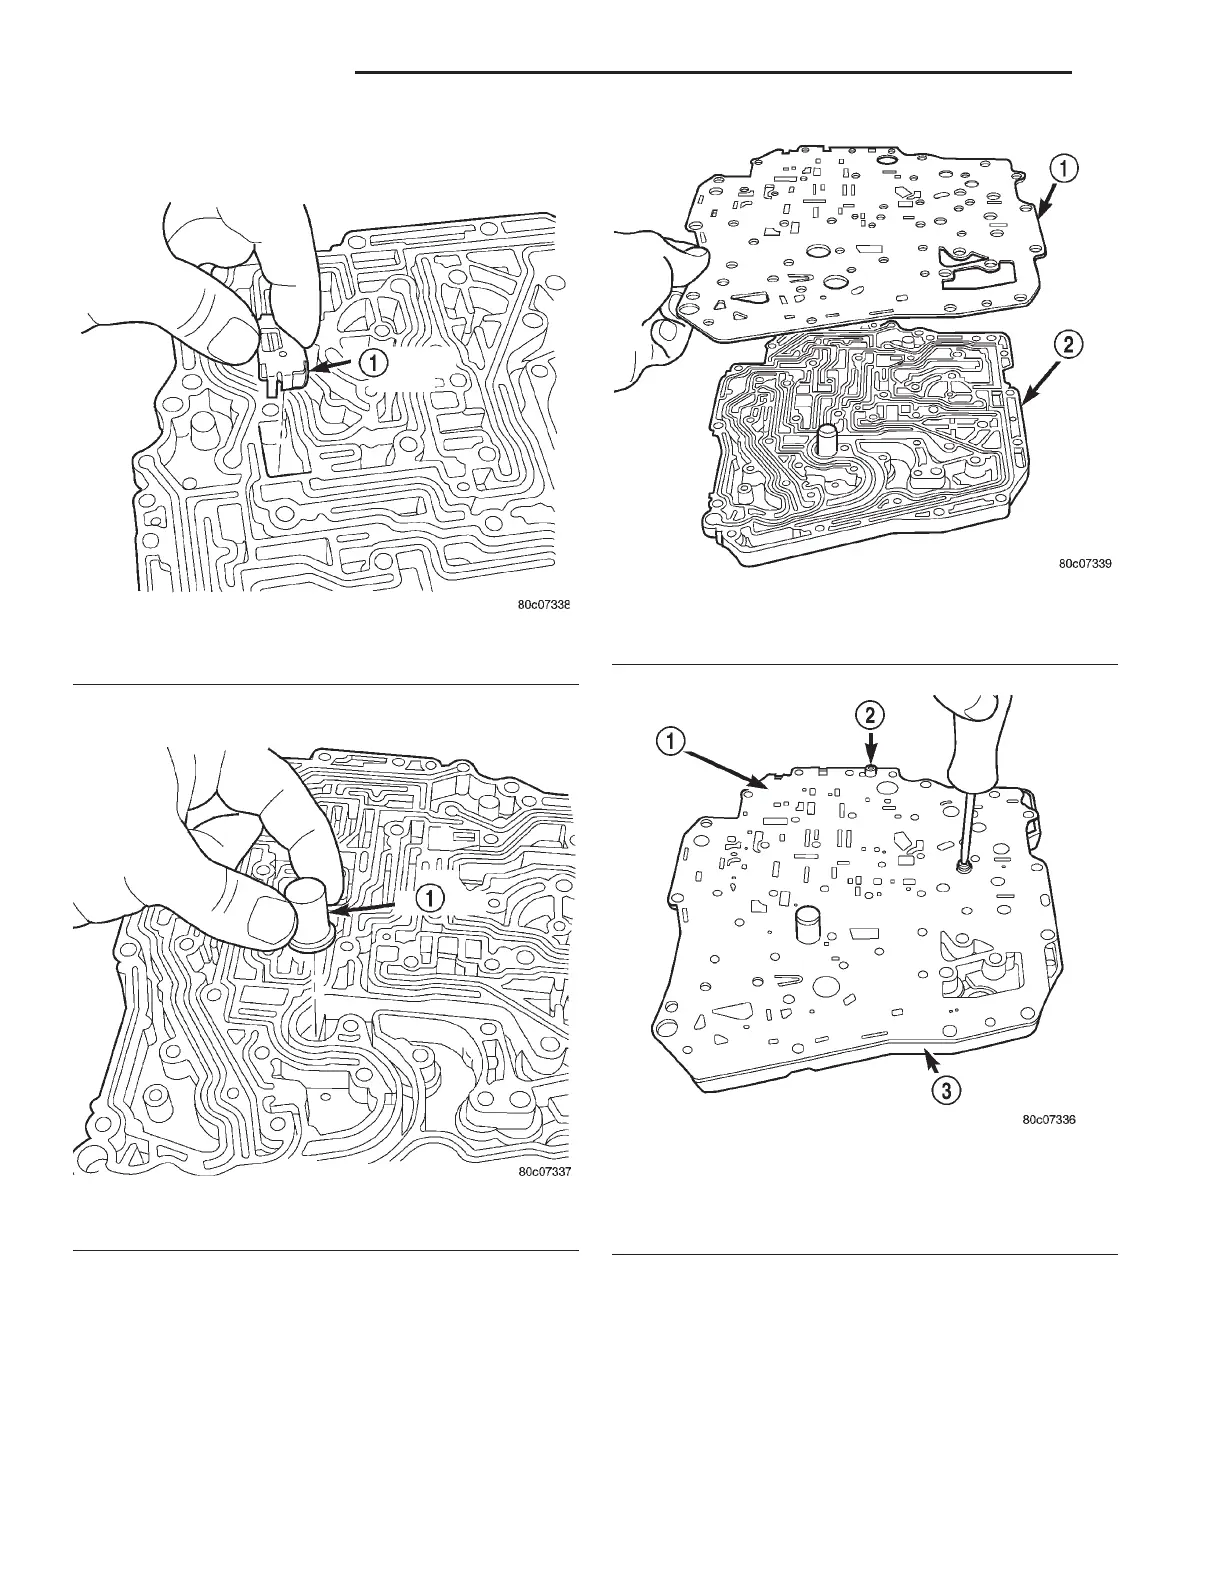
(9) Install thermal valve to the transfer plate (Fig.
145).
(10) Install oil screen to transfer plate (Fig. 146).
(11) Install separator plate to transfer plate (Fig.
147).
(12) Install the two separator plate-to-transfer
plate screws (Fig. 148).
(13) Install the transfer plate to the valve body
(Fig. 149).
(14) Install the transfer plate-to-valve body screws
(Fig. 150) and torque to 5 N·m (45 in. lbs.).
(15) Install the stiffener plate (Fig. 151).
(16) Install the solenoid/pressure switch assembly
and to the transfer plate (Fig. 152) and torque to 6
N·m (53 in. lbs.).
Fig. 145 Install Thermal Valve to Transfer Plate
1 – THERMAL VALVE
Fig. 146 Install Oil Screen to Transfer Plate
1 – OIL SCREEN
Fig. 147 Install Separator Plate to Transfer Plate
1 – SEPARATOR PLATE
2 – TRANSFER PLATE
Fig. 148 Install Separator Plate-to-Transfer Plate
Screws
1 – SEPARATOR PLATE
2 – SCREW (2)
3 – TRANSFER PLATE
21 - 64 42LE TRANSAXLE LH
DISASSEMBLY AND ASSEMBLY (Continued)