(36) To complete the assembly, reverse clutch and
overdrive clutch must be removed.
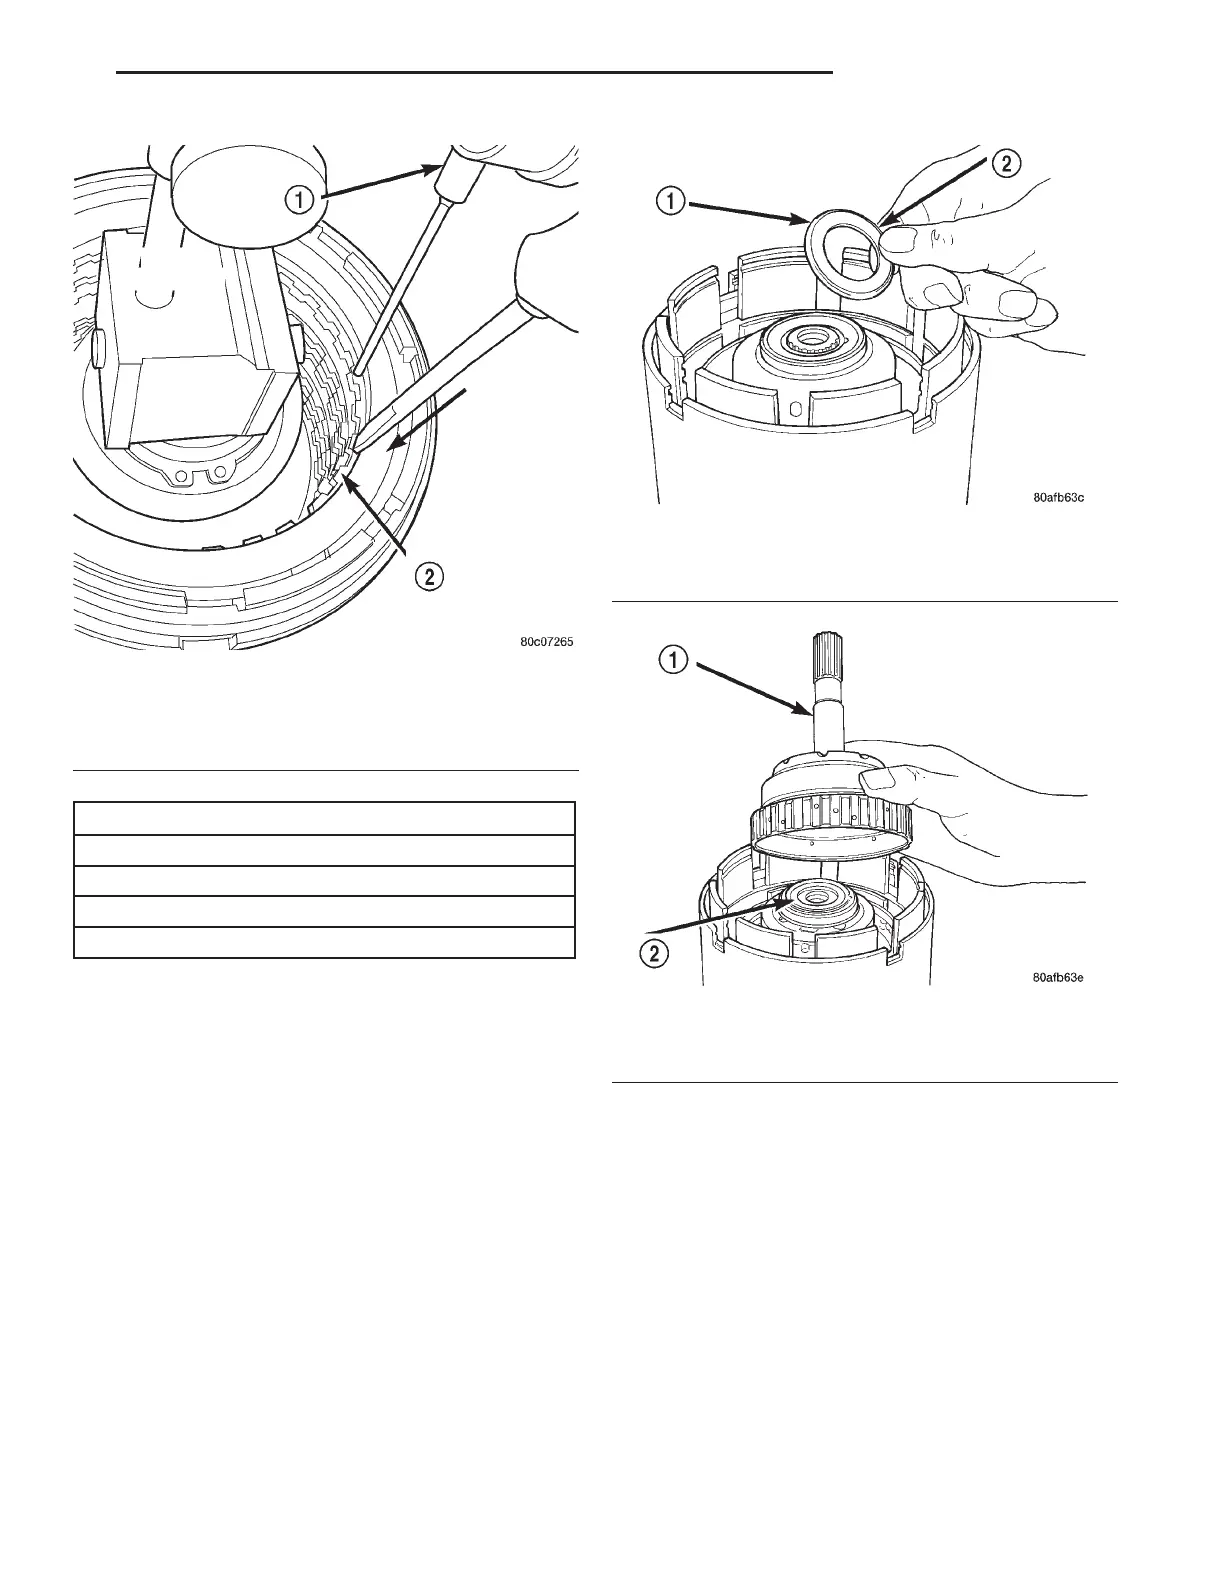
(37) Install the #2 needle bearing (Fig. 285).
(38) Install the underdrive shaft assembly (Fig.
286).
(39) Install the #3 thrust washer to the underdrive
shaft assembly. Be sure five tabs are seated properly
(Fig. 287).
(40) Install the #3 thrust plate to the bottom of the
overdrive shaft assembly. Retain with petrolatum or
transmission assembly gel (Fig. 288).
(41) Install the overdrive shaft assembly (Fig.
289).
(42) Reinstall overdrive and reverse clutch as
shown. Rechecking these clutch clearances is
not necessary.
Fig. 284 Press Down on Reverse Clutch and Zero
Indicator
1 – DIAL INDICATOR
2 – REVERSE CLUTCH
REVERSE CLUTCH SNAP RING THICKNESS
4377195 1.53-1.58 mm (0.060-0.062 in.)
4412871 1.77-1.83 mm (0.070-0.072 in.)
4412872 2.02-2.07 mm (0.080-0.082 in.)
4412873 2.27-2.32 mm (0.090-0.091 in.)
Fig. 285 Install No. 2 Needle Bearing
1 – #2 NEEDLE BEARING (NOTE 3 SMALL TABS)
2 – TABS UP
Fig. 286 Install Underdrive Shaft Assembly
1 – UNDERDRIVE SHAFT ASSEMBLY
2 – #2 NEEDLE BEARING
LH 42LE TRANSAXLE 21 - 99
DISASSEMBLY AND ASSEMBLY (Continued)