INSTALLATION
(1) Insert roller channel through access hole in
door panel.
(2) Insert bolt heads on regulator through key hold
slots in door panel.
(3) Tighten bolts attaching regulator to door panel.
(4) Tighten bolt to attach regulator support brace
to door panel.
(5) Tighten screw to attach regulator scissor chan-
nel to door panel.
(6) Connect power window motor wire connector.
(7) Lower door glass on to regulator roller channel.
(8) Align glass and verify operation.
(9) Install pull cup support bracket, water shield,
door trim panel and flag cover.
FRONT DOOR CHECK STRAP
REMOVAL
(1) Place door glass in the full up position.
(2) Remove door trim panel.
(3) Remove water shield as necessary.
(4) Remove bolts holding check strap to door end
frame and body.
(5) Remove check strap from vehicle (Fig. 41).
INSTALLATION
(1) Place check strap in position on vehicle.
(2) Install bolts to hold check strap to door end
frame and body.
(3) Install water shield.
(4) Install door trim panel.
FRONT DOOR
REMOVAL
(1) Open front door.
(2) Mark location of hinge on door end frame.
(3) Disengage clips holding wire harness connector
and boot to hinge pillar.
(4) Remove connector from hinge pillar.
(5) Disengage clip holding wire connector together
on hinge pillar side of the connector.
(6) Remove door wire harness from instrument
panel harness.
(7) Disengage door check stop from pin on upper
door hinge.
(8) Support door on suitable lifting device.
(9) Remove bolt and nut attaching lower hinge to
door end frame (Fig. 42).
(10) Steady door on lifting device and remove bolt
and nut attaching upper hinge to door end frame.
(11) Remove door from vehicle.
INSTALLATION
(1) Place door in position on vehicle.
(2) Engage door onto pin on upper door hinge.
(3) Steady door on lifting device and install bolt
and nut attaching upper hinge to door end frame.
Tighten the hinge bolt and nut to 28 N·m (21 ft. lbs.)
torque. If the double ended stud is loosen or replaced
tighten the stud to 14 N·m (10 ft. lbs.) torque.
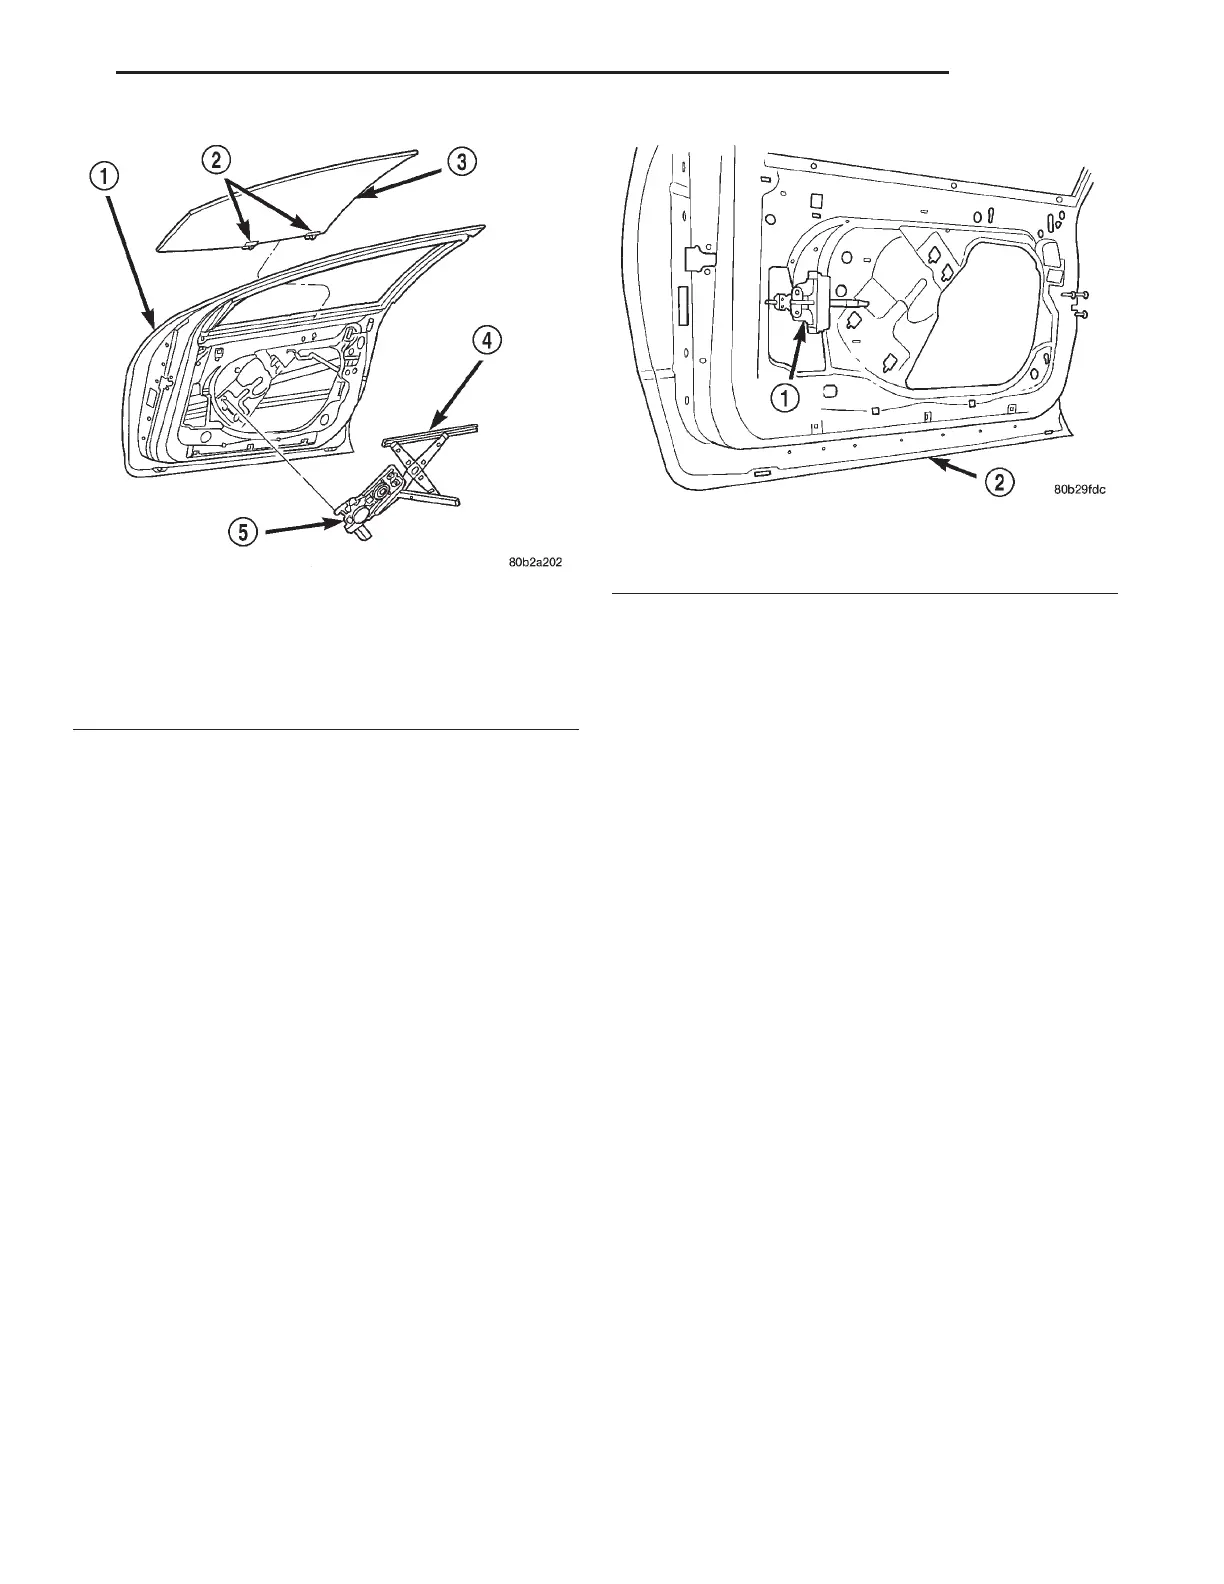
Fig. 40 Window Regulator
1 – FRONT DOOR
2 – LIFT PLATES
3 – GLASS
4 – GLASS ROLLER CHANNEL
5 – WINDOW REGULATOR
Fig. 41 Front Door Check Strap
1 – CHECK STRAP
2 – FRONT DOOR
LH BODY 23 - 49
REMOVAL AND INSTALLATION (Continued)