FRONT DOOR WINDOW FRAME MOLDING
REMOVAL
(1) Remove flag trim, speaker, door trim panel,
water shield as necessary, and mirror.
(2) Remove door glass run weatherstrip as neces-
sary to gain access to applique fasteners.
(3) Remove screws attaching molding to window
frame (Fig. 38).
(4) Remove molding from door.
INSTALLATION
(1) Place molding in position on door.
(2) Install screws to attach molding to window
frame.
(3) Install door glass run weatherstrip.
(4) Install the mirror, water shield, door trim
panel, speaker and flag trim.
FRONT DOOR GLASS
REMOVAL
(1) Remove flag cover, door trim panel, water
shield as necessary, and pull cup support bracket.
(2) Connect power window switch and lower win-
dow 150 mm (6 in.) from full up position.
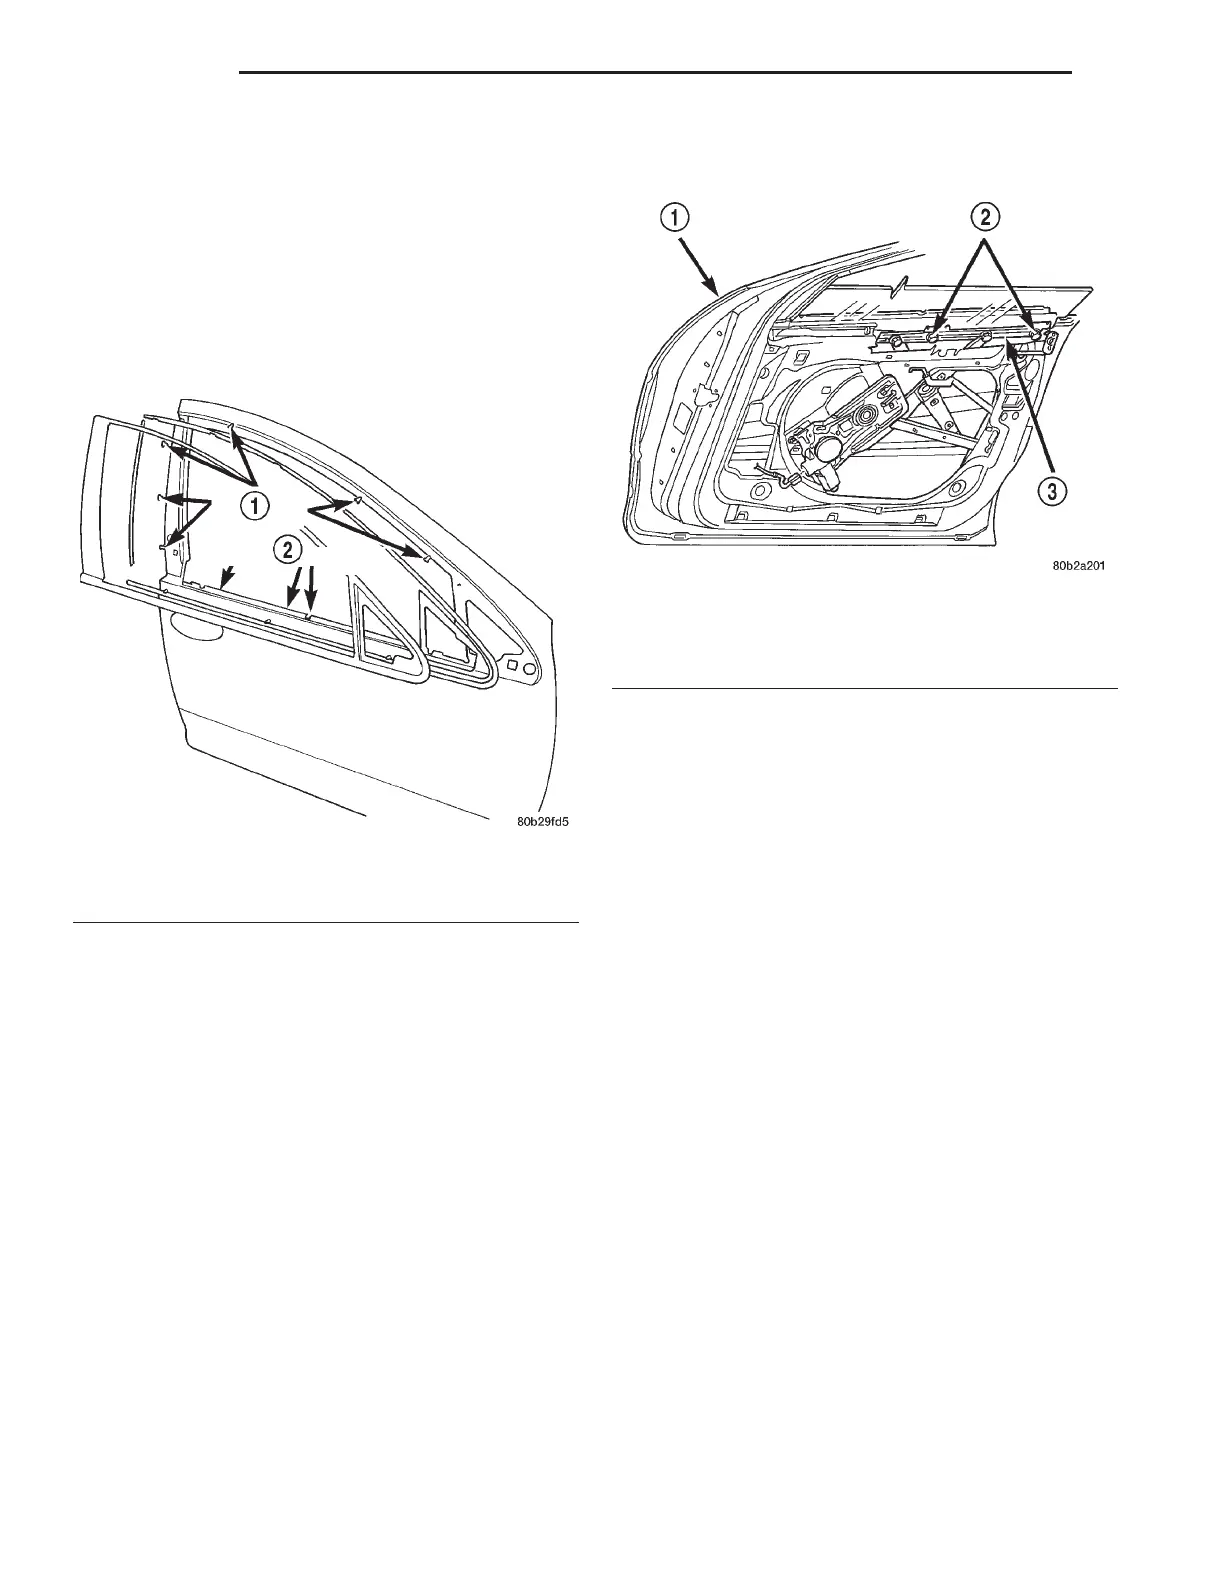
(3) Loosen nuts attaching regulator roller channel
to glass and lift plates.
(4) Slide roller channel rearward to allow lift plate
nuts to pass through key hole slots in channel (Fig.
39).
(5) Remove glass from roller channel.
(6) Raise glass upward and out of the opening at
top of door.
INSTALLATION
(1) Lower glass into opening at top of door.
(2) Place glass in position against roller channel.
(3) Insert lift plate nuts into key hole slots in
roller channel and slide channel forward to locked
position.
(4) Tighten nuts to attach regulator roller channel
to glass and lift plates.
(5) Install pull cup support bracket, water shield,
door trim panel, and flag cover.
FRONT DOOR GLASS REGULATOR
REMOVAL
(1) Remove flag cover, door trim panel, water
shield as necessary, and pull cup support bracket.
(2) Slide glass from regulator roller channel.
(3) Disconnect power window motor wire connec-
tor.
(4) Loosen bolt attaching regulator support brace
to door panel.
(5) Remove screw and bolt heads from keyhole
slots in door panel.
(6) Loosen bolts attaching regulator to door panel.
(7) Remove regulator from door panel.
(8) Slide regulator rearward and rotate forward
end of roller channel through access hole in door
panel (Fig. 40).
Fig. 38 Front Door Frame Window Molding
1 – REMOVE SCREWS
2 – LOOSEN HALFWAY
Fig. 39 Front Door Glass
1 – FRONT DOOR
2 – LIFT PLATE NUTS
3 – GLASS ROLLER CHANNEL
23 - 48 BODY LH
REMOVAL AND INSTALLATION (Continued)