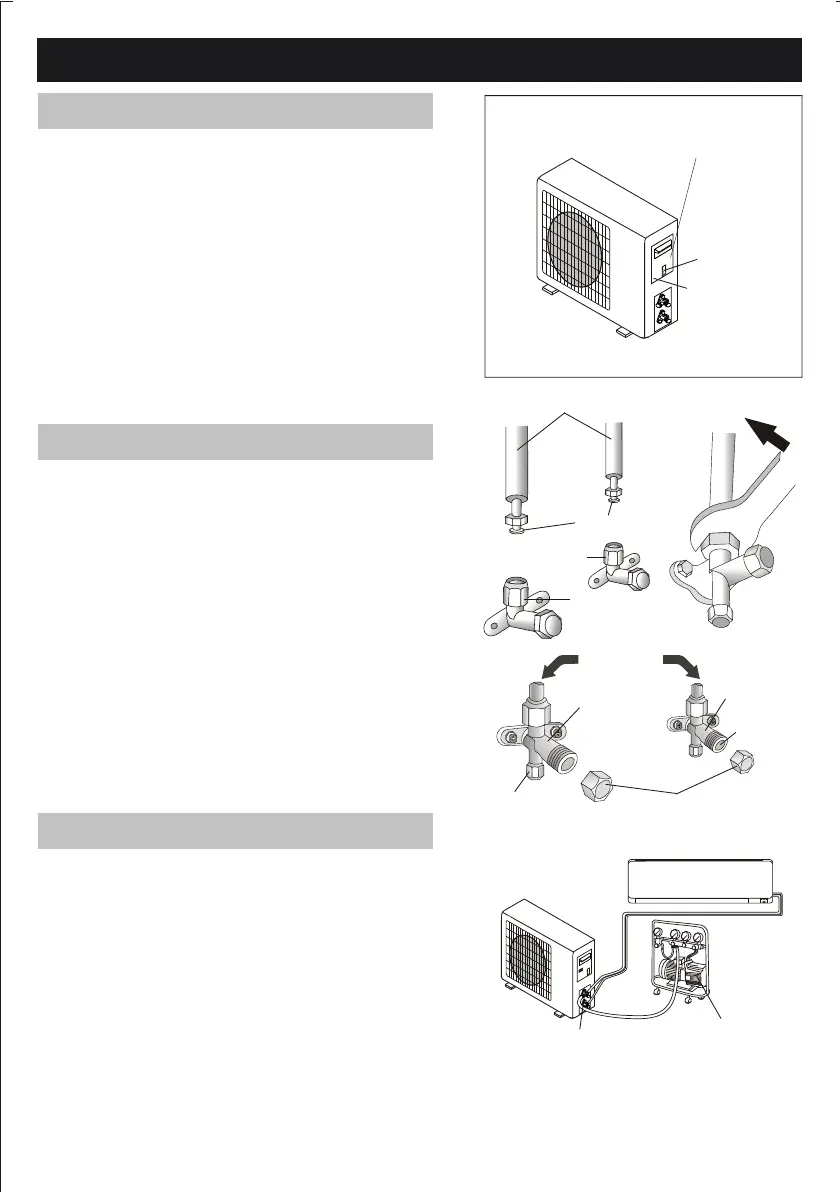
INSTALLATION MANUAL---Installation of the outdoor unit
outdoor unit
remove
the upper
cover
screw
wiring diagram on the
back of the cover
1. Remove the electrical box cover..
2. Connect the wires the terminal board using
the same numbering as in the indoor unit.
3. For the electrical connections, see the wiring diagram
on the back of the cover
4. Fasten the cables with a cable-clamp.
5. A proper earth connection must be ensured.
6. Replace the covers .
Screw the are nuts to the outdoor unit coupling with
the same tightening procedures described for the indoor
unit.
connection pipes
are nuts
liquid tap
gas tap
indoor unit
protection caps
liquid valve
gas valve
service port nut
To avoid leakage, pay attention to the following points:
1. Tighten the are nuts using two wrenches. Pay atten-
tion not to damage the pipes.
2. If the tightening torque is not sucient , there may
be some leakage. Excessive tightening could cause
damage to the are connection and subsequent leaks.
could be damaged.
3. The surest system consists in tightening the connecti-
on by using a x wrench and a torque wrench. Follow
the recommended torques on the table found on page 21.
vacuum pump
service port
Air and humidity left inside the refrigerant circuit can
cause compressor malfunction. After having connected
the indoor and outdoor units, evacuate the air and humidity
from the refrigerant circuit by using a vacuum pump.
Evacuate to 500 microns.
19
ELECTRICAL CONNECTIONS
CONNECTING THE PIPES
EVACUATION & DEHYDRATION