3-8
Hardware Installation Guide for Cisco 4000 Series Integrated Services Routers
OL-32185-02
Chapter 3 Install and Connect Cisco 4000 Series ISRs
Install the Router
• Front mounting—Brackets attached at the front of the chassis with the front panel facing forward.
• Back mounting—Brackets attached at the back of the chassis with the back panel facing forward.
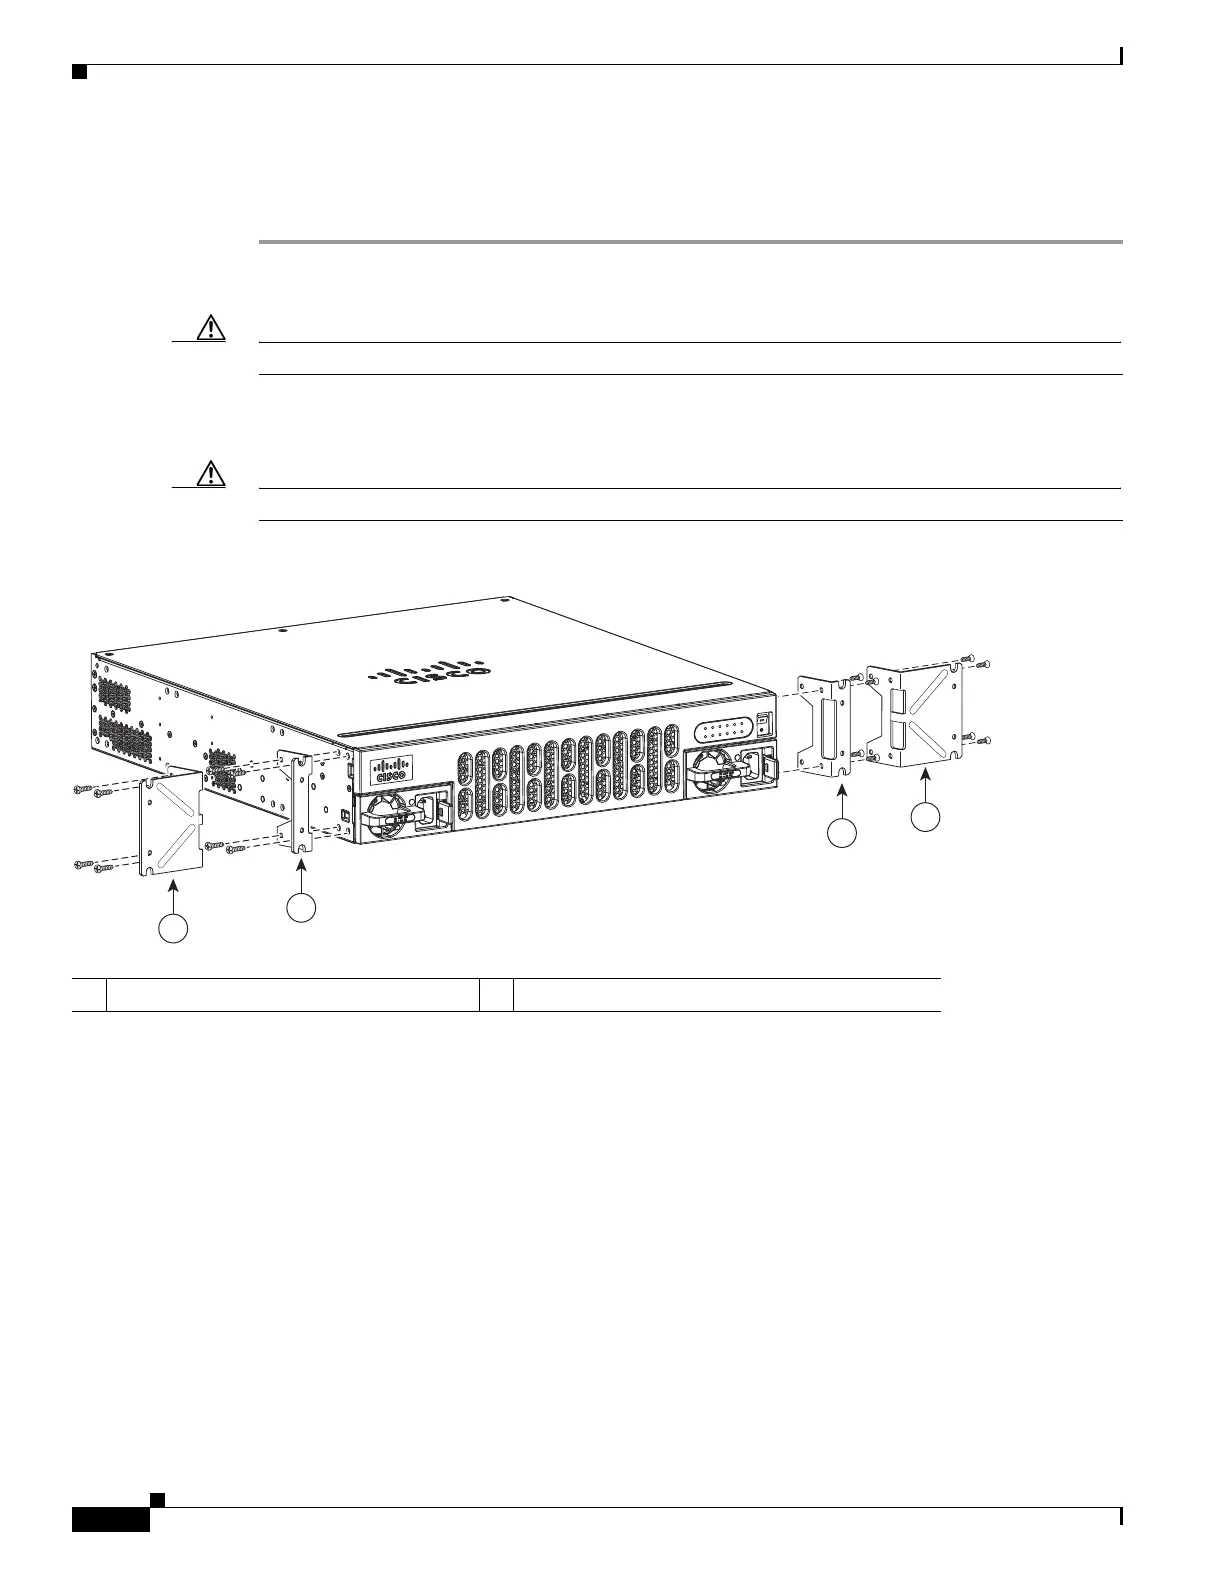
Step 1 Attach the mounting brackets to the router chassis as shown in Figure 3-2 through Figure 3-5, using the
screws provided.
Caution Do not over-torque the screws. The recommended torque is 15 to 18 inch-lb (1.7 to 2.0 N-m).
Attach the second bracket to the opposite side of the chassis. Use a number-2 Phillips screwdriver to
install the number-8 bracket screws.
Caution Your chassis installation must allow unrestricted airflow for chassis cooling.
Figure 3-2 Bracket Installation for Front Mounting (Cisco 4451-X ISR shown)
1 23-inch SBC
1
brackets
1. Southwestern Bell Corporation (SBC)
2 19-inch EIA brackets
 Loading...