EasyManuals Logo

Cisco Catalyst 8200 Series User Manual

Cisco Catalyst 8200 Series
8 pages
To Next Page IconTo Next Page
To Previous Page IconTo Previous Page
Page #4 background imageLoading...
Page #4 background image
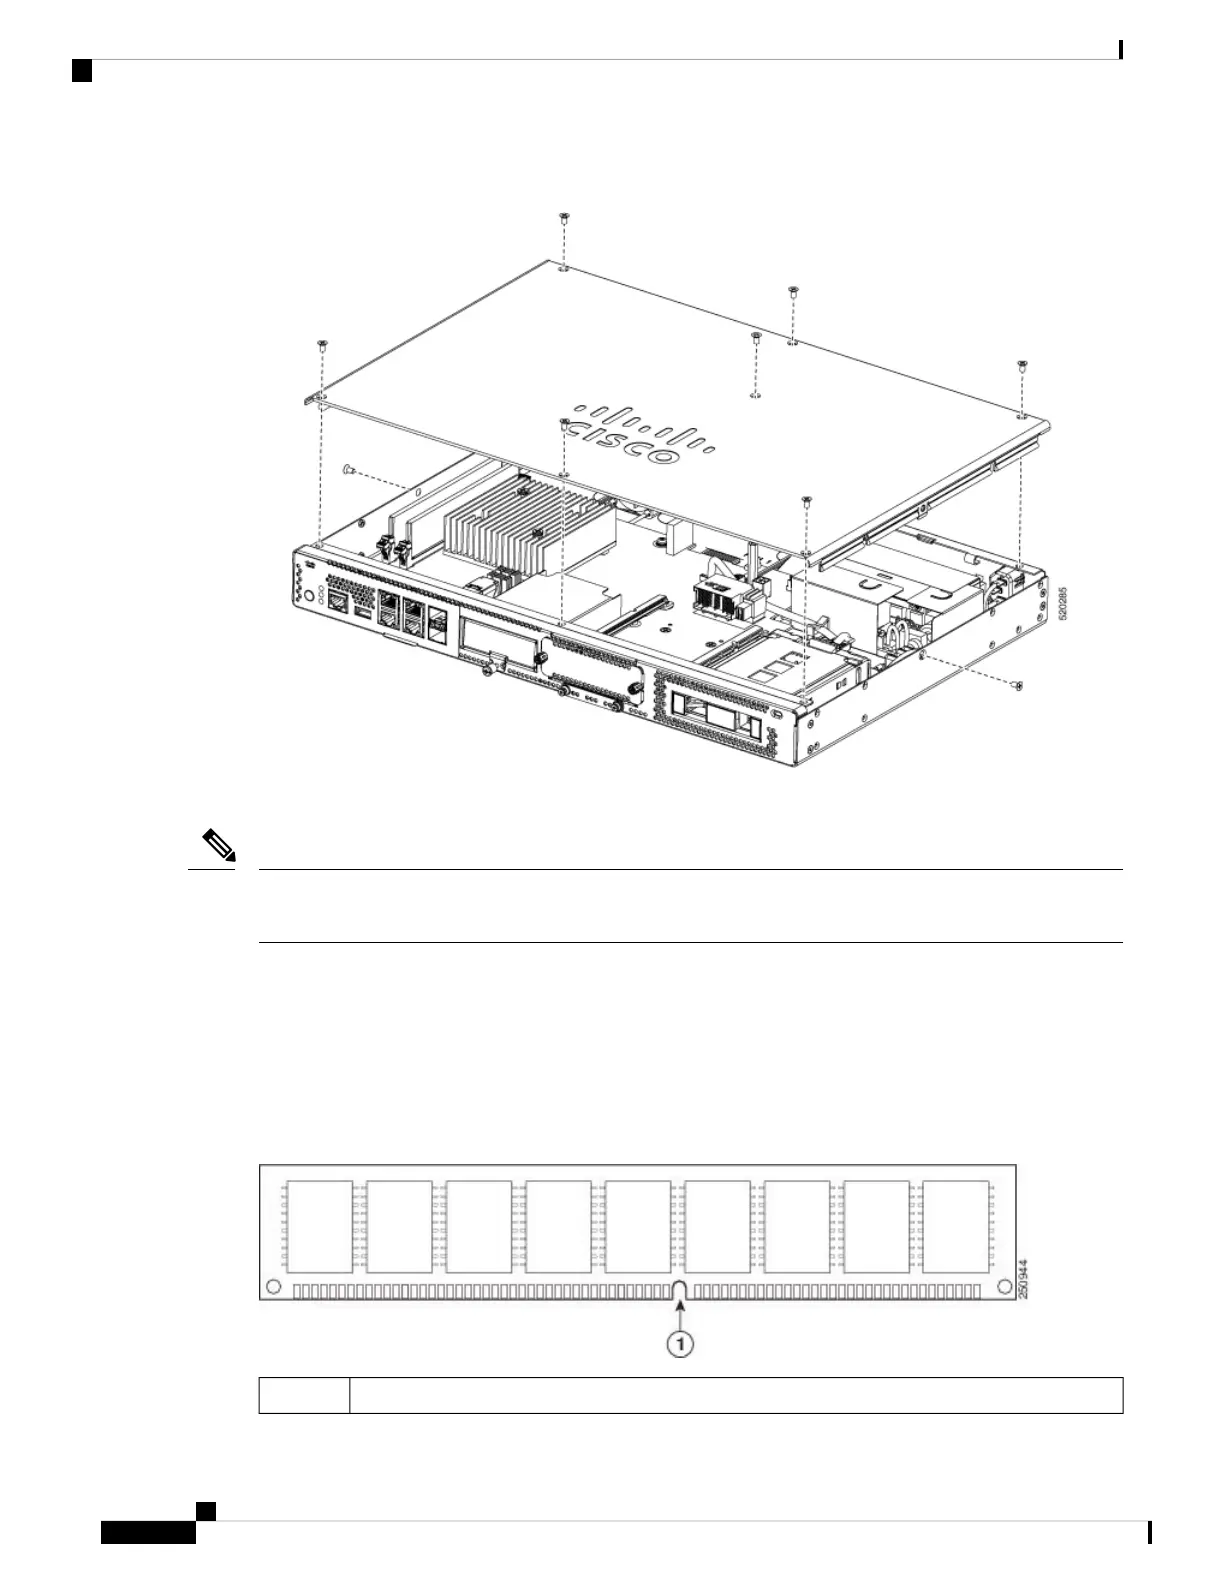
Figure 3: Removing the Chassis Cover
5. Lift the chassis cover after you have removed all the screws.
To replace the chassis cover, place the cover evenly on the top of the device and use the screws to secure it
to the device.
Note
Installing a DIMM
There are two DDR4 DIMM slots. DIMMs have a polarization notch on the connecting edge to prevent
incorrect insertion.
Figure 4: DIMM Showing Polarization Notch
Polarization Notch1
Installing and Upgrading Field Replaceable Units
4
Installing and Upgrading Field Replaceable Units
Installing a DIMM

Questions and Answers:

Question and Answer IconNeed help?

Do you have a question about the Cisco Catalyst 8200 Series and is the answer not in the manual?

Cisco Catalyst 8200 Series Specifications

General IconGeneral
ModelCisco Catalyst 8200 Series
CategoryGateway
Operating SystemCisco IOS XE
Rack Height1RU
USB PortsUSB 3.0
Form FactorRack-mountable
Operating Temperature32°F to 104°F (0°C to 40°C)
SecurityFirewall
ManagementCisco DNA Center, CLI, SNMP, NETCONF, RESTCONF
Humidity5% to 95% non-condensing
ProcessorMulti-core x86 processor
Power SupplyInternal AC or DC power supply (redundant options available)

Related product manuals