EasyManuals Logo

Cisco Catalyst 8200 Series User Manual

Cisco Catalyst 8200 Series
8 pages
To Next Page IconTo Next Page
To Previous Page IconTo Previous Page
Page #6 background imageLoading...
Page #6 background image
Figure 5: Removing a DIMM
4. Place the DIMM in an antistatic bag to protect it from ESD damage.
5. Replace the chassis cover.
Installing the M.2 Storage Module
The M.2 storage modules come with different storage capacities and can be replaced through the front panel
if required.
These are the steps to upgrade the M.2 storage module:
1. Power off of the system before replacing M.2.
2. Locate the M.2 storage module slot. Refer to Chassis - Front Panel to identify and locate the module.
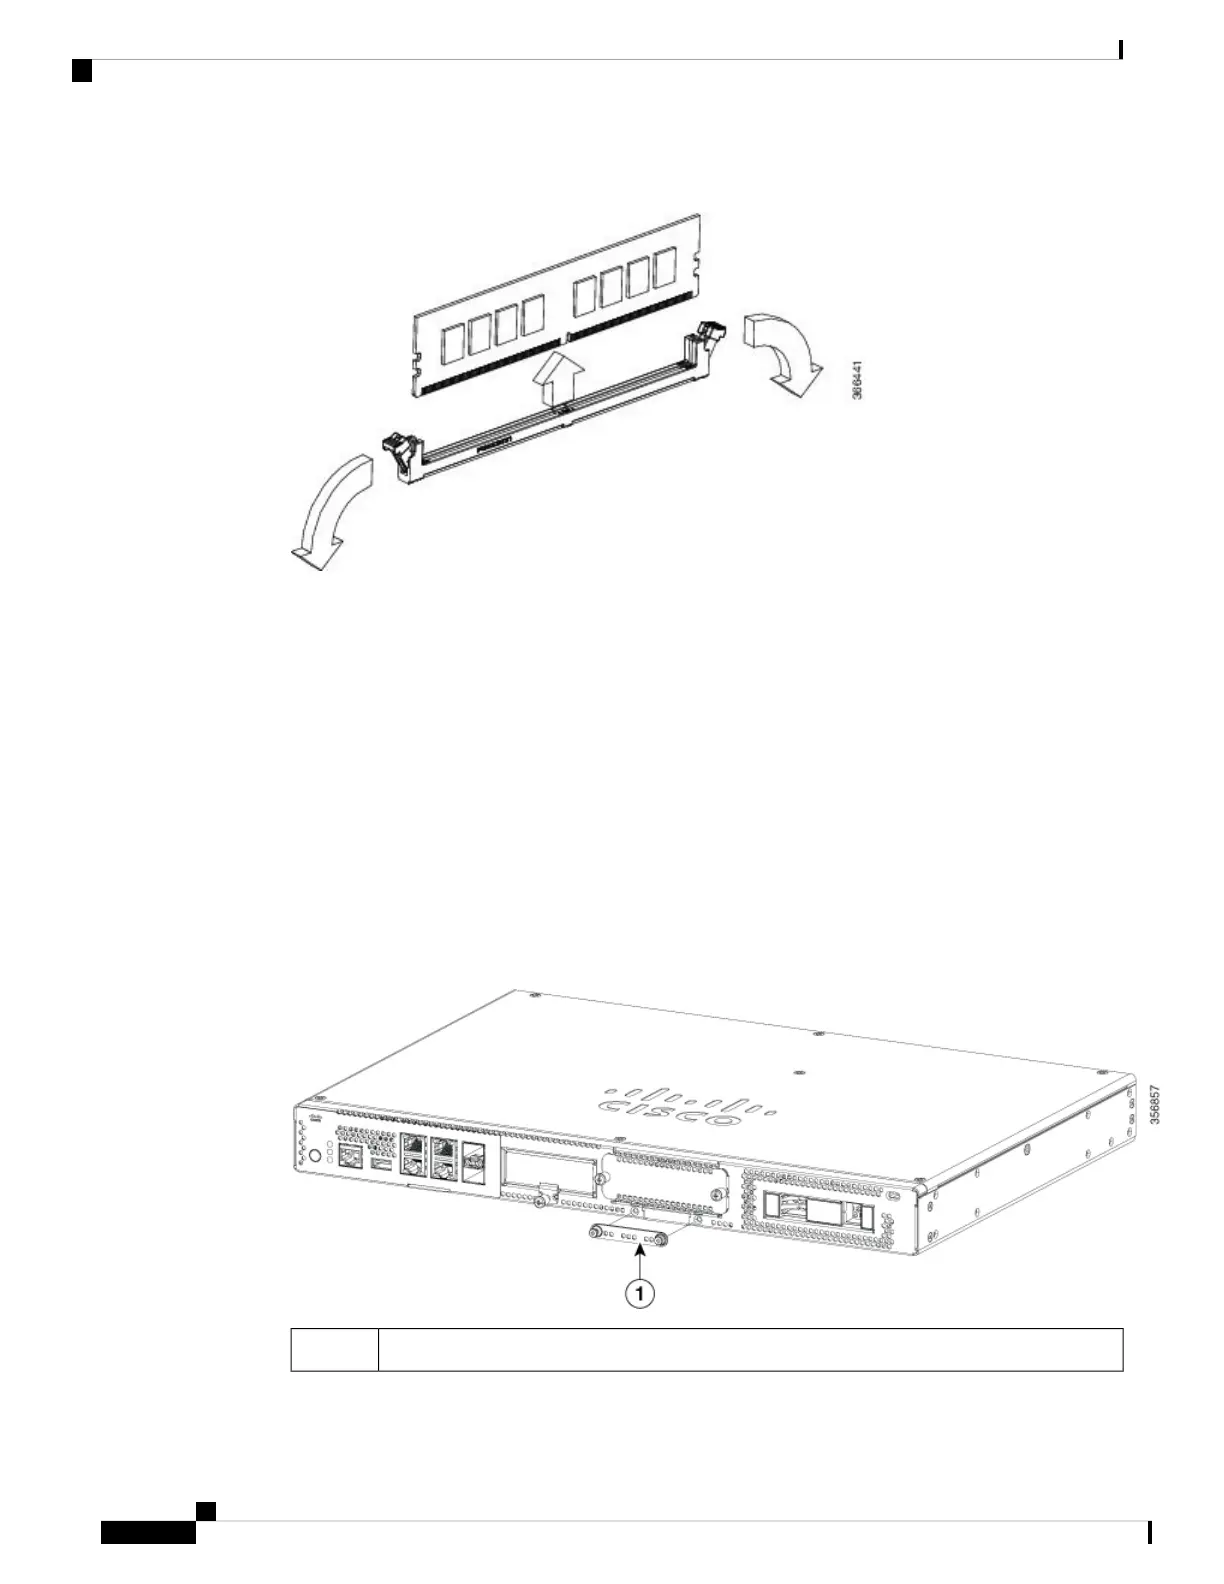
Figure 6: Blank M.2 Slot
M.2 slot blank cover1
3. Loosen the screws that secures the M.2 blank cover or existing M.2 module in the slot.
Installing and Upgrading Field Replaceable Units
6
Installing and Upgrading Field Replaceable Units
Installing the M.2 Storage Module

Questions and Answers:

Question and Answer IconNeed help?

Do you have a question about the Cisco Catalyst 8200 Series and is the answer not in the manual?

Cisco Catalyst 8200 Series Specifications

General IconGeneral
ModelCisco Catalyst 8200 Series
CategoryGateway
Operating SystemCisco IOS XE
Rack Height1RU
USB PortsUSB 3.0
Form FactorRack-mountable
Operating Temperature32°F to 104°F (0°C to 40°C)
SecurityFirewall
ManagementCisco DNA Center, CLI, SNMP, NETCONF, RESTCONF
Humidity5% to 95% non-condensing
ProcessorMulti-core x86 processor
Power SupplyInternal AC or DC power supply (redundant options available)

Related product manuals