32
Chapter 5: Configuring the Wireless-N Gigabit Router with Storage Link
The Storage Tab - Disk
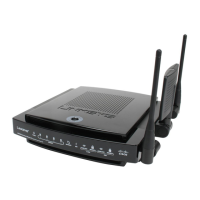
Dual-Band Wireless-N Gigabit Router with Storage Link
The Storage Tab - Disk
You can attach a USB flash drive or hard disk to the Router. The Disk screen describes the disk currently attached
to the Router. Using this screen, you can format a blank disk, safely remove a disk, or erase a disk.
Disk
Disk Detail
If a formatted disk is attached to the Router, you can view the Partition, File System, Capacity, and Free Space
information for each partition of the disk. Click the Create Share button to create a shared folder.
If you click the Create Share button, the Shared Folder screen appears.
Enter a name and the location of the folder you want to share. The folders will appear in the table. To select a
folder, select its Select button. To view the sub-folder, click View. To return to the previous folder, select
Back. To share all folders, select All Folders. Click the Save Settings button to save the changes. Click the
Cancel Changes button to cancel the changes.
Access. This feature allows you to control the Read and Write access to the folders for the groups that you
set up on the Administration tab. You can allow Read and Write or Read Only access. Select the right arrows
to allow access to a group or the left arrows to remove access to a group. Click the Save Settings button to
save the changes. Click the Cancel Changes button to cancel the changes. Click the Close button to close
the screen.
Safely Remove Disk 1. Before physically disconnecting a disk from the Router, click the Safely Remove button
first. This prevents the possible loss of data, if the disk is removed while data is transferring to or from the disk.
Shared Folder
Each name you created on the Shared Folder screen will be listed with its partition and shared folder, which you
can edit or delete. Select the Edit button to edit an item or Delete to delete the item.
If you click the Edit button, the Shared Folder screen appears.
You can view the current settings of the shared folder. To select a folder, select its Select button. To view a
sub-folder, click View. To return to the previous folder, select Back. Click the Save Settings button to save
the changes. Click the Cancel Changes button to cancel the changes.
Access. This feature allows you to control the Read and Write access to the folders for the groups that you
set up on the Administration tab. You can allow Read and Write or Read Only access. Select the right arrows
Figure 5-26: Storage Tab - Disk
Figure 5-27: Storage Tab - Shared Folder
 Loading...