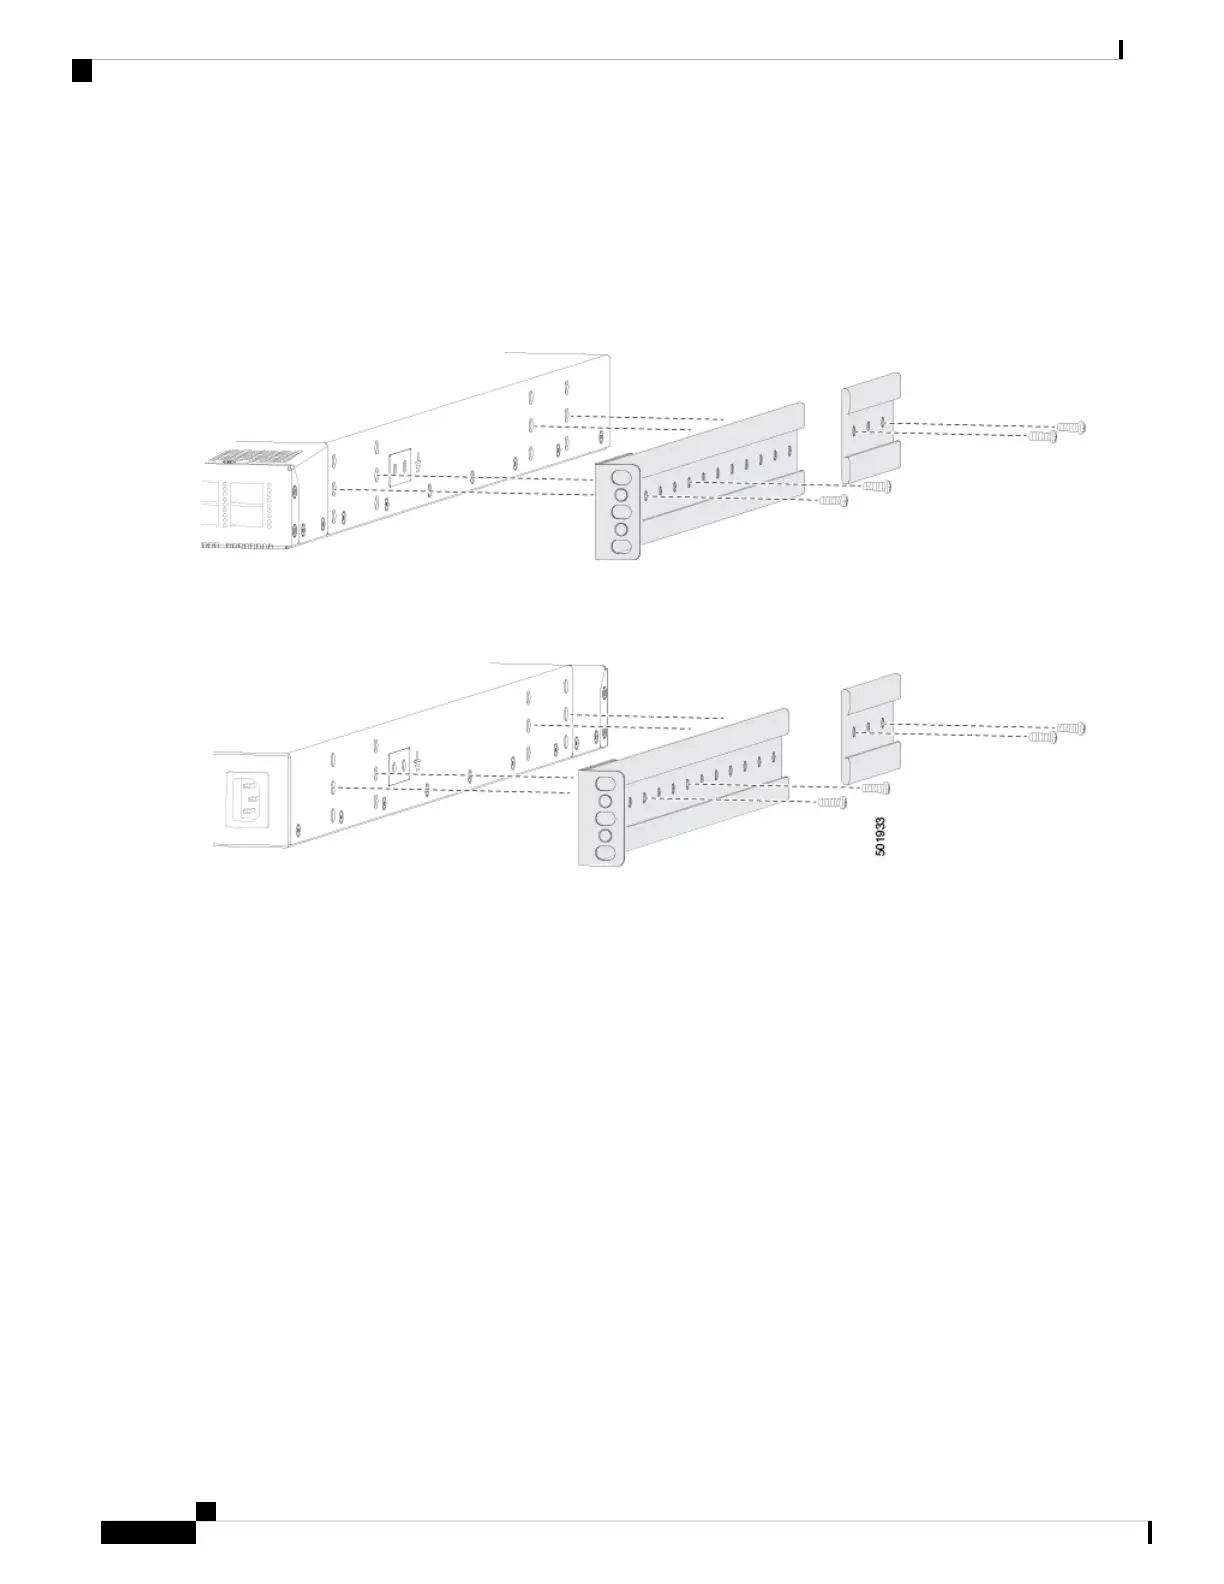
b) Position the front rack-mount bracket and the rear rack-mount bracket so that its screw holes are aligned to the screw
holes on the side of the chassis.
You can align the holes in the rack-mount bracket to the holes on the side of the chassis (see the two
ways to mount these brackets on a typical chassis, in following figure). The holes that you use depend
on the requirements of your rack and the amount of clearance required for interface cables (3 inches [7.6
mm] minimum) and module handles (1 inch [2.5 mm] minimum).
Note
c) Secure the front-mount bracket and the back-mount bracket to the chassis using four M4 screws and tighten each
screw to 12 in-lb (1.36 N·m) of torque.
d) Repeat Step 1 for the other front rack-mount bracket and the other back-mount bracket on the other side of the switch
and be sure to position that bracket the same distance from the front of the switch.
Depending on the chassis depth, the back rack-mount bracket may not fit. In that case the back rack-mount
bracket is not needed.
Note
Step 2 If you are not installing the chassis into a grounded rack, you must attach a customer-supplied grounding wire to the
chassis as explained in the Grounding the Chassis, on page 22 section. If you are installing the chassis into a grounded
rack, you can skip this step.
Step 3 Install the slider rails on the rack or cabinet as follows:
a) Determine which two posts of the rack or cabinet you should use for the slider rails. Of the four vertical posts in the
rack or cabinet, two will be used for the front mount brackets attached to the easiest accessed end of the chassis, and
the other two posts will have the slider rails.
b) Position a slider rail at the desired level on the back side of the rack and use 12-24 screws or 10-32 screws, depending
on the rack thread type, to attach the rails to the rack (see the following figure). Tighten 12-24 screws to 30 in-lb
(3.39 N·m) of torque and tighten 10-32 screws to 20 in-lb (2.26 N·m) of torque.
Cisco Nexus 93600CD-GX ACI-Mode Switch Hardware Installation Guide
20
Installing the Chassis
Installing the Switch Using the NXK-ACC-KIT-1RU Rack-Mount Kit

 Loading...


