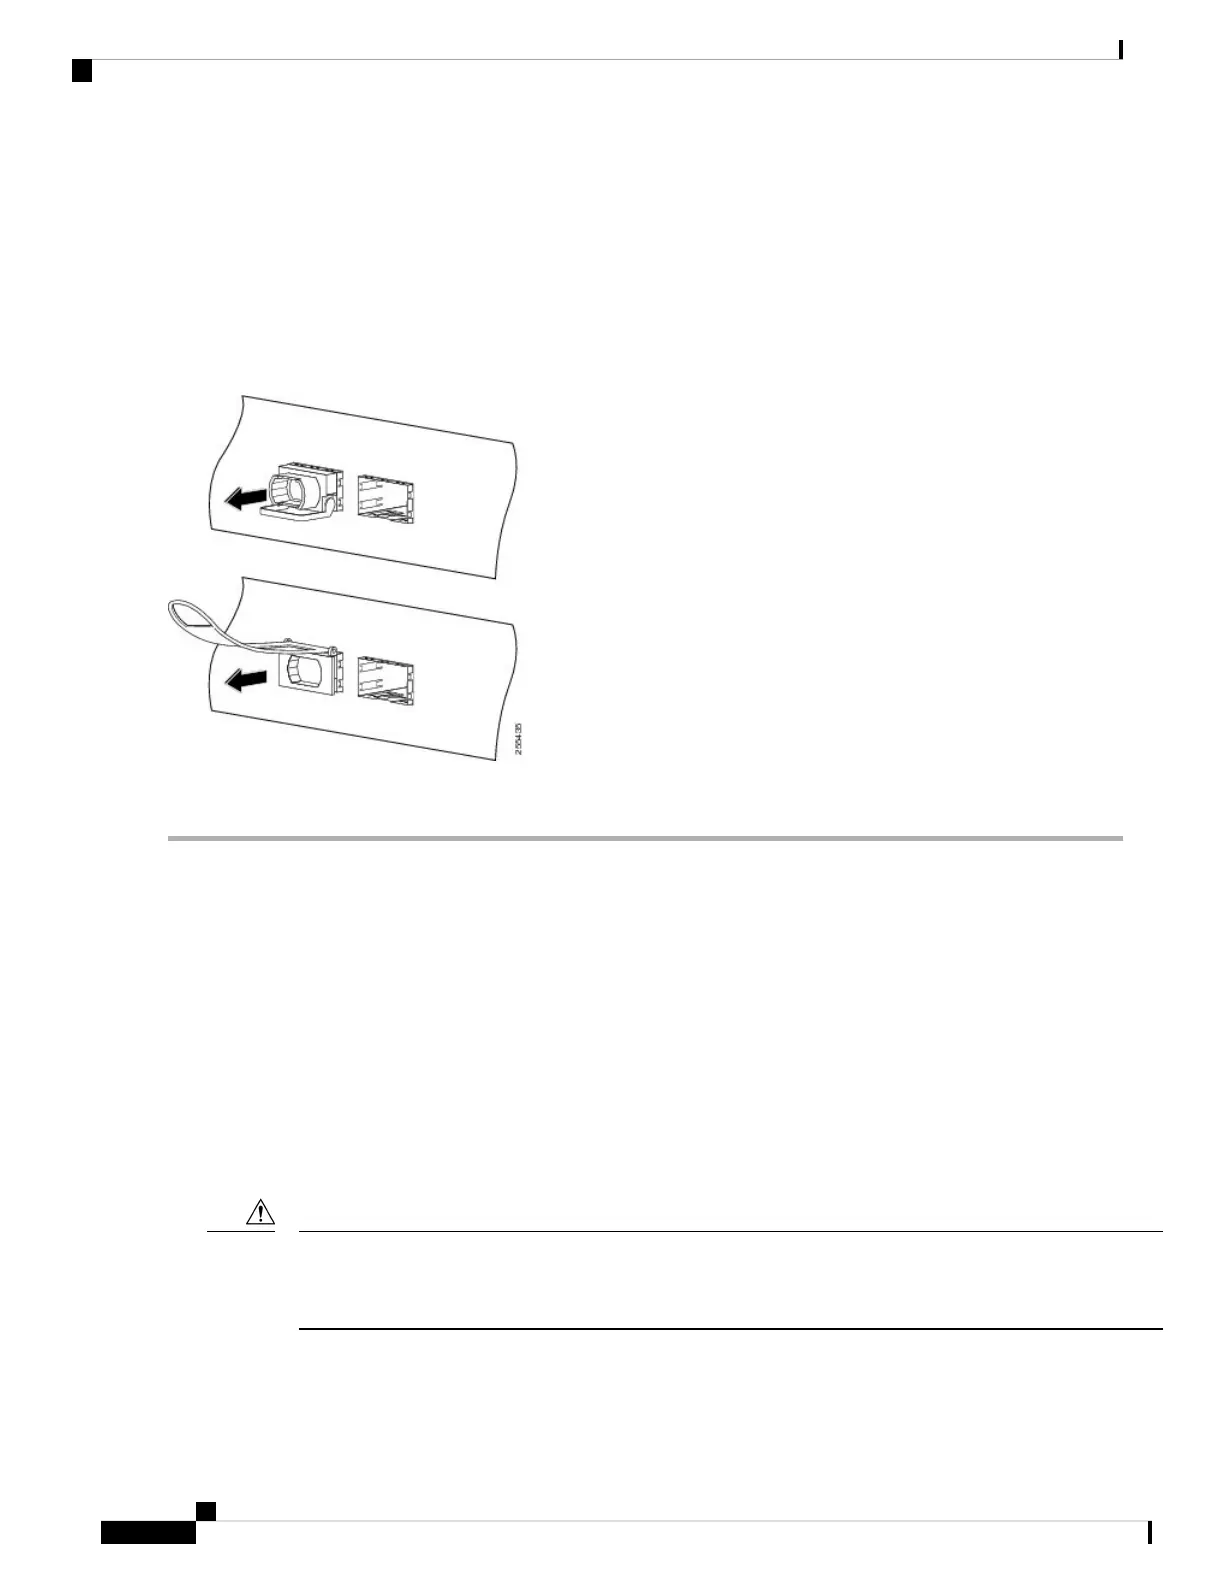
b) Immediately install the dust plug into the transceivers optical bore.
c) Grasp the sides of the QSFP+ or QSFP28 transceiver and slide it out of the module socket.
Step 3 For QSFP+ or QSFP28 transceivers equipped with a pull tab latch (see the below figure, bottom view):
a) Immediately install the dust plug into the transceiver’s optical bore.
b) Grasp the tab and gently pull to release the transceiver from the socket.
c) Slide the transceiver out of the socket.
Figure 15: Removing the 40-Gigabit QSFP+ or 100-Gigabit QSFP28 Transceiver Module
Step 4 Place the QSFP+ or QSFP28 transceiver module into an antistatic bag.
Connect Interface Ports
You can connect optical interface ports on line cards with other devices for network connectivity.
Connect a Fiber-Optic Port to the Network
Depending on the line card model that you are using, you can use either QSFP+ or QSFP28 transceivers.
Some transceivers work with fiber-optic cables that you attach to the transceivers and other transceivers work
with pre-attached copper cables. When installing fiber-optic cables for a port, you must install SFP transceivers
for 1-Gigabit optical ports or install SFP+ transceivers for 10-Gigabit optical ports or QSFP+ transceivers for
100-Gigabit ports before installing the fiber-optic cable in the transceivers.
Removing and installing a transceiver can shorten its useful life. Do not remove and insert transceivers any
more than is absolutely necessary. We recommended that you disconnect cables before installing or removing
transceivers to prevent damage to the cable or transceiver.
Caution
Connect Router to the Network
20
Connect Router to the Network
Connect Interface Ports




 To Next Page