4 Cisco 300 Series Managed Switches
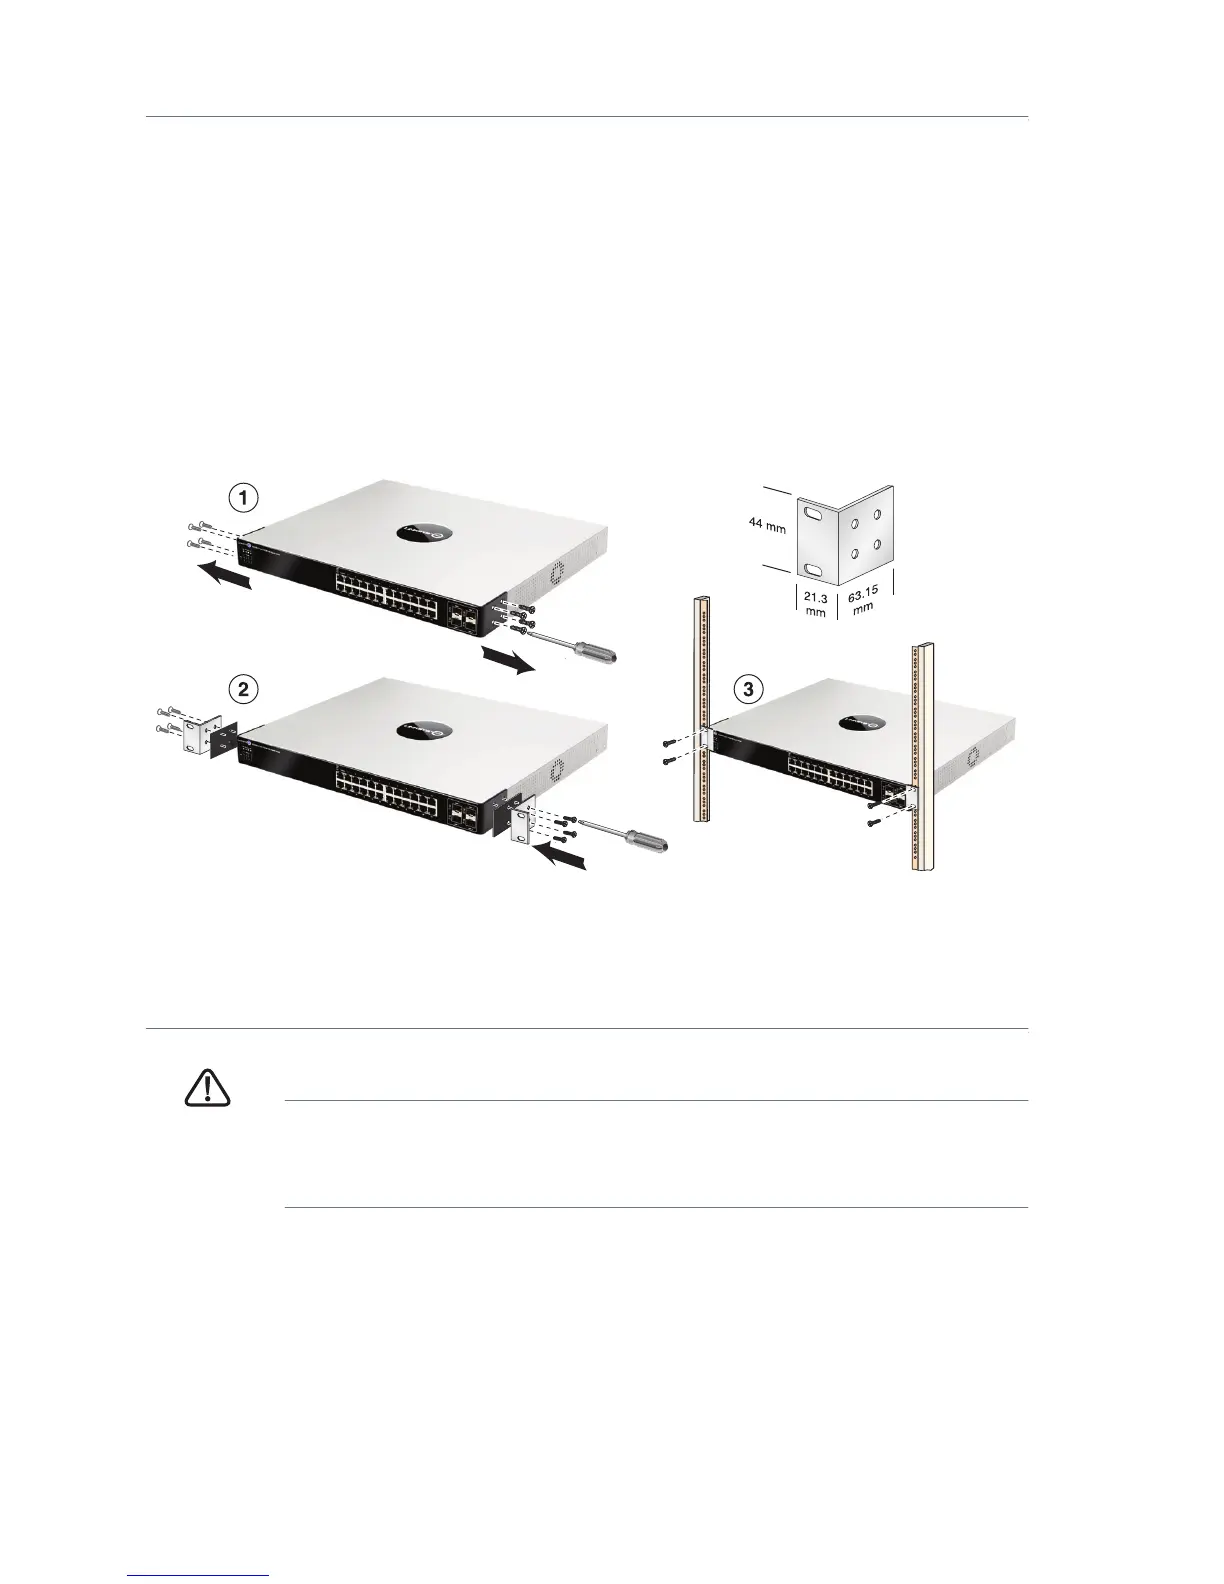
Rack-Mount Placement
STEP 1 Remove the four screws from each side near the front of the switch.
Retain the screws for re-installation. (Do not remove the four screws
from each side near the back of the switch.)
STEP 2 Place one of the supplied spacers on the side of the switch so the
four holes of the spacers align to the screw holes. Place a rack
mount bracket next to the spacer and reinstall the four screws
removed in Step 1.
NOTE If your screws are not long enough to reattach the bracket
with the spacer in place, attach the bracket directly to the case
without the spacer.
STEP 3 Repeat Step 2 for the other side of the switch.
STEP 4 After the mounting hardware has been securely attached, the
switch is now ready to be installed into a standard 19-inch rack.
CAUTION For stability, load the rack from the bottom to the top, with the
heaviest devices on the bottom. A top-heavy rack is likely to
be unstable and may tip over.
Wall Mounting
Only the 8-port models of the switch can be wall-mounted.
NOTE The switch should be mounted so that the ports face up or down.
Do not mount the switch with the ports to the side.
181185
 Loading...