EasyManuals Logo

Cisco SG220-26P User Manual

Cisco SG220-26P
16 pages
To Next Page IconTo Next Page
To Previous Page IconTo Previous Page
Page #6 background imageLoading...
Page #6 background image
6 Cisco 220 Series Smart Plus Switches Quick Start Guide
S
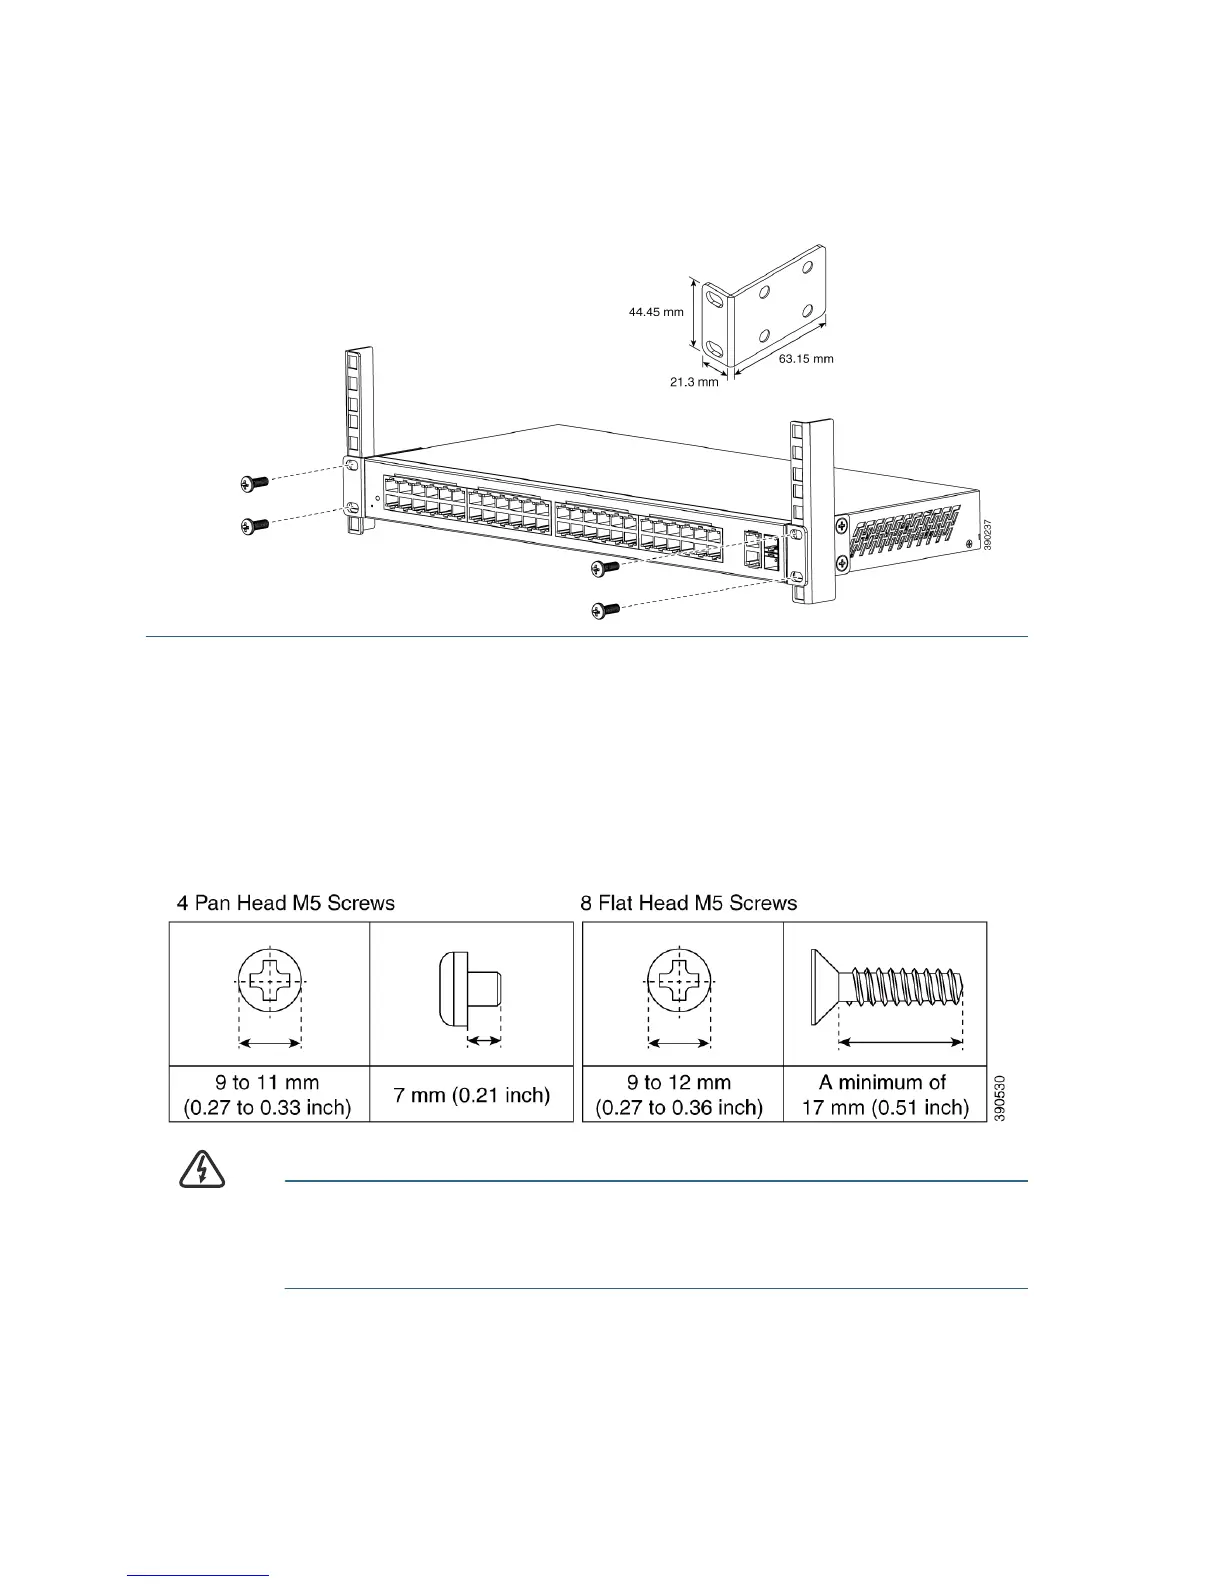
TEP 2 Repeat the previous step to attach the other bracket to the opposite
side of the switch.
STEP 3 After the brackets are securely attached, the switch is now ready to
be installed into a standard 19-inch rack as shown here.
Wall Mounting (Non-PoE Models Only)
If your switch is the non-PoE model, you can wall-mount it by utilizing the
supplied rack-mount brackets. The pan head screws used to attach the
brackets to the switch and the flat head screws used to attach the switch
to wall are user-supplied. Suggested hardware is illustrated here.
WARNING Insecure mounting might damage the device or cause injury.
Cisco is not responsible for damages incurred by insecure
wall-mounting.

Other manuals for Cisco SG220-26P

Questions and Answers:

Question and Answer IconNeed help?

Do you have a question about the Cisco SG220-26P and is the answer not in the manual?

Cisco SG220-26P Specifications

General IconGeneral
ModelSG220-26P
Ports26
PoE Ports24
Switching Capacity52 Gbps
Forwarding Rate38.69 Mpps
LayerLayer 2
Power SupplyInternal
VLANs Supported256
ManagementWeb-based GUI, SNMP
Operating Temperature0°C to 40°C
Storage Temperature-4°F to 158°F (-20°C to 70°C)
Operating Humidity10% to 90% non-condensing
Storage Humidity5% to 95% non-condensing
Dimensions440 x 44 x 257 mm
Weight3.3 kg

Related product manuals