`
`` Page 16 of 27
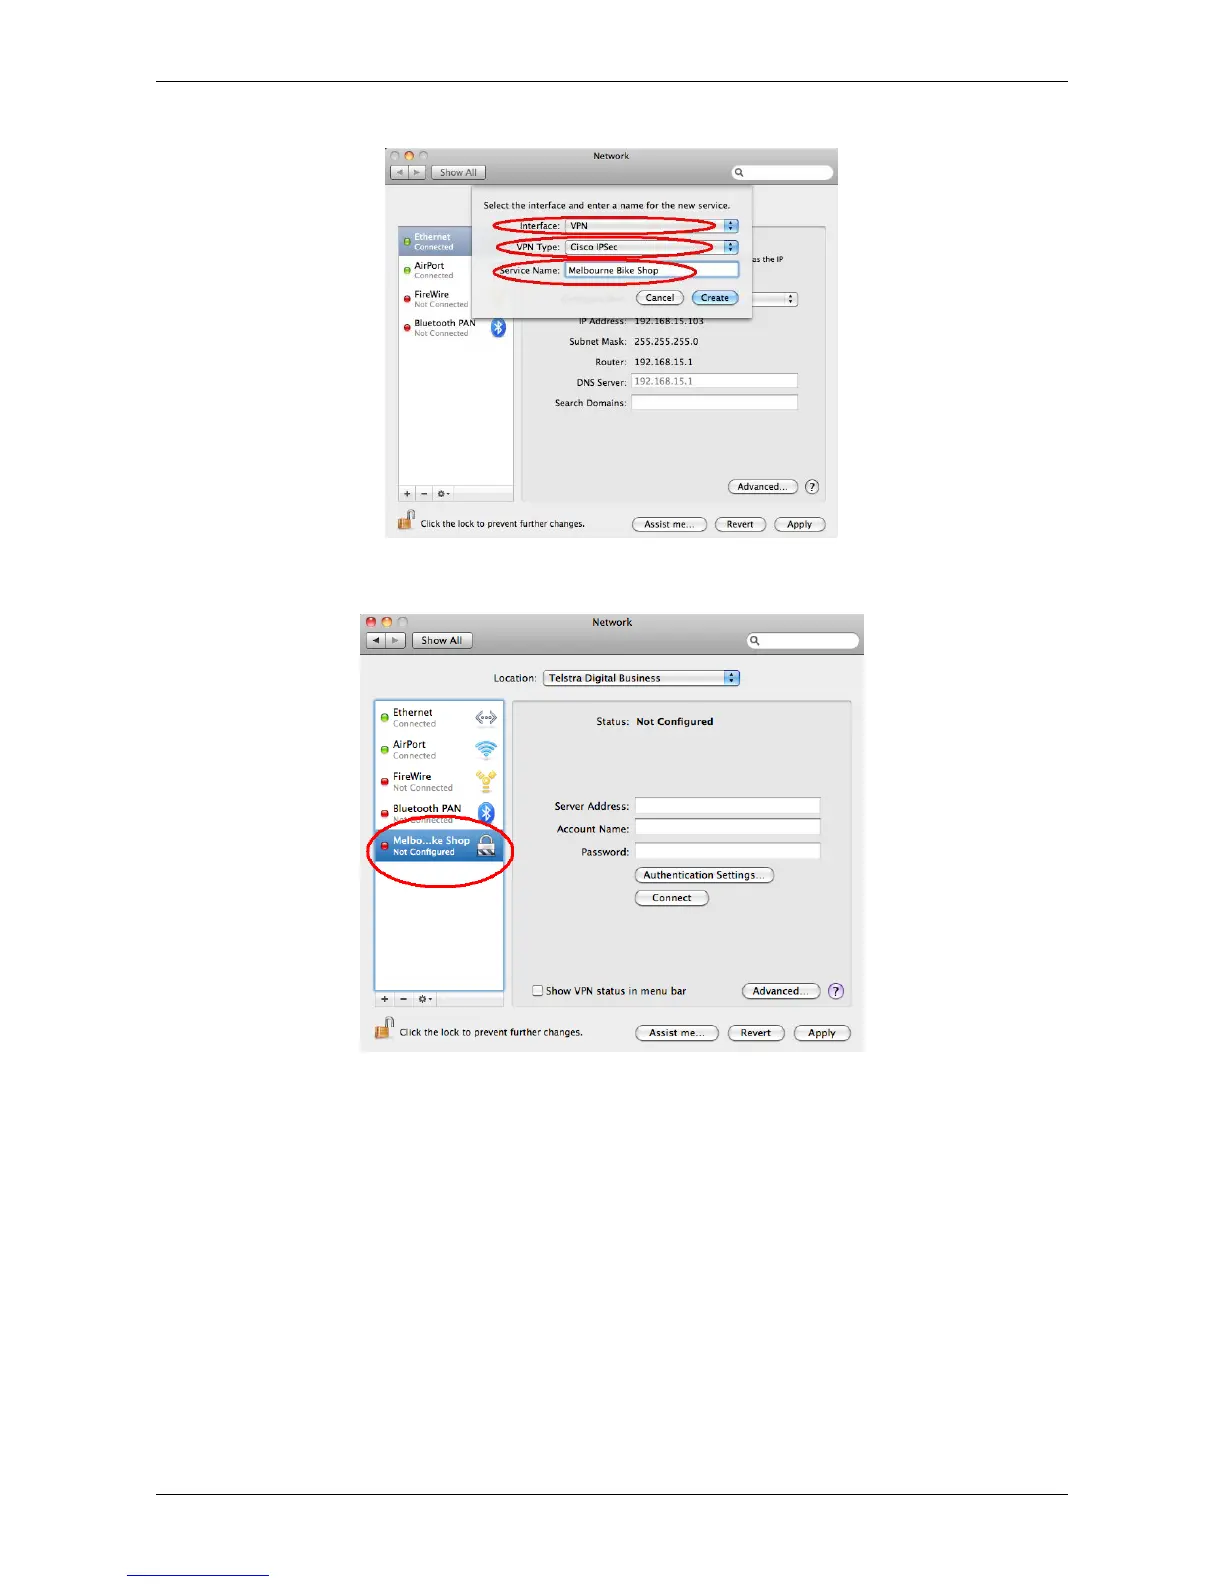
3. Change the Interface to ‘VPN’, change the VPN Type to ‘Cisco IPSec’, and into Service Name enter a
name of your choice (Figure ).
Figure 24 Setting custom details
4. Click the Create button and the Service will appear in the left column (Figure ).
Figure 25 Network Settings Dialog
Now you are ready to configure the user’s computer to remotely connect to the router. You will need the
TelstraDB.PCFfile, which was provided in the previous section (see Set-up Remote Working on the Router
for your Business), to complete the next steps.
1. Open the PCF file and note the following information (Figure ):
• Host IP address
• GroupName
• GroupPwd
These are unique to your business’ router.