Cisco Unified Communications 500 Series Model UC 540 Quick Start Guide 17
Connecting to the UC 540
This section describes how to connect your PC to the UC 540 and how to
use CCA to connect to the UC 540.
Before you connect your PC, do the following:
• Disable all network interface Cards (NICs) that are not directly
connected to the UC 540.
• Disable the wireless network card.
• Turn off any third-party FTP or TFTP services.
• Temporarily disable any software firewalls running on the PC.
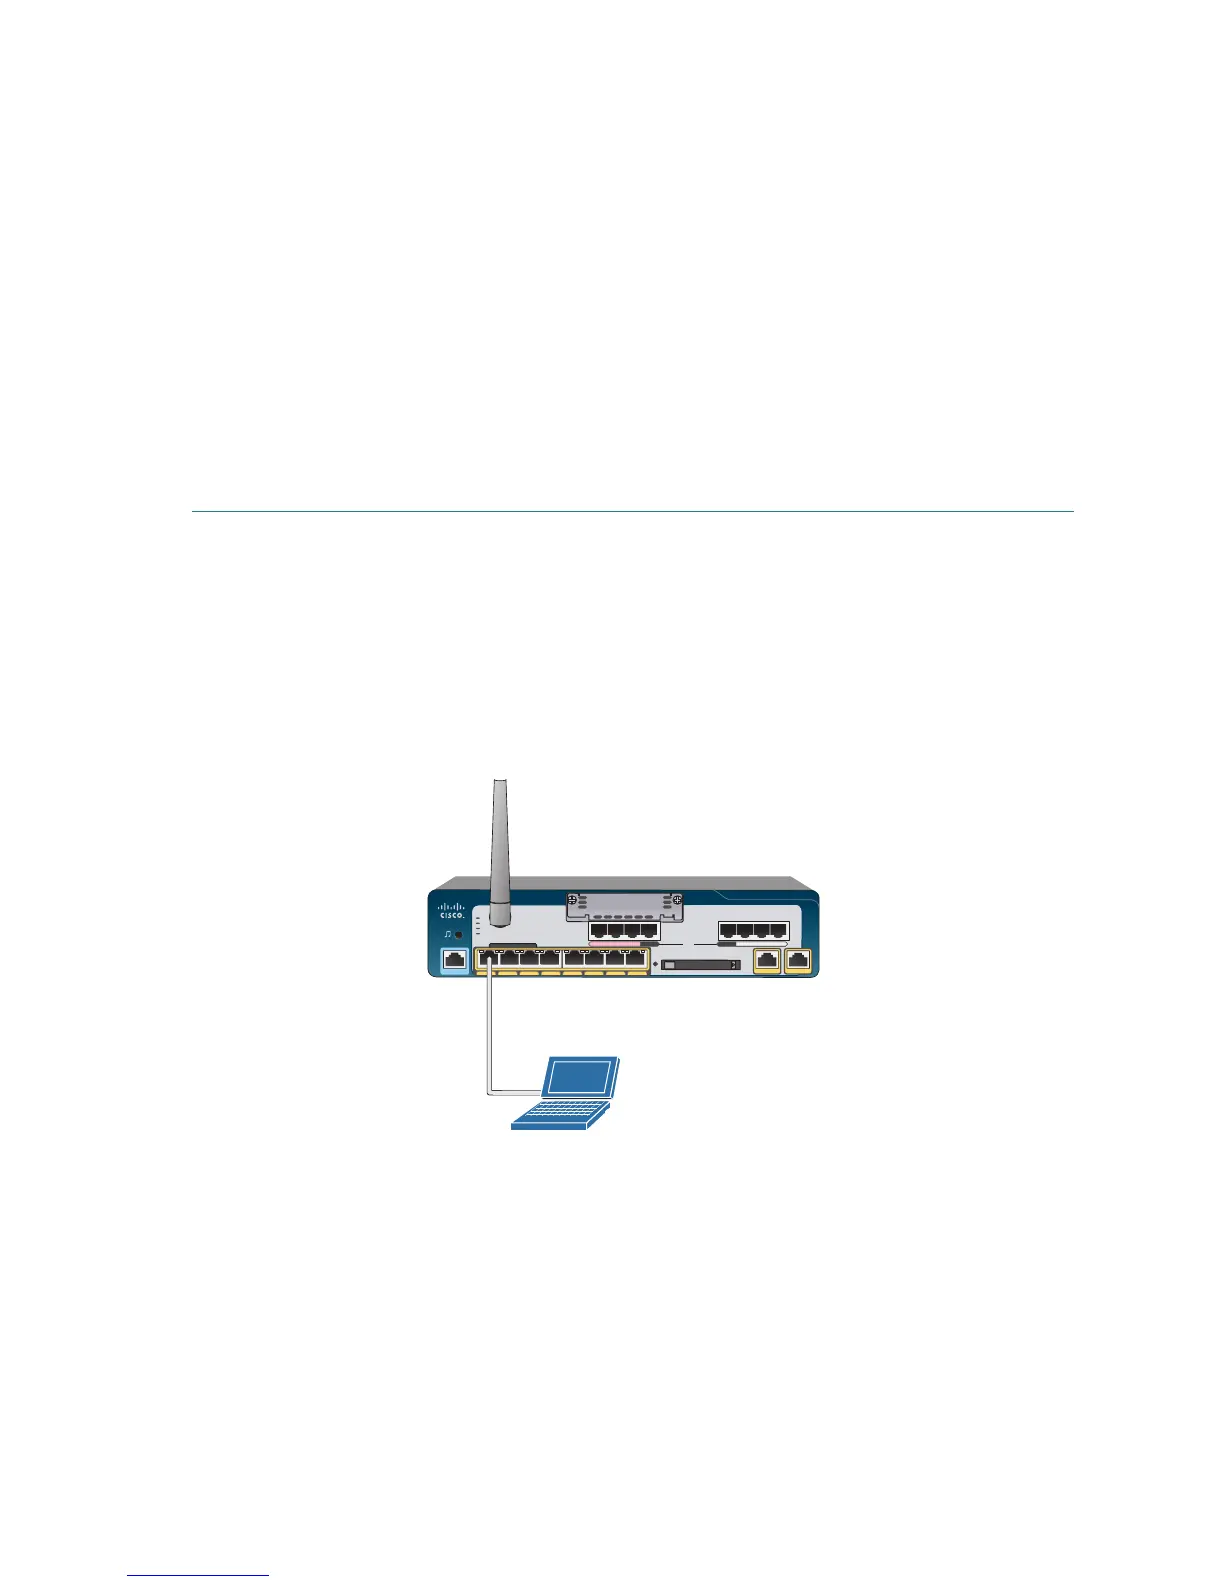
To connect to the UC 540:
STEP 1 Connect an Ethernet cable to one of the PoE ports on the front panel
of the UC 540. Connect the other end of the cable to the Ethernet
port on your PC.
Verify that the PC is set to use the Dynamic Host Configuration
Protocol (DHCP) to obtain its networking parameters (such as IP
Address, Subnet Mask, Default Gateway, DNS Server, and so forth).
STEP 2 From CCA, open the Connect window and click Add a New Site.
This is the preferred way to connect to a Cisco Smart Business
Communications System (SBCS).
STEP 3 Enter the name and description for the new customer site.
STEP 4 From the Discover Devices drop-down menu, select Using a
Starting IP address.
Cisco Small Business Pro
CONSOLE
POWER ETHERNET
PWR LNK PWR LNK PWR LNK PWR LNK PWR LNK PWR LNK PWR LNK PWR LNK
COMPACT FLASH
CF
SYS
POE
VM
WLAN
275525
UC 540
PoE port
Cisco
Configuration
Assistant
Unified Communications 500 Series
UC540 with FXO
PFO
 Loading...