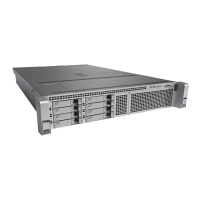
c) Slide the inner-rail release clip toward the rear on both inner rails, and then continue pushing the server into the rack
until its front slam-latches engage with the rack posts.
Figure 3: Inner-Rail Release Clip
Outer slide rail attached to rack post3Inner-rail release clip1
-Inner rail attached to server and inserted into outer
slide rail
2
Step 5 To comply with GR-63-CORE Seismic requirements, you (the end user) must secure the server in the rack more permanently
by using the two screws that are provided with the slide rails.
With the server fully pushed into the slide rails, open a hinged slam latch lever on the front of the server and insert a
screw through the hole that is under the lever. The screw threads into the static part of the rail on the rack post and prevents
the server from being pulled out. Repeat for the opposite slam latch.
Step 6 (Optional) If applicable, do the following:
a) Attach the cable management arm. Go to Installing the Cable Management Arm (Optional), on page 9 or Reversing
the Cable Management Arm (Optional), on page 10.
Installing the Server
8
Installing the Server
Installing the Server in a Rack

 Loading...


