-8-
4. Auto-cutter settings
“Cut On” menu will be selected automatically when the auto-cutter is
installed; thus, the printer can be used without adjustment. However, some
printers may not have the “AutoCongure” function. In this case, select the
“After Print” menu of the menu setup mode, and the “Cut On” menu on the
“Function Select” menu. If the printer has the “AutoCongure” function, the
“AutoCongure” menu will be printed out in front of “Function Select” menu
when you print the “Current Setup”.
See the printer’s User’s Manual (CD-ROM) for details on “Print Menu Settings”.
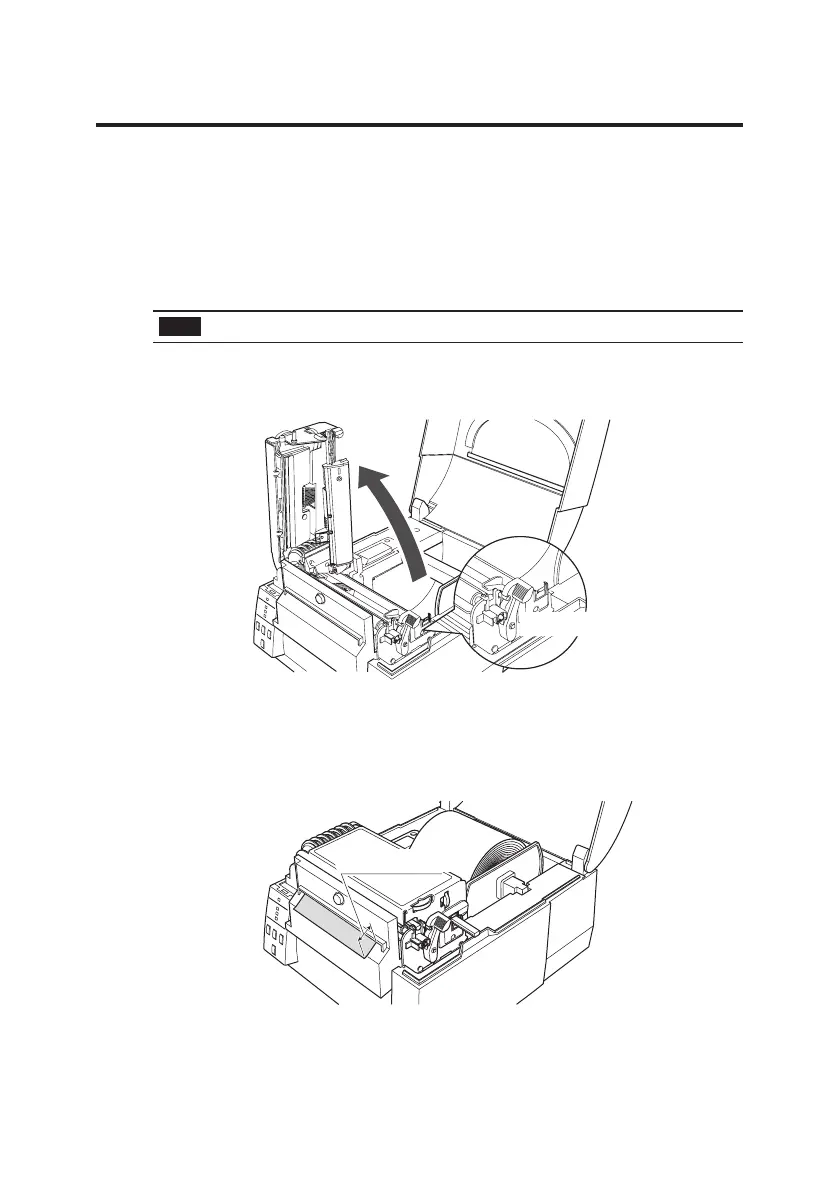
Loading Media (For CL-S52X/53X/62X/63X/CL-E720/E730/E720DT)
(1) Press the printhead lever, and then open the head unit and sensor arm.
Printhead lever
(2) With scissors, cut the end of the media loaded in the media holder.
(3) Feed the end of the media through the cutter assembly until the end
extends 10 mm past the cutter cover.
(4) Close the head unit and sensor arm.
Approx. 10 mm
(5) The cutter will operate one time when the FEED key is pressed.