NX603/FX503 13
English
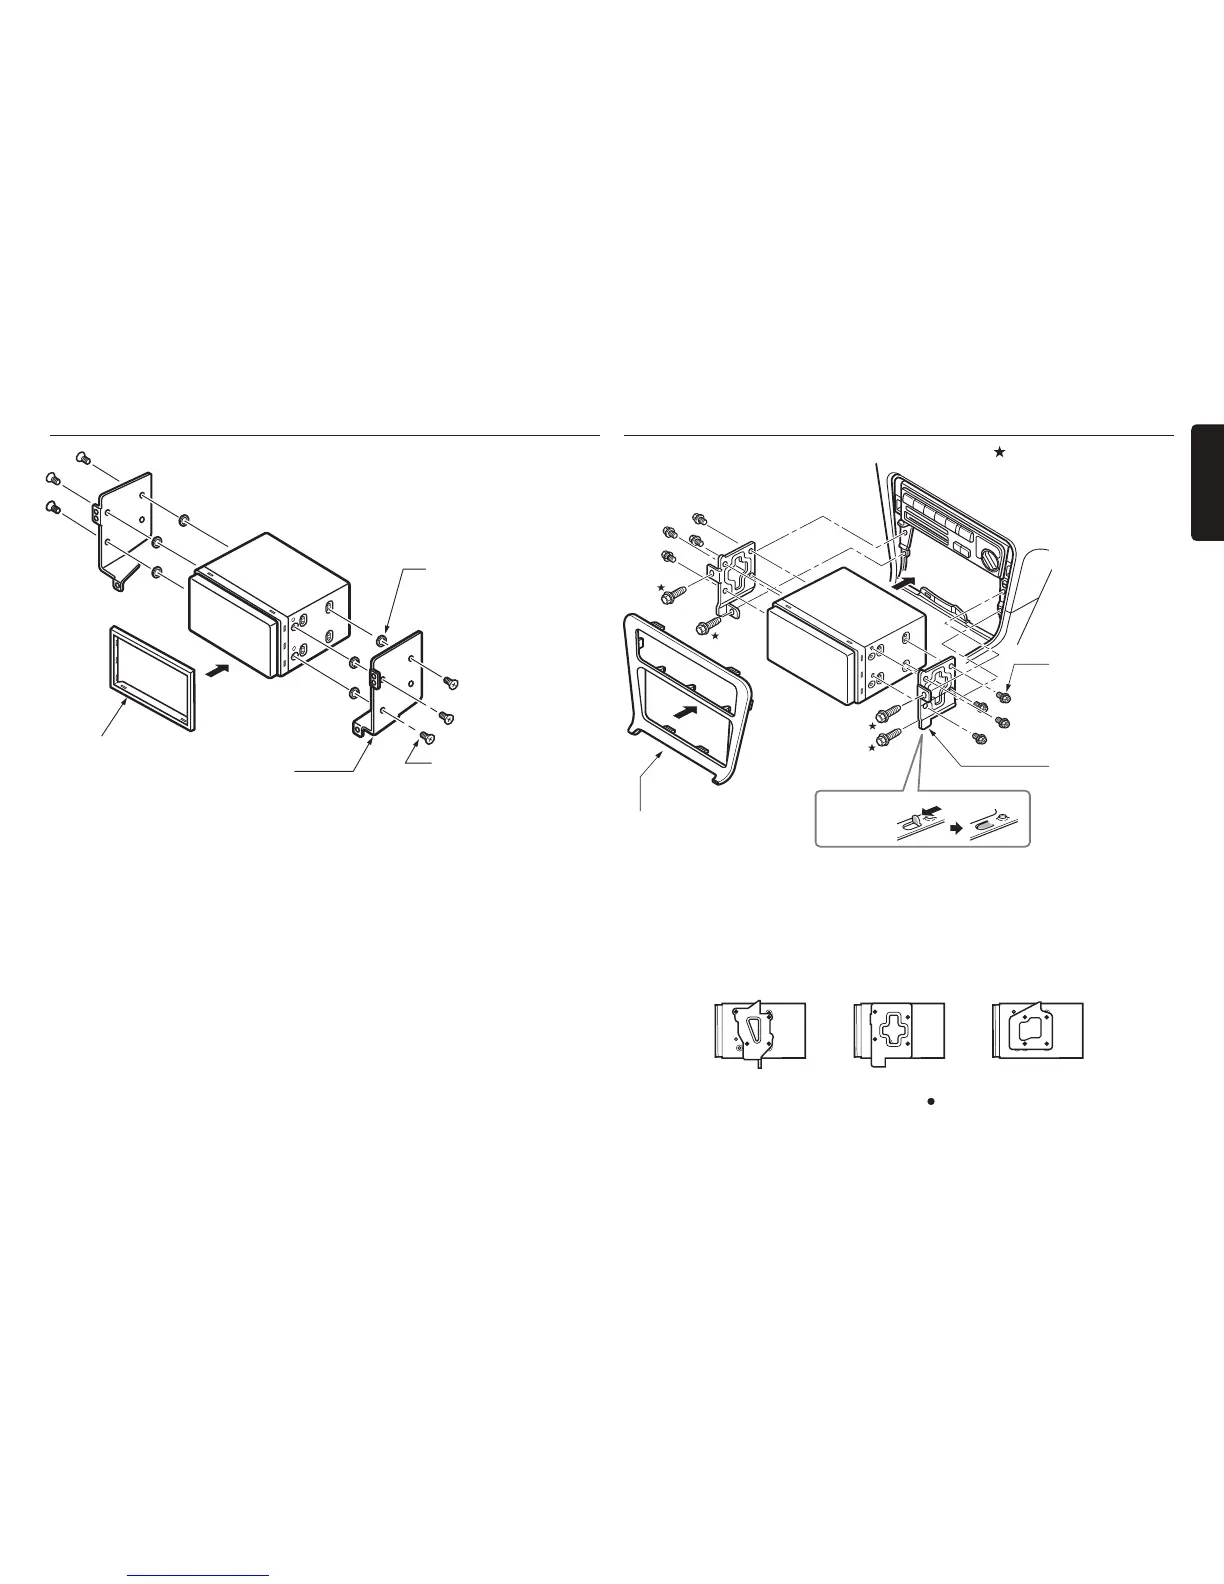
Installing the Main Unit in a NISSAN Vehicle
Figure 3
Mounting bracket
(1 pair for the left and right sides)
6-Spacer (thickness: 1 mm)
6-Flat head screw
(M5 x 8)
(attached to the main unit)
Main Unit
Finisher
✽
1
✽
1 Position the face panel with its wide edge at the bottom. Fit the edge into the groove of the main
unit.
Installing the Main Unit in a TOYOTA Vehicle
Install by using parts attached to the vehicle. (Screws marked are attached to the vehicle.)
Figure 4
✽
3
Mounting bracket
(1 pair for the left
and right sides)
8-Hexagonal screw
(M5 x 8)
Main Unit
Center Panel
✽
2
✽
2 Some panel openings are too small for the unit depending on the vehicle type and model. In
such a case, trim the upper and lower sides of the panel frame by about 0.5 to 1.5 mm so the
unit can be inserted smoothly.
✽
3 If a hook on the installation bracket interferes with the unit, bend and flatten it with a nipper or
similar tool.
■
Typical Mounting Brackets
Example 1 Example 2 Example 3
Affix the screws to the
marks.
 Loading...