5. INSTALLATION AND WIRING
24 VT1010E
CAUTION!
Make sure the switch is fully to one side or the other.
Do not attempt to configure this switch once the player is in position.
4. Cut a one-inch hole in the headliner along the backside of the ceiling bracket for the
cables to pass through.
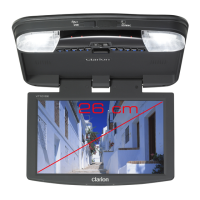
Install the ceiling bracket and cables
1. Disconnect and remove the original dome light.
2. Screw the metal mounting plate to the beam or plywood using the six ST4.2 x 16
screws.
Metal mounting plate showing screw position
Note:
Do not obscure the original dome light opening.
Connect cables
1. Pull out the original dome light’s power wire and signal/power cable through the
original dome light opening.
2. Place the rubber gasket on the player.
Placing the rubber gasket on a player
3. Route the cables through the hole to the location of any audio/video sources.
4. Identify the dome light wires in the vehicle and connect them to the corresponding
dome light wire on the overhead monitor system.
5. Plug in any audio/video source cables.
 Loading...