A-8 / ENGLISH
A-8 - FORM NO. 56041658 - Clean Track
®
12
EN
9
AFTER USING THE MACHINE
1 Turn the Power Switch OFF (O). Unplug the Power Cord (G). Coil the cord and hang it from the cord hook.
2 To empty the solution tank, pull the Solution Drain Hose (A) off the upper hose barb. Direct the hose to a designated waste water “DISPOSAL
SITE”. Rinse the tank with clean water. Inspect the solution hoses; replace if kinked or damaged.
3 To empty the recovery tank, swing open the recovery tank lid and lift the Recovery Tank (5) off the machine. Empty the tank at a designated waste
water “DISPOSAL SITE”. Rinse the tank with clean water. Inspect the recovery hose; replace if kinked or damaged.
4 Remove the brush, rinse with warm water and remove any built-up string, hair or carpet fi bers.
5 Disconnect the Recovery Hose (2) from the Recovery Tank Dome Lid (3) and fl ush with warm water to wash any debris out of the Recovery Hose
and Vacuum Shoe.
6 Wipe the machine with a damp cloth. Do not use abrasive chemicals or solvents.
7 Perform any required maintenance before storage.
MAINTENANCE SCHEDULE
MAINTENANCE ITEM Daily Weekly Monthly Yearly
Check / Clean Power Brush •
Check / Clean Tanks & Hoses •
Clean Vacuum Shoe •
Check/Clean the vacuum motor foam fi lter •
Inspect & Clean Solution Screen •
Clean Spray Nozzle •
*Check Carbon Brushes •
* Have a Clarke service technician check the vacuum motor carbon brushes once a year or after 300 operating hours. The brush motor carbon brushes
check every 500 hours or once a year.
IMPORTANT! Motor damage resulting from failure to service the carbon brushes is not covered under
warranty. See the Limited Warranty Statement.
8 Store the machine indoors in a clean, dry place with the tank dome lid open. Keep from freezing.
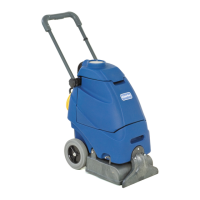
9 Place the machine in the storage position. This will prevent the brush from taking a “set”, and will increase the brush life and maintain the
performance of the brush. See Figure 7. Lift up on the base of the machine and rotate the Brush Storage Position Lever (9) backwards to latch
the base in the storage position.
FIGURE 7
For more compact storage loosen the Handle Adjustment Knobs (C) and push the handle down onto
the recovery tank.
VACUUM SHOE MAINTENANCE
Check the vacuum shoe daily. Remove any built-up string, hair or carpet fi bers.
revised 9/07
 Loading...