4.0 ELECTRICAL CONNECTION
The wires in the input cable of this machine are colored in
accordance with the following code:
120V. 230V.
Green Ground Green & Yellow Ground
White Neutral Blue Live
Black Live Brown Live
120 Volts 20Amp grounded plug: Model 80E - 95E - 131E.
230 Volts grounded plug: Model 240TE
WARNING: This machine must be grounded.
Ifyou intend on using an extension cord make sure the wire cable
size is adequate in diameter.
Ifyou are in doubt about electrical connections consult a qualified
electrician. Do not attempt electrical repairs yourself.
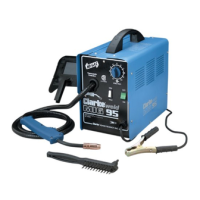
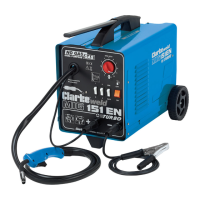
5.0 PREPARATION FOR WELDING
1 With the On/Off switch (item B) in the Off position, connect
the welding leads as follows. (Does not apply to models 80E,
95E and Easi Arc 150 which have fixed leads):
• Connect the ground lead (item N) to the ground terminal
which is the black knob (item F) identified by the ground
symbol (see diagram 1), and secure the ground clamp (item
M) to the workpiece (item L). Note: For good contact the
ground clamp must be attached to the clean bare metal, not
painted.
• Connect the welding lead (item G) to the electrode terminal,
which is the black knob (item E) identified by the electrode
holder symbol (diagram 1) and secure an appropriate welding
rod (item I) by its bare end into the jaws of the elctrode holder
(item H). Note: All connections should be a good metal contact.
Clean with a wire brush where necessary.