Chapter 7 Inspection and Maintenance
7-4 750-177
over the top studs and install washers and nuts but don't tighten. The end clamp can now be installed and nuts
on the end clamp can be snugged up but not completely tightened. Before installing the next panel, apply a
small amount of teflon paste to the area where the vertical gasket and the horizontal gaskets will overlap at the
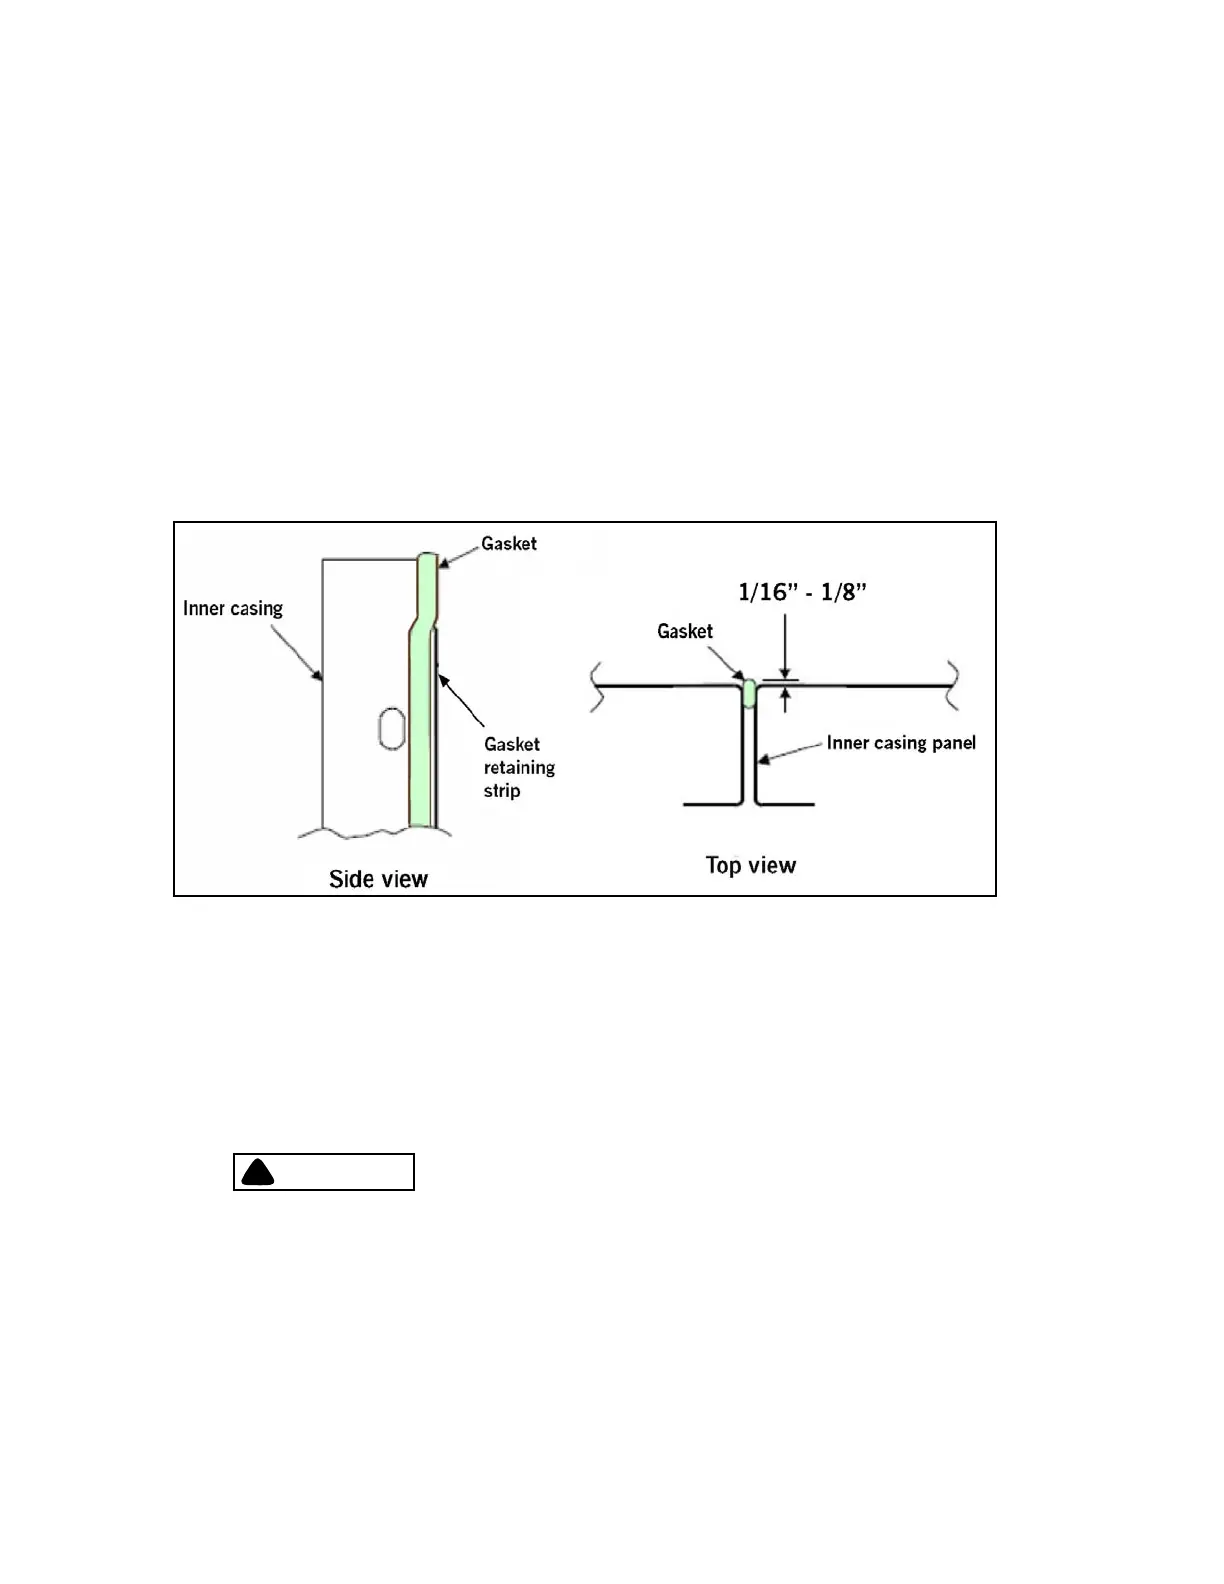
top and bottom. This will help ensure an air tight seal. Install the next panel in line being careful to slide the 1"
gasket retaining strip behind the panel but under the insulation. Install the bottom and top clamp angles to hold
panel in place, but don't tighten. Install the bolt strips, washers and nuts which clamp the panels together. Pull
panels together evenly and tighten nuts to 250 to 300 in-lbs. Repeat until all panels are installed and securely
bolted together. Now panels can be evenly pulled toward boiler with clamp angles. Tighten all nuts to 250 to
300 in-lbs.
The outer casing panels can now be installed starting with the end panels.
Slide each end panel under the upper
frame and push the bottom section into the boiler and allowing it to slide down to catch the bottom clamp angle.
Then slide the end panels under the corner frames and install any remaining center panels.
The fireside should be thoroughly cleaned prio
r to any extended layup of the boiler. Depending upon
circumstances, a protective coating may be required. See Chapter 3, Section J "Preparation for Extended Layup".
Figure 7-1: Gasket application to inner casing
E. Controls
Relief Valves
The relief valve is a very important safety device and deser
ves attention accordingly. Proper removal, installation
or handling of a relief valve is of primary importance. Exercise care when removing, installing or handling a relief
valve to ensure proper operation, long service life, and to ensure that the valve functions as designed.
Improper removal, handling or installation of a relief valve may adversely affect the valve's operation, resulting
in serious personal injury or death.
Observe the following precautions when removing, handling or installing relief valves.
• Use only flat jawed wrenches on the flats of the valve
• Do not use a pipe threaded into the outl
et to turn a valve
• Apply only a moderate amount of pip
e compound to male threads
• Avoid over tightening, which can distort valve seating surfaces
 Loading...