SLEEPVIEW USER MANUAL
28
6. If you would like the SleepView unit to automatically turn on and remain on for a
specified duration, click the check box labeled “Begin recording at a specified time
and duration” and select the desired start time and duration (specified in hours and
minutes).
PLEASE NOTE: see note on “automatic on” below.
If the study you are scheduling is being done at a location in a time zone different from
the one your computer is set to, check the checkbox labeled “Study will take place in a
different time zone” and select the time zone using the drop-down list provided. This will
adjust the internal clock within the SleepView to the time zone where the study will be
performed.
Configure the auxiliary port for the appropriate sensor that will be used for the study. If
no sensor will be used select none. This option will disable the LED for this channel only
and it will remain off.
IMPORTANT NOTE: the next step will cause all previously recorded studies to be
deleted from the device.
7. Click <Next> and the “Downloading Parameters” page will appear and begin to send
all of the options you selected down to the device.
8. Once programming is complete, all of the operations will report “DONE” next to its
label and the <NEXT> button will become active. Click <Next> and the “Insert
Battery and Check Device” page will appear.
PLEASE NOTE: if you did not program the SleepView unit to automatically
turn on,“n/a” will appear next to “setting auto-start time”.
9. The SleepView will turn off after programming is complete.
IMPORTANT NOTE: the next steps must be performed in order to commit the
settings to the device. You must comply within 2 minutes to ensure proper
configuration.
10. Click <NEXT> and the “Insert Battery and Check Device” page will appear.
Disconnect the SleepView from the USB cable and within 2 minutes insert a new
AAA battery.
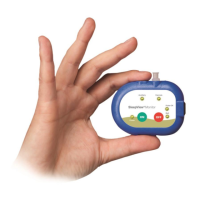
11. Press and hold the ON button until the power LED lights green.
IMPORTANT NOTE: if the power led does not illuminate green and flashes
amber, then the settings did not properly transfer into the device.