Disassembly
Removing the Processor 2 - 11
2.Disassembly
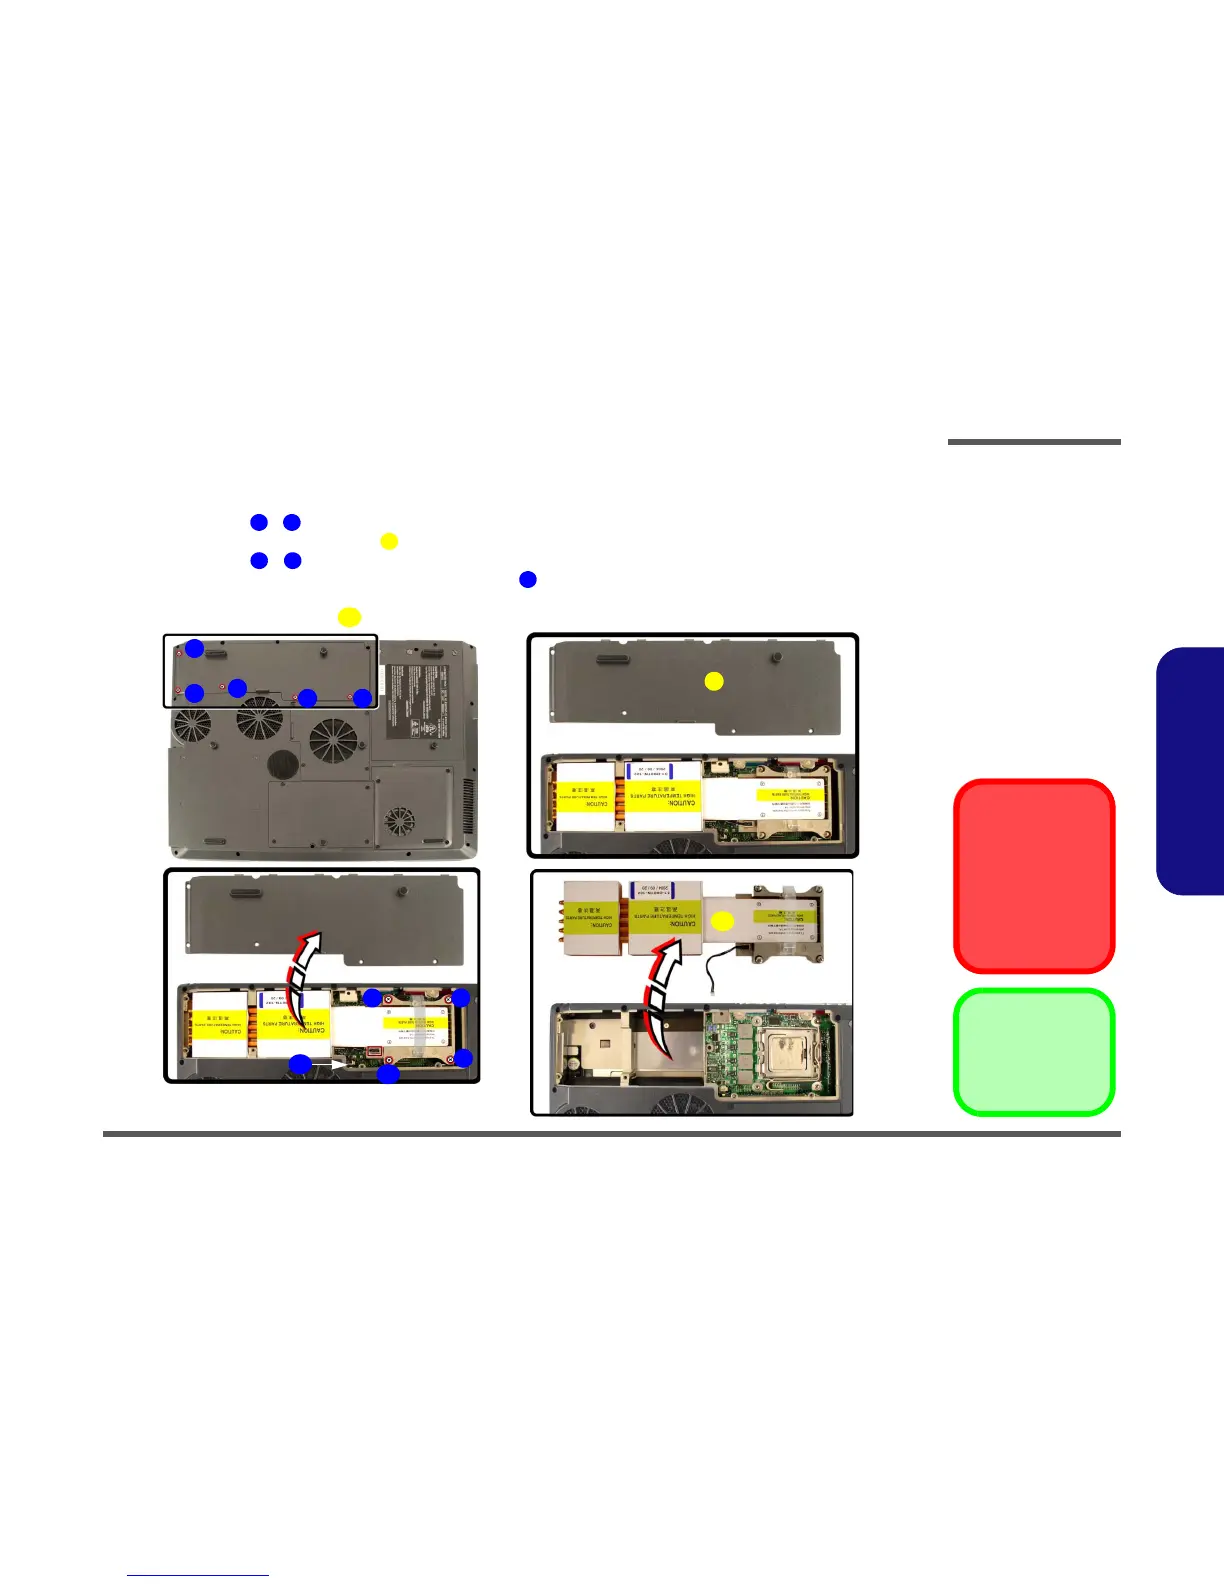
Removing the Processor
1. Turn off the computer, remove the battery (page 2 - 5) and turn it over.
2. Remove screws - from the CPU bay cover
.
3. Carefully lift up the CPU bay cover .
4. Remove screws
- from the heat sink, in the order indicated on the label (and the same screw order
when replacing the heat sink)
, and disconnect cable from the mainboard (the cable remains attached to the
heat sink).
5. Carefully lift up the heat sink off the computer.
Figure 2 - 7
Processor Removal
a. Remove the screws.
b. Remove the bay cover
computer.
c. Remove the screws in
the order indicated, and
disconnect the cable.
d. Remove the heat sink.
Reassembly Screw
Order
When replacing the
heat sink, make sure
you insert the screws
in the same order indi-
cated on the label.
1 5
6
7 10
11
12
9
10
8
c.
1
54
3
7
a.
6
b.
2
d.
12
11
6. CPU Bay Cover
12. Heat Sink Unit
•9 Screws