4
WATER-SOURCE HEAT PUMPS
ATA11U03
Rev.:09/16/13
Installation - Toinstallthethermostat,performthe
followingprocedure:
1. Turnoffallpowertoequipment.
Installation
� CAUTION! �
ENVIRONMENTAL HAZARD! Failure to follow this
caution may result in environmental damage. Mercury is a
hazardous waste. Federal regulations require that mercury
be disposed of properly.
2. Ifanexistingthermostatisbeingreplaced:
a. Remove existing thermostat from wall.
b. Recordthewirecolorandoldterminalmarking.
c. Disconnectwiresfromexistingthermostat,one
atatime.Becarefulnottoallowwirestofallback
into the wall.
d. RecycleoldthermostatsthatcontainMercury.
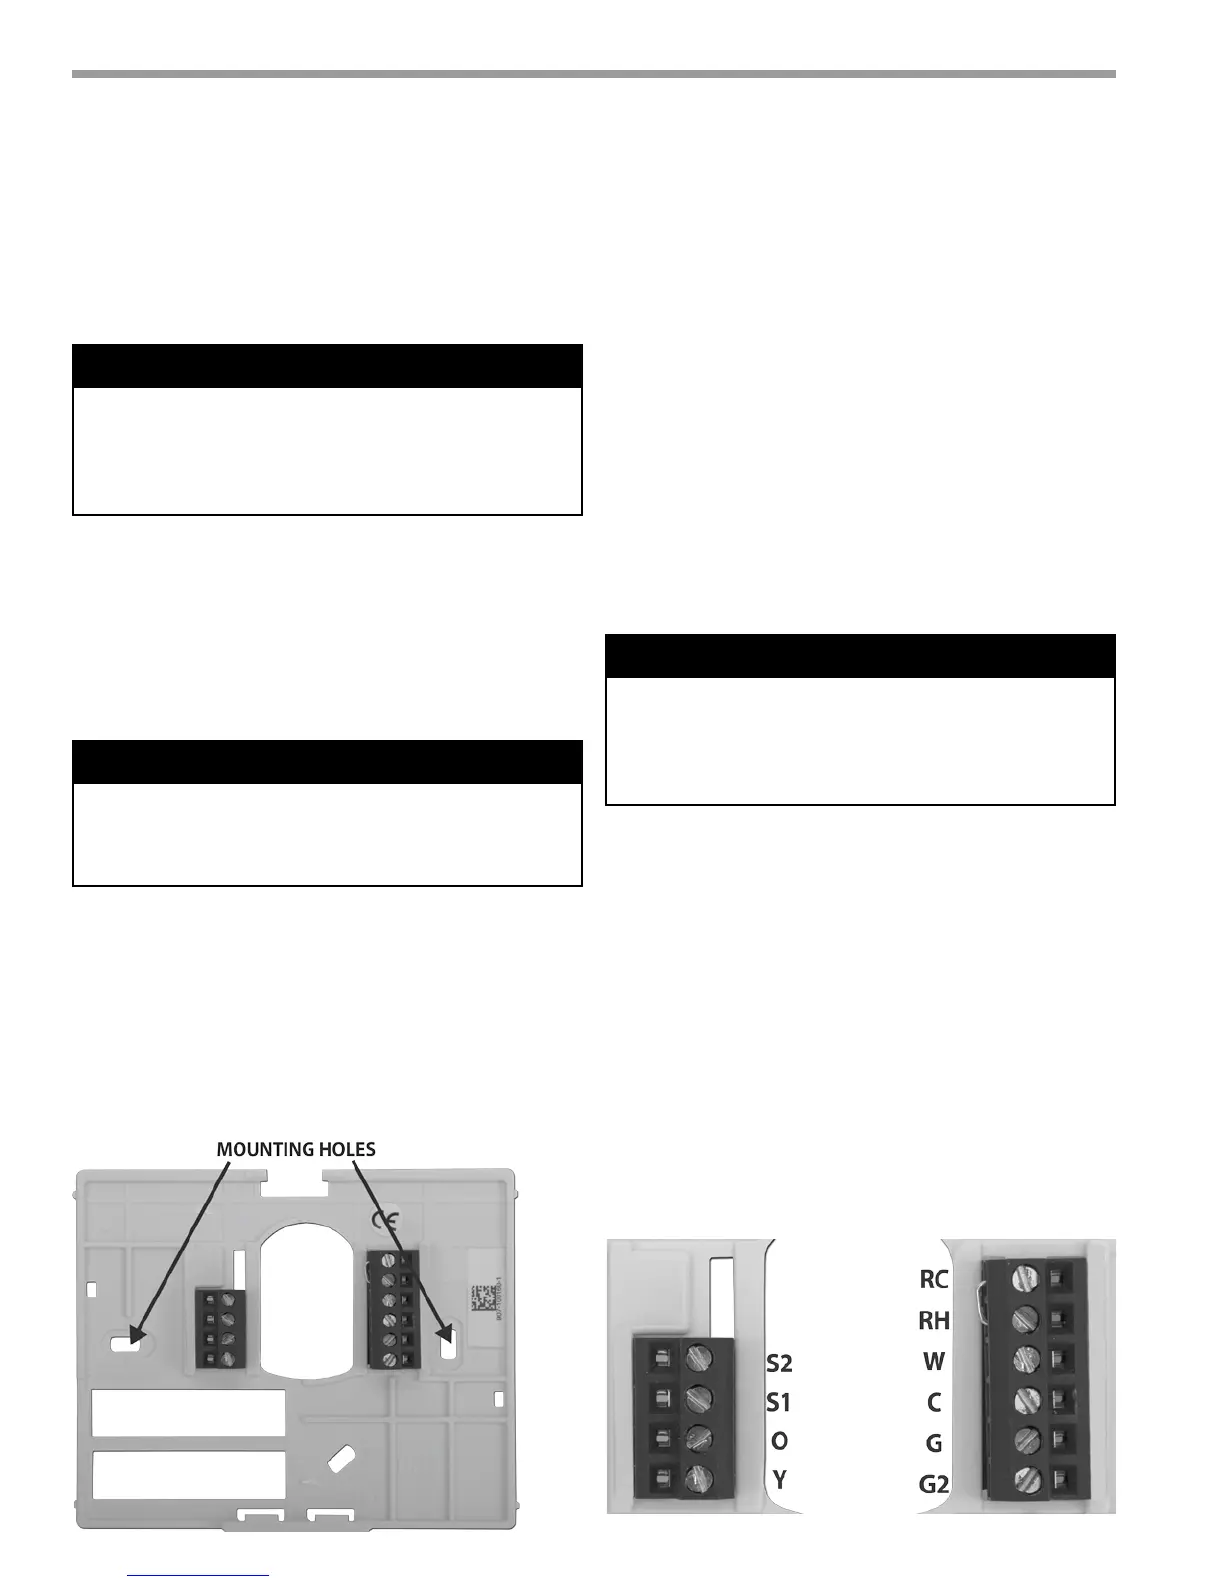
Figure 2: Backplate Mounting
2.A New Installation -
a.Optional-install2x4boxhorizontal.
b.Runnewwiring,mustmeetallNECandlocal
codes.
c. Noteeachwirecolorandconnectionatunit.
3. Pressthethumbreleaseatthetopofthethermostat
andpullapartcarefullytoseparateback-platefrom
the thermostat.
4. Pullthermostatwiresthroughlargeholein
backplate.Levelback-plateagainstwall(for
appearanceonly,thethermostatdoesnotneedbe
leveledforproperoperation)andmarkwallthrough
twomountingholes.SeeFig.2.
5. Fordirectmountingtowall,drilltwo3/16-in.
mountingholesinthewallwheremarked,use
anchorsprovided.
6. Securebackplatetoboxorwallwithtwoscrews
provided.Makesureallwiresextendthroughholein
backplate.
7. Adjustlengthandroutingofeachwiretoreach
properconnectorblockandterminalonbackplate
with1/4-in.(6mm)ofextrawire.Striponly1/4-in.of
insulationfromeachwiretopreventadjacentwires
from shorting together when connected.
8. Matchandconnectequipmentwirestoproper
terminalsoftheconnectorblocks(seeFig.3).
9. Pushanyexcesswireintowallandagainstbackplate.
Sealholeinwalltopreventairleaks.Leakscanaffect
operation.
10. Attachthermostattobackplatebyinsertingtabon
bottomedgeandhingingupuntiltopsnapsecures.
11. TurnONpowertounit.
Whenpowerisapplied,alldisplayiconsarelitfor2
secondstotestthedisplay.Followingthis,theequipment
typeforwhichthethermostatisconguredisdisplayed
for an additional 2 seconds.
� CAUTION! �
Failure to follow this caution may result in equipment
damage or improper operation. Improper wiring or
installation may damage the thermostat. Check to make
sure wiring is correct before proceeding with installation or
turning on unit.
Figure 3: Terminal Strip (wiring diagram - see gure 7)
� WARNING! �
WARNING! Electrical shock can cause personal injury and
death. Before installing thermostat, shut off all power to
this equipment during installation. There may be more than
one power disconnect. Tag all disconnect loca tions to alert
others not to restore power until work is completed.

 Loading...